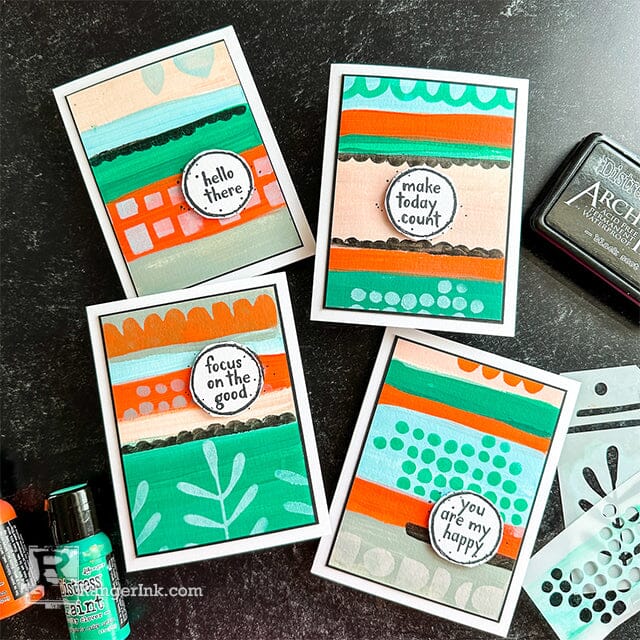
Bring in summer with these unique, vibrant cards! In this tutorial, Cheiron Brandon uses a summery palette of Distress Paints and the Tim Holtz Elements Stencil to craft a fun abstract card set.

Bring in summer with these unique, vibrant cards! In this tutorial, Cheiron Brandon uses a summery palette of Distress Paints and the Tim Holtz Elements Stencil to craft a fun abstract card set.
Hello crafty friends! It’s Cheiron Brandon and I am thrilled to be back here at Ranger this month to share a fun project with you. I don’t know about you, but I love to make card sets just to have on hand or to give as gifts. I have a super easy and fun one for you today…this would even been a great summer project to make with kids!

Step 1: Gather supplies. I used Distress Paints in a fun summery palette of Iced Spruce, Lucky Clover, Tumbled Glass, Ripe Persimmon, and Tattered Rose, some Distress Watercolor Cardstock, the Tim Holtz Elements stencils (which have all kinds of awesome shapes) and the Note Quotes stamps.

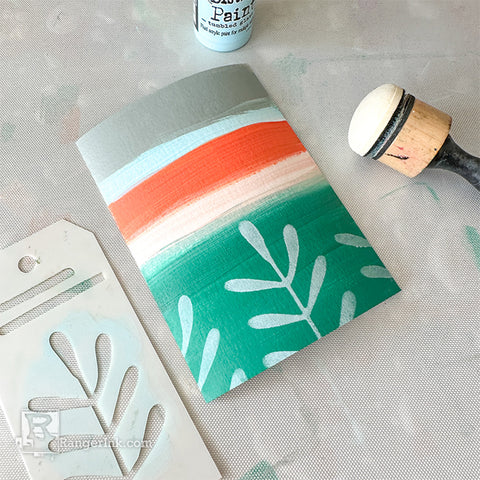
Step 2: Begin by putting your paints out onto a media surface mat or other work surface. Start by painting stripes on panels of Distress Watercolor Cardstock (mine were 3 5/8 x 4 7/8). Let dry or dry with a heat tool.

Step 3: Keep adding stripes, varying the widths until your panels are completely covered. Let dry completely or dry with heat tool.

Step 4: Using a foam blending tool, begin adding paint through the Elements stencils onto different striped sections of your panel.

Step 5: Add a few different shapes to each panel and also add a pop of contrast by stenciling a shape or two with some Black Soot Distress Paint onto each.

Step 6: Once you have added shapes to each panel, be sure to let the panels dry completely before finishing the cards.

Step 7: From the Note Quotes stamp set, use the circle stamp and select your favorite sentiments.

Step 8: Stamp the circle and the sentiment inside using Archival Distress Black Soot Ink. Let dry and cut the circles out leaving a small white border around the edge.

Step 9: Also stamp the circle onto the card panel where you are going to place the sentiment. This is so you can keep the little “splatters” that are on the stamp.

Step 10: Adhere the sentiments over the stamped part of your panel using foam tape.

Step 11: Mount the panels onto a piece of black cardstock measuring 3 3/4 x 5. Adhere to a white notecard.
I hope you enjoyed this fun paint project. These little abstract pieces are so fun to make especially when combined with the Elements stencils. I hope you will try creating some of these fun cards on your own!
 My name is Cheiron Brandon. I live in Bayonne, New Jersey with my husband and our adorable rescue pup, Big Boy. I work in the financial district by day and love to play with stamps, ink, and paint at night in my studio. You can find me on my blog at www.cheironbrandon.typepad.com, on my new YouTube Channel, or posting almost every day @cheiron on Instagram!

Step into the woods with this enchanting card tutorial by Lieschen Harshbarger! Crafted using the Simon Hurley create...
Read More
Get into the holiday spirit with this stunning “Peace on Earth” card by Cheiron Brandon! Learn how to layer...
Read More