


Hi everyone, it’s Audrey, and I’m so happy to be back here on the Ranger Ink blog to share another fun Distress Ink project with you. Valentine’s Day is just around the corner, and today I’ve got a silly sweet love-themed card for you that would work well for anyone on your Valentine card list, from kids, to friends and coworkers, or even that special someone in your life.

Rawr Means Card by Audrey Pettit
- Materials
- Instructions
- Tim Holtz Distress® Watercolor Cardstock
- Tim Holtz Distress® Ink Pads: Spun Sugar, Candied Apple, Iced Spruce, Brushed Corduroy
- Tim Holtz Distress® Oxides® Sprays: Iced Spruce
- Tim Holtz Distress® Markers: Iced Spruce
- Ranger Multi-Medium: Matte
- Ranger Artist Brush Set
- Tim Holtz Distress® Sprayer
- Letter It™ Acrylic Stamp Block
- Ranger Mini Blending Tool with Foam
- Ranger Non-Stick Craft Sheet™
- Letter It™ Adhesives: White Adhesive Foam
- Tim Holtz Alterations by Sizzix: Prehistoric, Splat; My Creative Time- Stitched Hearts
- Tim Holtz by Stamper’s Anonymous Stamp Sets: Simple Sayings; My Creative Time- Prehistoric Holidays
- Tim Holtz by Stamper’s Anonymous Stencil: Dot Fade
- Tim Holtz Idea-ology: Paper Flowers
- Washi Tape
- Twine: Maya Road
Instructions

I’m sure you’ve all been following along with the latest product releases from the Creativation show, and I know you’re as excited as I am about the newest additions to the Ranger Distress line. Today’s project features one of the new Distress Oxide Sprays, and I tell you what… if you’re a fan of the Oxide ink, you’re going to love the spray!
Let’s take a closer look:

Step 1: Today’s card is a 5×5 square design, with three separate layers made up of inked Distress Watercolor Cardstock. To begin, cut three squares of cardstock, starting at 4.5” square, and going up a ¼” each layer. Begin work with the smallest square by applying a light coat of Spun Sugar Distress Ink onto the paper using a Mini Ink Blending Tool. Spray the paper with Iced Spruce Distress Oxide Spray, and then mist the paper with water using the Distress Sprayer. Set the paper aside to dry completely.

Step 2: With the Mini Ink Blending Tool, ink the second layer of paper with Spun Sugar Distress Ink, and the largest paper with Candied Apple Distress Ink. Die cut the largest shape from the Splat die set in the middle of the Spun Sugar paper panel. Die cut a large heart from the Iced Spruce Oxide Spray paper panel. Set the heart aside for now. Mix Candied Apple Distress Ink with a bit of water on your Craft Sheet. Pick up the ink mixture with a wet paint brush, and then flick the ink onto the heart frame.

Step 3: Stamp an “I Love You” sentiment repeatedly in a random fashion onto the Candied Apple paper panel using the matching Distress Ink. Try to avoid stamping at the outer edges of the paper, if possible. Create a side-folding 5” x 5” card base from white cardstock. Adhere the red layer to the card base.

Step 4: Die cut the brontosaurus dinosaur from the leftover heart shape die cut in Step 2. The entire dinosaur may not fit in the space, but that’s okay. Just be sure to get the head and most of the body, as the rear and tail will be largely cut off.

Step 5: Place a Dot Fade stencil over the brontosaurus body, and ink over the stencil using Iced Spruce Distress Ink and a Mini Ink Blending Tool. Adhere the leg and head pieces to the main body. Use an Iced Spruce Distress Marker to add features to the face.

Step 6: Cut two ¾” squares from the remaining Iced Spruce Oxide paper scraps. Cut them in half along the diagonal. Using Multi-Medium Matte adhesive, attach these triangles to the corners of the red card base. Next adhere the pink paper panel to the center of the card. Add zig-zag machine stitching around the edge of the pink layer, and straight stitching around the edge of the Iced Spruce layer, if desired. Apply Brushed Corduroy Ink to the paper corners using a Mini Ink Blending Tool. Stamp a sentiment onto the top right corner of the pink paper using Iced Spruce Distress Ink.

Step 7: Tie twine around the dinosaur’s neck. Tuck him behind the bottom corner of the heart cut out, and attach him with a bit of Multi-Medium Matte on the tail. Trim off any part of the dinosaur that extends out of the heart frame. Place foam adhesive onto the back of the dinosaur, and around the frame, and then attach it to the center of the card. Cut a ½” strip of white cardstock, and ink it with Spun Sugar Distress Ink. Stamp a second sentiment in the center of the strip using Iced Spruce Ink. Trim the right end of the strip into a diagonal. Mask off the center of the strip with a bit of washi tape, and then ink the edges with Candied Apple Distress Ink, moving the washi tape as needed to ink all the edges. Tuck the sentiment strip under the left edge of the heart, extending over the dinosaur body, and hold it in place with the liquid adhesive and foam tape.

Step 8: Remove the center stamen from a paper flower embellishment. Dab Spun Sugar Distress Ink onto your Craft Sheet, and spray it with water using the Distress Sprayer. Dip the flower into the ink mixture, and then set it aside to dry. Color the stamen with an Iced Spruce Distress marker. Replace the stamen, and adhere the flower to the twine knot using Multi-Medium Matte adhesive. Trim off the stem.
Happy Valentine’s Day, crafty friends! Enjoy!

Related Posts

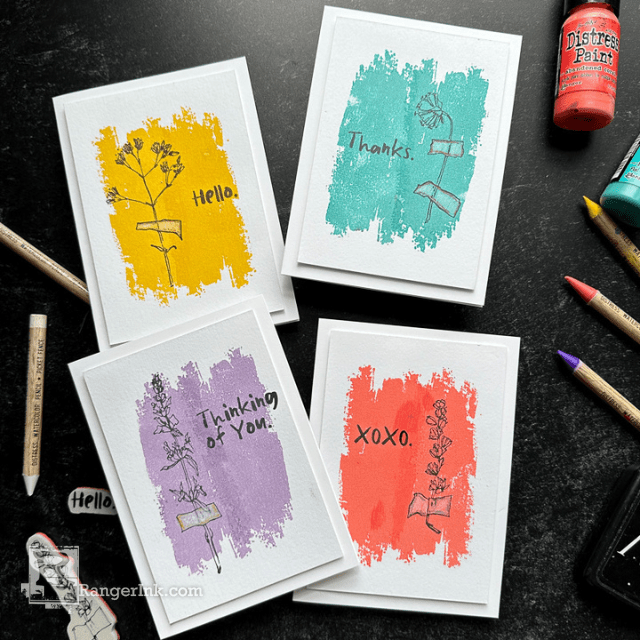
Distress Paint Floral Card Set by Cheiron Brandon
Join in on the fun with this tutorial by Cheiron Brandon! Using a delightful combination of Distress Paints, Watercolor Pencils,...
Read More
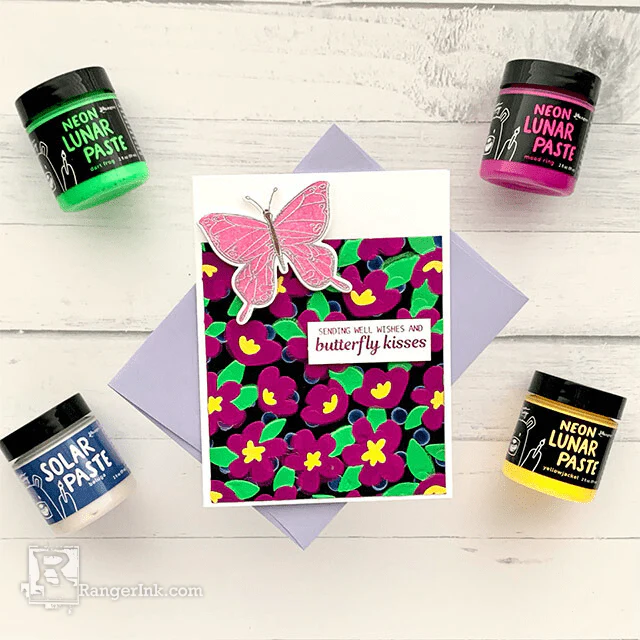
Simon Hurley create. Neon Lunar Paste Butterly Card by Lieschen Harshbarger
Follow along as Lieschen Harshbarger creates this stunning card filled with vibrant hues and fluttering beauty! Crafted using the...
Read More