


As the holiday season approaches, discover a creative DIY gift box idea featuring the stunning Dylusions Dyamond Collection. Start with a simple black box and let Patti guide you through the process.
Dylusions Dyamond Gift Box by Patti Behan
- Materials
- Instructions
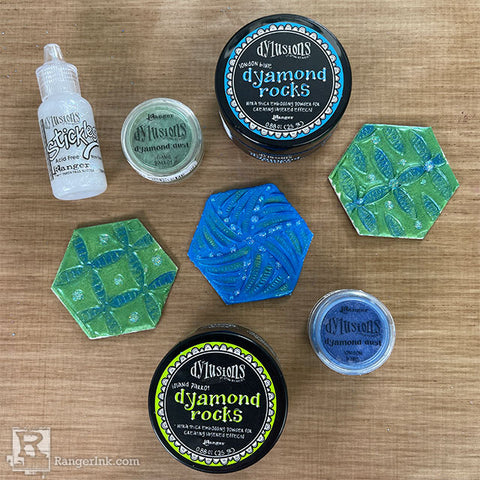
Dylusions Dyamond Rocks: London Blue, Island Parrot
Dylusions Dyamond Dust: London Blue, Island Parrot
Dylusions Dyamond Medium Dabber
Dylusions Dyamond Medium Pad
Dylusions Designer Series Stickles: Stardust
Dylusions Dyamond Brush Set
Dylusions Dyamond Boards: Hexagons
Tim Holtz Distress® Collage Medium
Ranger Heat It Craft Tool
Ranger Non-Stick Craft Sheet
Dylusions Stampers Anonymous Cling Mount Stamp Build A Quilt
Other:
Black Gift Box
Scrap Paper
Instructions
As the holiday season approaches, discover a creative DIY gift box idea featuring the stunning Dylusions Dyamond Collection. Start with a simple black box and let Patti guide you through the process.
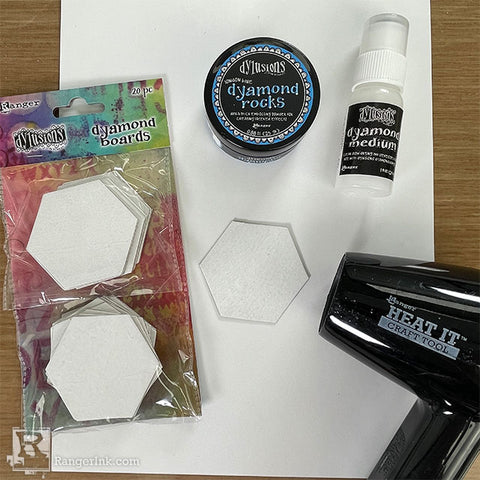
Step 1: Start by gathering your supplies. You will need London Blue Rocks, Hexagon Dyamond Boards, Dyamond Medium Dabber and a Ranger Heat It Craft tool.
Working on the Non-Stick Craft Sheet, place a Hexagon shape on a piece of scrap paper.
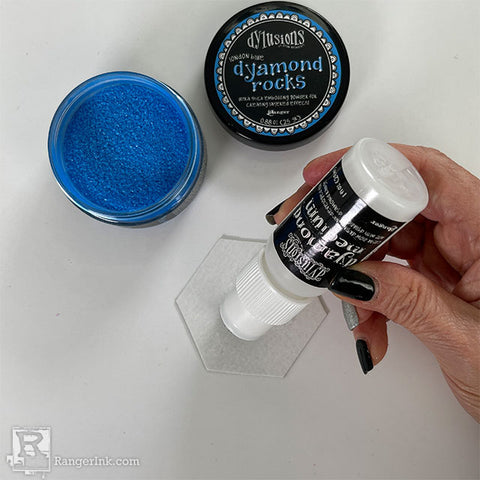
Step 2: Apply Dyamond Medium to the Board until it is fully covered.
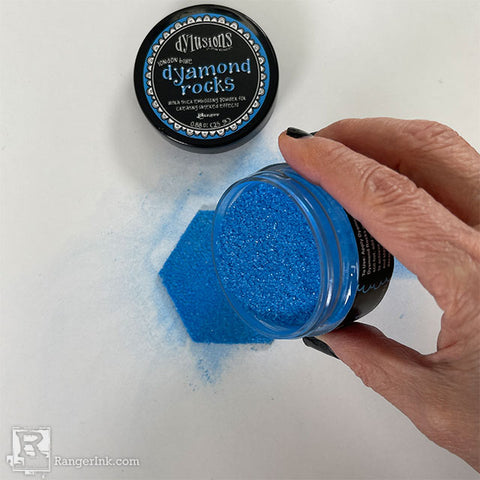
Step 3: Pour the rocks over the top. Remove the excess and return it back into the jar.
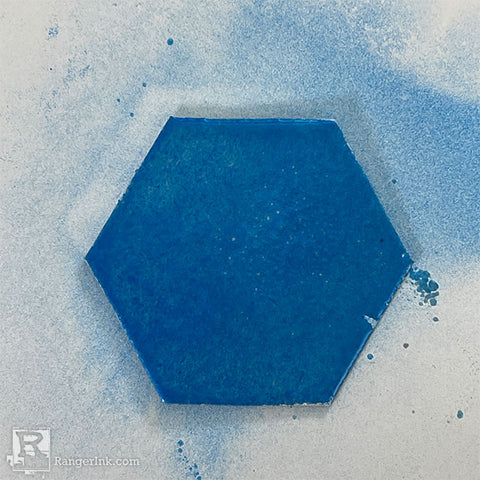
Step 4: Melt with the Craft Tool and this will be your first layer. (We will be making three layers total.) While it is still hot, pour more Rocks over the top, return the excess to the jar and again melt with the Heat Tool. If your piece cools before you get a chance the pour the second layer of powder, you can reheat it.
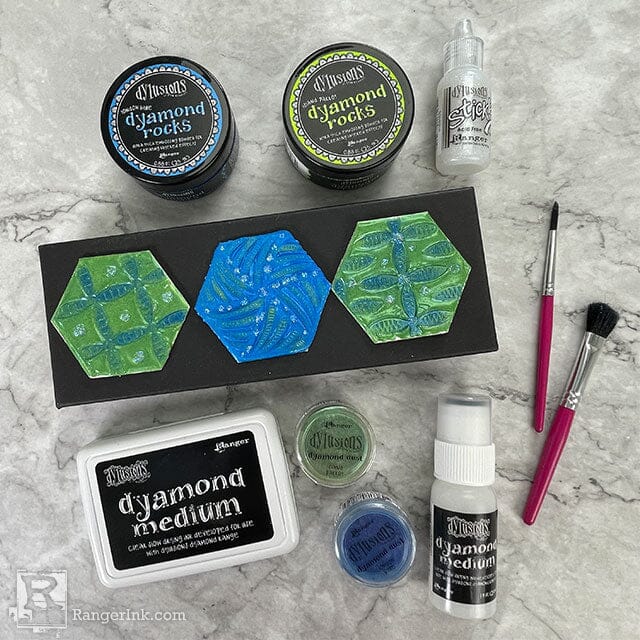
Step 5: Your second coat will look something like this.
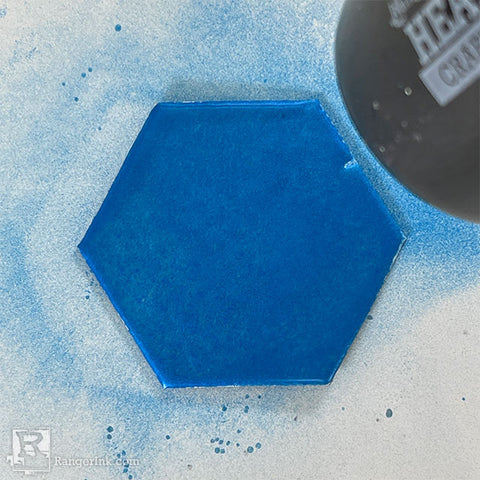
Step 6: Before you do the last and third coat, put your stamp on a block and get the Dyamond Medium Pad within quick reach. Reheat the board and pour more Rocks over the top, return the excess to the jar and again melt with the Heat Tool. Ink the stamp in the Medium pad.
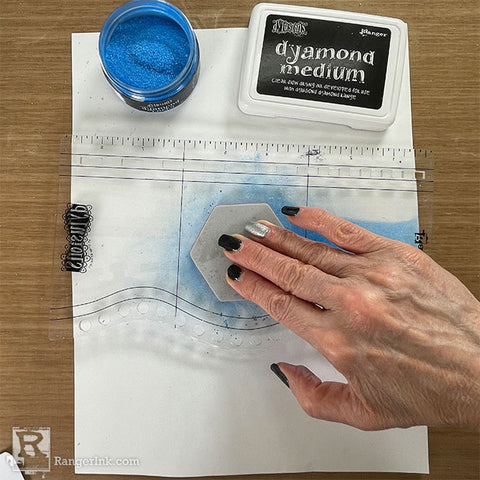
Step 7: Stamp into the board while still hot. The ink in the Medium Pad acts as a release and the stamp will come off of the tile easily. Tip: If you didn't like the impression you got, you can reheat and add another layer of rocks.
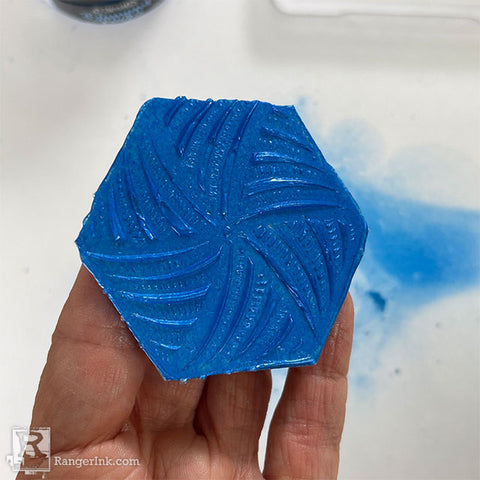
Step 8: After you stamp into the board, it will look like this.
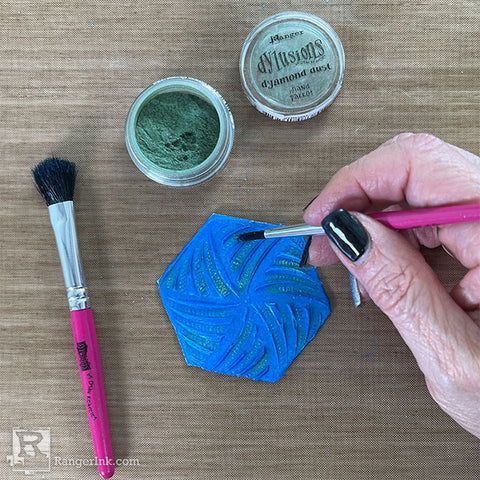
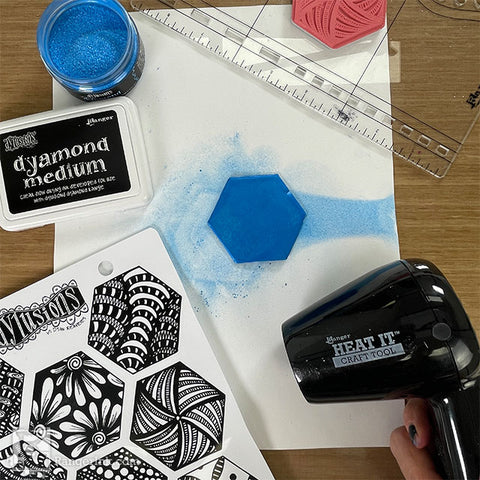
Step 9: While still warm, use the small brush to "paint" on the dry dust as desired. Use the large brush to pounce on the dust to make it stick and remove any excess.
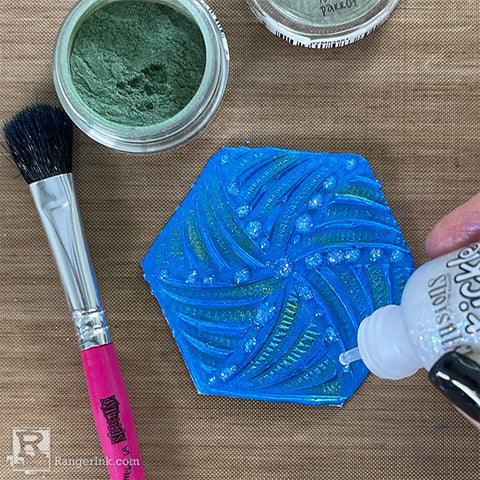
Step 10: To add a little sparkle use Dylusions Stickles.
Step 11: Use the same steps as above to create two more boards. This time use Island Parrot Rocks and London Blue Dust. Don't forget to add the Stickles.
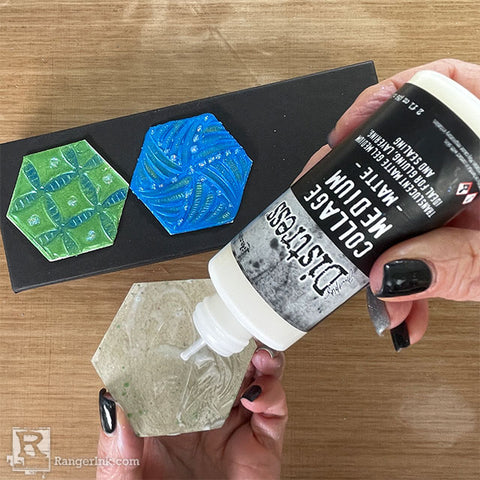
Step 12: Adhere the finished boards to the box with Collage Medium.
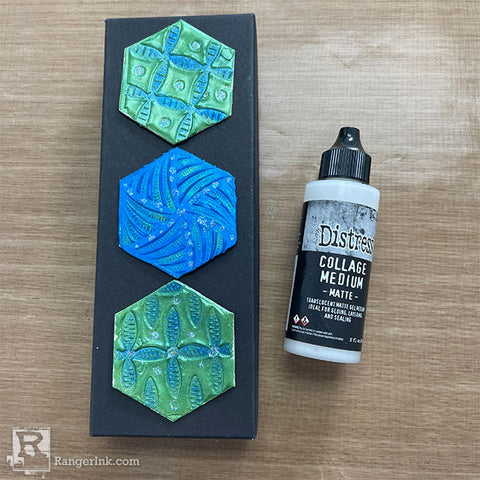
Step 13: Here is your completed creation – a charming gift box, designed to beautifully present a heartfelt surprise for that special someone in your life.
 Hello there, everyone! I'm Patti Behan, happily married to my high school sweetheart and the proud mother of three amazing young adults. Crafting has been my lifelong passion, and I've dedicated over two decades to the craft industry. My dream job is being the Social Media/Education Specialist at Ranger, where I get to explore the endless possibilities of their fantastic products and share creative inspiration with you. Join me in the world of crafting and let's embark on artistic adventures together. For a glimpse into my crafty journey, connect with me on Instagram!
Related Posts


Dylusions Dual Colored Stencil Technique by Denise Lush
Follow along with Denise Lush as she guides you through this fun technique to create a dual-colored background! Using...
Read More
Dylusions Shimmer Spray Tag by Denise Lush
Unleash a world of shine! Check out Denise Lush's latest creation using the enchanting Dylusions Shimmer Sprays and...
Read More