


By Candy Colwell
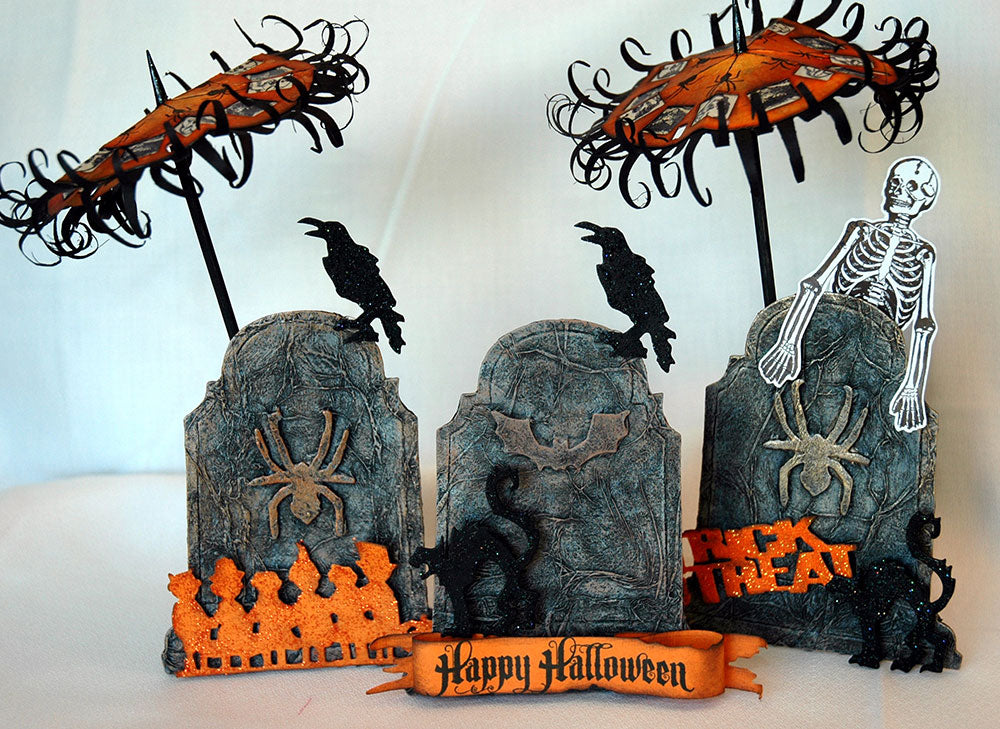
Distress Halloween Headstones
- Materials
- Instructions
- Tim Holtz® Distress Ink Pads: Black Soot, Spiced Marmalade, Ripe Persimmon
- Archival Ink™ #0 Pads: Jet Black
- Ranger Cut n’ Dry™ Foam and Felt Pads
- Ranger Glossy Accents™
- Stickles™ Glitter Glue: Black Diamond, Orange Peel, Paprika
- Ranger Wonder Tape™
- Ranger Specialty Stamping Paper
- Tim Holtz® Distress™ Markers: Black Soot
- Ranger Ink Blending Tool & Foam
- Tim Holtz idea-ology: Plain Grungeboard
- Tim Holtz® Alterations by Sizzix®: Picture Wheel, Tapered Fringe, Headstone, Halloween Shadows, Movers & Shapers – Mini Cat & Raven, Mini Spider & 31
- Black card stock
- Clear vellum
- Dowel rod
- White tissue paper
- Tonic Craft Pick
Instructions
1. Die cut Headstone and Mini Bat out of Plain Grungeboard. Use Glossy Accents to attach the bat onto the center of the headstone.

2. Brush Matte Multi-Medium all over the front of the headstone and attach white tissue paper. Be sure to wrinkle up the tissue as you are applying it. This adds more dimension to the headstone. Do this to the backside of the headstone as well. Heat Set.

3. Paint the entire headstone with a Pitch Black Paint Dabber. Heat set.

4. DRY BRUSH the entire headstone with Antique Linen Distress Paint. This will begin to really bring out the texture and dimension of the tissue paper and make the headstone look like old, brittle stone. Heat set.

5. DRY BRUSH over the entire headstone with Tarnished Brass Distress Paint to add a slight metallic shimmer. (In the photo above, you can see the dramatic difference that adding the Tarnished Brass over the Antique Linen creates). Set aside.
6. Die cut the Mini Cat out of Plain Grungeboard and paint with a Pitch Black Paint Dabber. Heat Set. Lightly add Black Diamond Stickles and let dry.
7. Die cut “TRICK OR TREAT” from Halloween Shadows out of orange card stock. Distress the edges of the letters with Black Soot Distress Ink. Lightly cover the letters with Orange Peel Stickles and let dry. When dry, use a Pop it Shape to adhere the Mini Cat and “TRICK OR TREAT” in place on the front of the headstone. Set aside.
8. Stamp the skeleton from Retro Halloween onto Specialty Stamping Paper using Jet Black Archival Ink. Cut around the skeleton, leaving a small edge of the stamping paper. Line just the edge of the paper using a Black Soot Distress Marker to darken the white edge. Set aside to slide over the top of the headstone when it is finished.
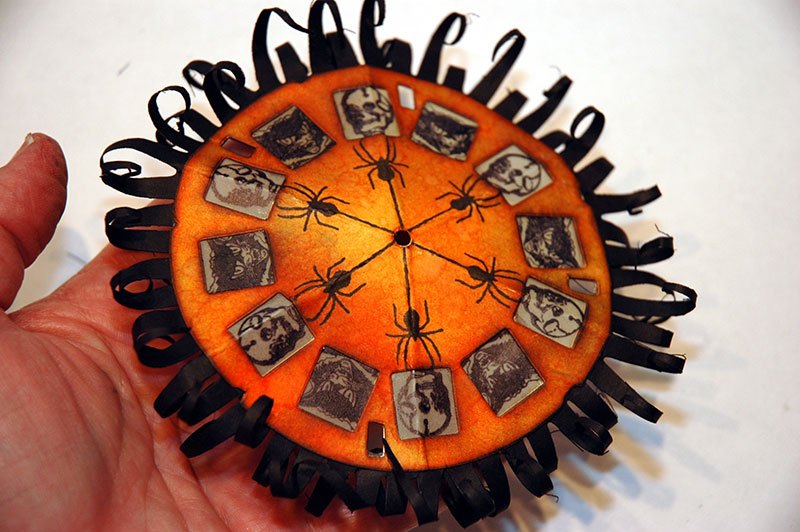
9. Die cut two Picture Wheels on Manila card stock. Distress both wheels first with Spiced Marmalade then Ripe Persimmon using Ink Blending Tools with foam, making sure that you are distressing the top of one wheel and the bottom of the other wheel, so that their holes will line up when you glue them together. Set the bottom wheel to the side to finish later. Then Distress the top wheel by inking the inside edges of the cut out squares within the wheel with a Black Soot Distress Marker. Distress the outer edges of the wheel with Black Soot Distress Ink and Ink Blending Tool.

10. Stamp the spider from Mini Halloween 2 onto the Picture Wheel, skipping every other “window”. Only ink up about half of the way on the spider webbing when stamping the spider so that it fades into the hole in the center of the wheel. (The photo above shows the top of the umbrella being distressed and then adding the spiders).

11. Stamp only the heads of the cat and the skeleton from Mini Halloween 2 onto Vellum using Jet Black Archival Ink. Gently heat set. Cut out around the heads in a rectangle that will fit over the squares in the wheel.

12. Using Glossy Accents on the underside of the distressed wheel, alternate the skeleton and cat heads and attach them to the wheel. Let dry.

13. Take the other bottom distressed picture wheel and stamp the bat from Mini Halloween 2 in the center of the wheel.

14. Die cut two strips of tapered fringe out of black card stock and trim the straight edge fairly close so that it will more easily lay around the circle of the wheel. Add 1/8” Wonder Tape around the outside edge of the picture wheel and lay the fringe in place. When you run out of one strip, simply start with the second strip until you have gone all the way around.
15. Use the Tonic Craft Pick to alternate rolling up the fringe edges all the way around the umbrella.
16. Glue the bottom wheel in place, lining up the holes. Gently fold the Picture Wheel umbrella three times, across the lines you created when stamping the spider and webbing onto the top. This makes the umbrella more realistic and dimension. Slide the pointed end of a dowel rod painted with a Pitch Black Dabber through the hole of the picture wheel. When it begins to “catch,” lightly glue around the hole and dowel rod on the underside of the umbrella with Glossy Accents. Repeat on the top side of the umbrella and also include the black point of the dowel rod. Let dry.

17. Use hot glue or Glossy Accents to add two manila strips painted with Pitch Black and dry brushed with Antique Linen to the back side of the headstone. These are to slide the umbrella in place. By not gluing the umbrella onto the headstone, you can use the headstone with or without the umbrella. Also hot glue two smaller pieces of painted dowel rod to the back of the headstone to support the headstone. Slip the umbrella and skeleton in place.

