


By Wendy Vecchi
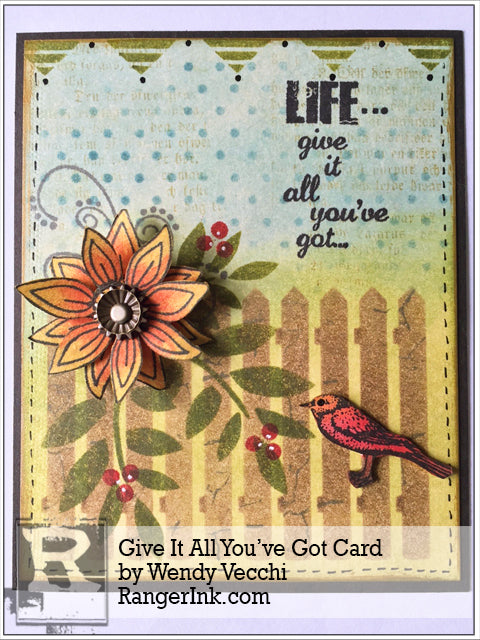
Give It All You’ve Got Card By Wendy Vecchi
- Materials
- Instructions
- Dylusions Paint: White Linen, Black Marble
- Tim Holtz® Waterbrush: Detailer
- Tim Holtz® Distress Crayons: Festive Berries
- Ranger Mini Blending Tool
- Ranger Multi-Medium Matte
- Ranger Adhesive Foam Rolls
- Ranger Non-Stick Craft Sheet™
- Ranger Heat it™ Craft Tool
- Archival Ink™ Designer Series: Wendy Vecchi: Leaf Green, Fern Green, Watering Can, Sky Blue, Cornflower Blue, Sunflower, Red Geranium, Potting Soil
- Archival Ink™ #0 Pads: Jet Black
- Stampers Anonymous/Wendy Vecchi Newsprint Paper
- Stampers Anonymous/Wendy Vecchi Clearly For Art
- Stampers Anonymous/Wendy Vecchi Stencils For Art - Fence and Foliage, Lots of Dots, Wreathe, Repeating Quilt
- Stampers Anonymous/Wendy Vecchi Stamp-it Stencil it - Put a Bird on It
- Stampers Anonymous/Wendy Vecchi Mat Minis Birds and Their Houses
- Stampers Anonymous/Wendy Vecchi Stamps - Flowers for Art SCS 136, Artful Life SCS134, Textures for Art SCS 128, Paper Doll Art SCS 125
- Tim Holtz Idea-ology - Fluted Fastener, Mini Gear
- Misc: Black Cardstock, Scissors, awl, painters tape, black glaze pen
Instructions

 Step 1: Cut manila cardstock to 4 x 5 inches. Working on the Non-Stick Craft Sheet. Use the Blending Tool with Foam to ink the top portion with Sky Blue Archival Ink and the lower half with Leaf Green Archival.
 Step 2: Stencil the picket fence with Potting Soil Archival. With the stencil in place, ink the unmounted “cracks” stamp with Watering Can Archival & stamp thru the stencil to create cracks in the wood fence. The stencil allows the “cracks” to be added to the fence only and it protects the background.

 Step 3: Use a scrap of Clearly For Art, that is covered with Newsprint Paper. Use Jet Black Archival to stamp the flower two times, onto the Newsprint side. Cut out both flowers.
 Step 4: Use the flower as a guide to determine where to stencil the leaves. Stencil two large sets of leaves and one small set of leaves as shown using Fern Green.
 Step 5: Use Jet Black to stamp the sentiment toward the top right corner.
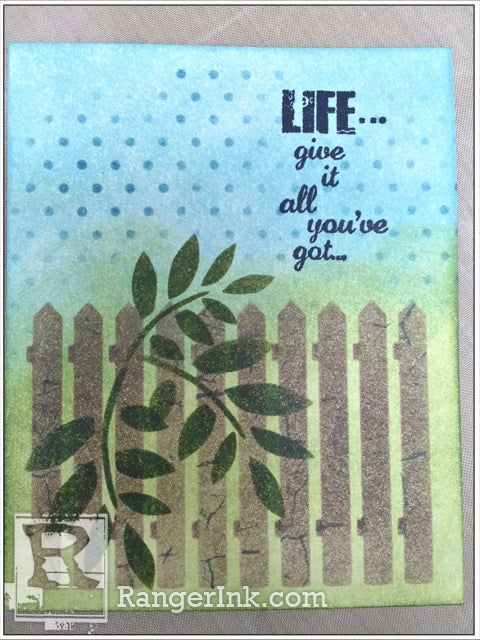 Step 6: Use Cornflower Blue with the “lots of dots” stencil to add dots above the fence.
 Step 7: Use Watering Can with the flourish stamp and add the flourish at the top left of the leaves.
 Step 8: Ink the unmounted “vintage text” stamp with Tree Branch Archival and stamp randomly above the fence.
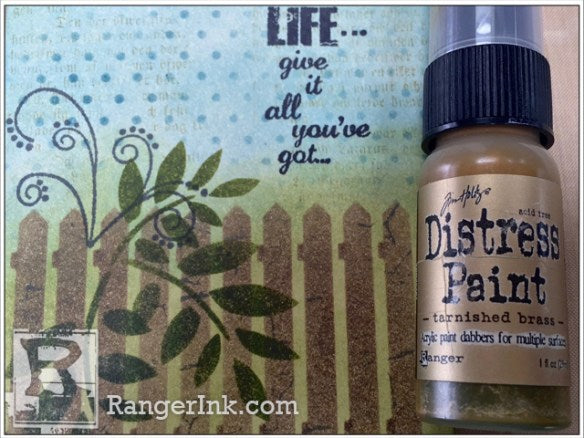 Step 9: Shake the Tarnished Brass Distress Paint dabber & use it to edge the piece.
 Step 10: Ink over the two flowers with Sunflower Archival Ink.
 Step 11: With a moist Detailer Waterbrush, touch the tip to the Festive Berries Distress Crayon to pick up color and add shading to the flowers. Add most of the color to the centers.

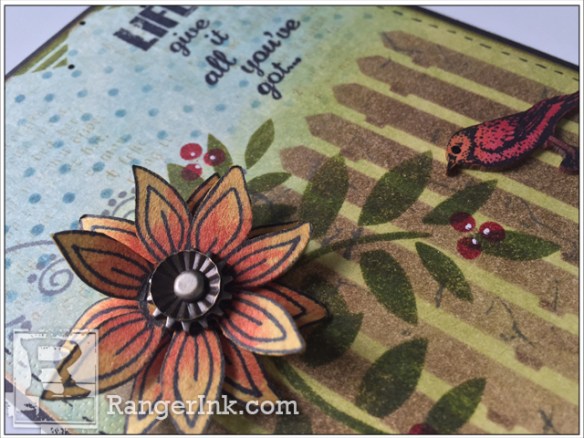
 Step 12: Use the Heat-It Tool to soften the flower petals. While the Clearly For Art is warm, shape the flower petals. Use an awl to add a hole to the flower centers. To create the flower center, insert the long fastener thru the fluted collar, then thru the gear. Use black adhesive tape between the flower layers. Assemble the flower a little offset to allow the bottom petals to show.
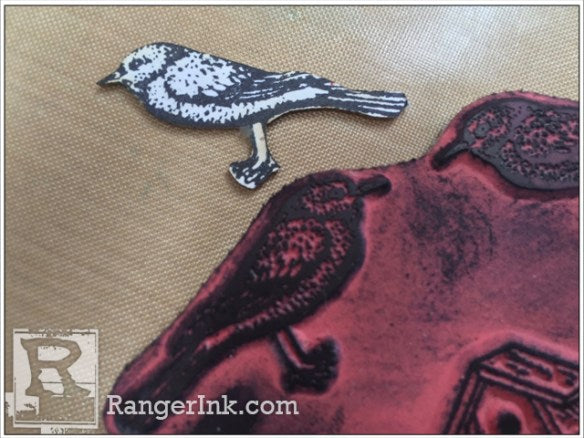
 Step 13: Ink the bird portion of the stamp and press the coordinating mat mini bird onto the inked stamp. DRY, then ink the bird with Potting Soil, Sunflower and Red Geranium.
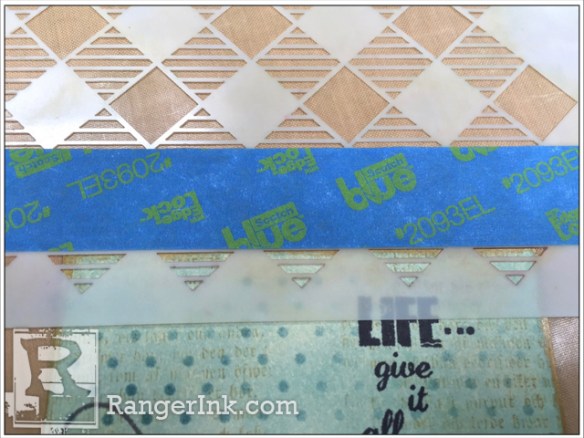 Step 14: To create a banner, mask off the “repeating quilt” stencil as shown. Stencil the border at the top of the card with Fern Green.
 Step 15: Use Red Geranium to stencil berries in 3 areas on the leaves. Use the white paint pen to add accent dots. Use the black paint pen to add pen stitching detail.
 Step 16: Assemble the card. Use Black Foam Adhesive to add the flower and Multi Medium to add the bird. Add black glaze pen dots to add the bird’s eye & to accent the banner at the top. Add to a black base. This can be a card or a little art to set in an easel.
Things to note:
1. Because Archival is a permanent waterproof ink, the Distress Crayons can be used to add shading over the Archival Inks. They work well together…Pretty cool!
2. Masking a portion of a stencil creates a whole NEW stencil. Look at what you have (both stamps & stencils) to see how it can be used for a different effect. This banner looks nothing like the original repeating quilt stencil.
3. If your stencil is clean, you can see exactly where you’re adding stenciling & avoid sentiments or areas that you prefer not to stencil over. Sorry Dina…for me…clean is good!
4. Using a red rubber stamp unmounted is an easy way to add small areas of stamping to a background. Just bend it to fit the selected area. This works great even with large background stamps.
5. The black Foam Tape is an awesome adhesive for Clearly For Art. It provides a very strong adhesive and just the right amount of dimension between layers.

Related Posts

Make-It™ You're The Zest Card by Miriam Prantner
Bright, bold, and full of summer vibes! Miriam Prantner created this cheerful citrus-inspired card using the Make-It Fun with Fruit...
Read More
Dylusions Neon Ink Sprays Journal Page by Miranda van den Bosch
Neon color takes center stage on this eye-catching journal page by Miranda van den Bosch! The newest...
Read More