


Adorn your tree, wreath, or presents with these wood branch slice chalkboard looking ornaments. They are so easy and fast to make, and with the many fabulous word stamps from the Letter It line, you will want to make several.
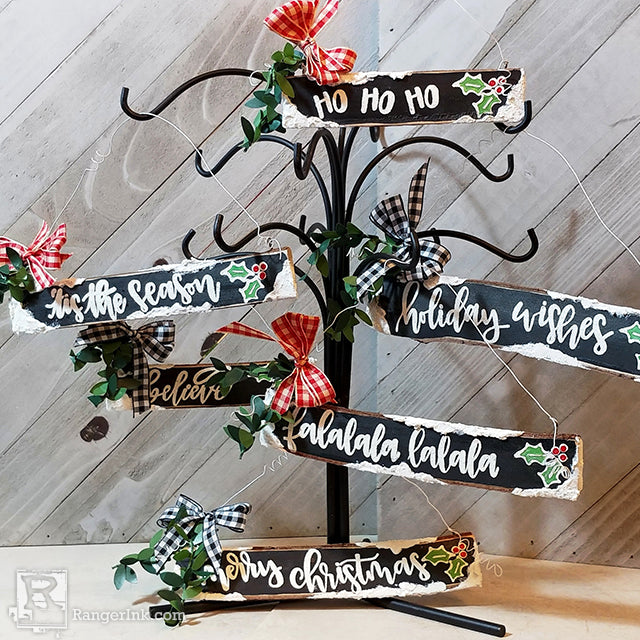
Letter It™ Wood Branch Christmas Ornaments by Anita Houston
- Materials
- Instructions
- Tim Holtz Distress® Paints: Black Soot, Festive Berries, Mowed Lawn
- Letter It™ Stamp Sets: Christmas, Encouragement, Greetings
- Ranger Anti-Static Pouch
- Ranger Storage Jars
- Letter It™ Embossing Powders: Bridal Tinsel
- Ranger Embossing Powders: Seafoam White or White
- Letter It™ Embossing Ink Pad
- Tim Holtz Distress® Grit-Paste
- Ranger Non-Stick Craft Sheet™
- Ranger Multi-Medium: Matte
- Ranger Artist Brush Set
- Letter It™ Acrylic Stamp Block
- Ranger Heat it™ Craft Tool
- Tim Holtz Idea-ology: Screw Eyes, Boxwood Twine
- Wood Branch Slices (at least 1.5 x 7 inches)
- Piece of paper
- Scissors
- Craft Pick
- Regular and Wire Looping Pliers
- Ribbon (1/2 inch or thinner)
- Palette Knife
- Craft Wire (28 gauge or thicker)
Instructions
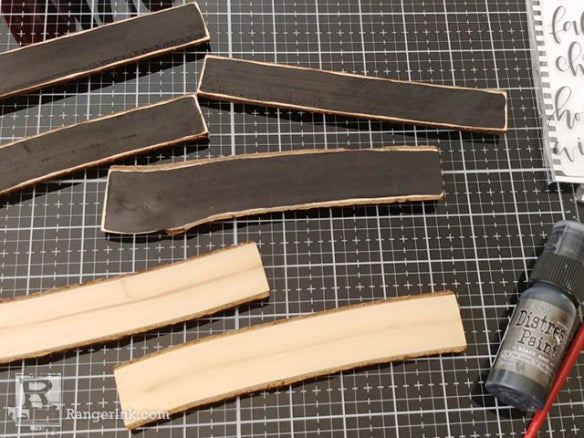
Step 1: You can purchase wood branch slices at a craft store, or cut your own. To create a chalkboard base, paint each wood slice with Black Soot Distress Paint, leaving a tiny border of wood showing, and let these dry naturally or use a heat tool to help them along. Figure out which word stamps will fit on each wood slice. For example, the ‘holiday wishes’ stamp was taller and so I had to use the widest wood slice I had. Don’t forget to figure in the holly leaves stamp as well. For shorter word stamps like believe or ho ho ho, cut off the extra wood with a saw.

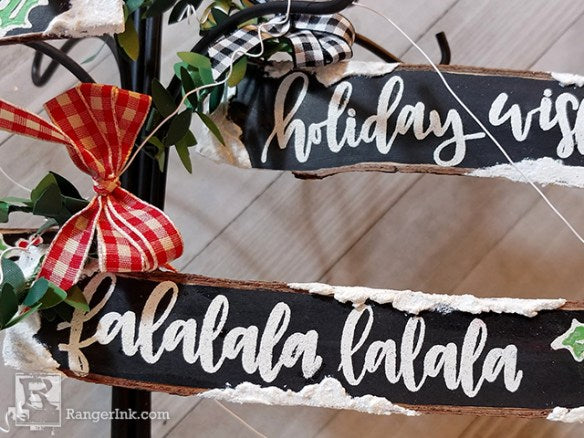
Step 2: In a Storage Jar, mix 90% Seafoam White Embossing Powder to 10% Bridal Tinsel Embossing Powder, for more of an opaque look with a tiny bit of sparkle. Have a sheet of paper ready to have under the wood for easier clean up of the embossing powder. Rub each wood slice with an Anti-Static Pouch to help the embossing powder not stick to the parts you don’t want it on. Place the stamps on a block and leaving a little bit of space on each side of the wood, stamp the words and the holly on each wood slice using Clear Embossing Ink, and then pour the powder mixture over the ink. Pour off the extra powder, place it back into the jar, and brush off any extra particles. Heat emboss the powder with a Heatit Craft Tool. You will see the solid matte look of the Seafoam with a tiny bit of sparkle from the Tinsel. Repeat with the other slices using different words. NOTE: I cut apart the ’tis the’ from ‘season’ to allow for straight line stamping. I also cut the ‘lalala’ off to repeat the line. If cutting the stamps bothers you, just ink up the parts you need, but when placed back on a stamping block the stamps print just fine after cutting them. The ‘believe’ is from the Encouragement set, and the ‘HO’ is really an ‘OH’ from the Greetings set, just turned upside down. You can also cut the ‘ho’ from the ‘holiday’ word, but I didn’t have enough width for it on my wood slice.

Step 3: Using a detail paintbrush, paint in the holly leaves with Mowed Lawn Distress Paint. Use the end of the paintbrush to add dots of Festive Berries Distress Paint to the berries for a perfect and fast circle. Let the paint dry.

Step 4: Use a craft pick to poke a hole on each top end of the wood slices about 1/8 inch deep to make it easier to twist in the Screw Eyes. Twist the Screw Eyes in slowly until fully inserted using pliers if you need help twisting them in.

Step 5: Place the scrap piece of paper under the wood slices again to help with clean up. Use a palette knife to spread Distress Grit-Paste over some of the border areas of the wood slices to look like snow, and while wet pour Bridal Tinsel Embossing Powder over the paste (I did 3 to 5 areas around each wood slice). Use a Heat Tool to emboss the powder, which doesn’t take long at all. If the paste is thick, just heat to melt the powder and let the rest of the paste dry naturally. Normally, you’d let the Grit-Paste dry naturally, but since you need a snowy look the heat will make the Grit-Paste bubble slightly for an even better snowy look, especially with the sparkle of the powder.

Step 6: Using about an eight-inch piece of wire for each longer wood slice (six inches for the shorter), place one end of the wire through the left side Screw Eye. Use the wire looping pliers (or a thin dowel or pencil) to coil the end of the wire into a spring, wrapping it around five to six times. Gently pull the coil out to soften it into a spiral. Wrap the other end of the wire around the Screw Eye once to secure the coil in place. Coil more of the wire about two inches up from there, then bend the wire slightly to form an arch and place the end of the wire through the right side Screw Eye. Leaving about two inches of wire out of the Screw Eye, wrap the wire one time around the Screw Eye to secure it, and then coil the end of the wire to make another spiral. The wire should now hold the wood slice. Wrap a 2 1/2 inch piece of Boxwood Twine twice around the wire above the Screw Eye on the left side. Separate the ends so that they frame the left corner of the wood slice nicely. Cut a three-inch piece of ribbon off, and lay it under the wire just above the twine. Wrap more ribbon (about a foot) around three of your fingers, three times around, and remove the ribbon gripping it in the middle. place the ribbon bundle on top of the wire and in the middle of the short piece of ribbon, and tie the short piece into a knot with the ribbon bundle in the middle center. Pull out each loop of ribbon and fluff them forming a nice bow with the ends of the ribbon hanging down.


Related Posts

Tim Holtz Distress Paint Summer Card by Tami Bastiaans
Bring the beach to your craft table! Tami Bastiaans created this bright summer card using Distress Texture Paste, Paints,...
Read More
49 and Market From The Garden Journal Page by Jessica Mikels
Step into the garden with this beautifully layered journal spread by Jessica Mikels! Created with the 49 and Market...
Read More