


Jess Francisco transforms the Simon Hurley create. Trampoline Friends stamp set images into this spooktacular Halloween card. See how she creates a night sky background using Tim Holtz Distress Oxide Ink Pads in this creative card tutorial.

Dude You Deserve a Treat Halloween Card by Jess Francisco
- Materials
- Instructions
-
Simon Hurley create. Trampoline Friends Stamp Set
Simon Hurley create. Dudes Too! Stamp Set
Simon Hurley create. Stark White Cardstock
Tim Holtz Distress® Oxide Ink Pad: Milled Lavender, Dusty Concord, Seedless Preserves, Black Soot
Tim Holtz Distress® Sprayer
Wendy Vecchi Make Art STAY-tion™
Ranger Matte Multi Medium
Ranger Mini Ink Blending Tool
Ranger Fine Tip Applicator
Letter It™ Embossing Ink Pad
Ranger Embossing Powder: White
Ranger Anti-Static Pouch
Ranger Heat it Craft Tool
Tim Holtz® by Stampers Anonymous Acrylic Grid Blocks
Vellum
Instructions

Step 1: It’s time for a haunt – let’s create a spookily cute Halloween card with Simon Hurley create. products. To get started, stamp the cute monkey and raccoon critters and the tree from ‘Trampoline Friends’ on a piece of Stark White Cardstock. Use masking tape or a full sticky Post It Note to mask off each of the critters.

Step 2: Cut a circle from a scrap piece of cardstock and use it to mask off a ‘moon’ in your night sky. Using Distress Oxide Inks in Milled Lavender, Dusty Concord, Seedless Preserves, and Black Soot, blend a night sky. Remove the masks from your critters and color them with your favorite medium. You can also add little details like grass if you’d like.

Step 3: Using the Distress Sprayer, spritz some water into your hand and then flick the water on to your background, then soak up the excess with a clean paper towel. Use a black marker to color in the whole tree. This gives a silhouette effect and makes your scene look a little spookier – which is perfect for Halloween!

Step 4: Use the anti-static pouch on a piece of black cardstock. Then, stamp ‘DUDE’ and ‘you deserve a treat’ from ‘Dudes Too!’ in Letter It Embossing Ink. Pour on the Ranger White Embossing Powder and tap off the excess. Melt the powder with a Heat Tool. Use a pair of scissors to fussy cut the word ‘dude’ and then trim down ‘you deserve a treat’ into a strip.

Step 5: Adhere both sentiments to a piece of vellum and trim around the outside, leaving a border of vellum. This mutes the background behind the vellum and allows your sentiment to stand out against the night sky. Use Multi Medium Matte to adhere the sentiments to your card front. Attach your card front to a white A2 sized card base and you’re done!

Related Posts
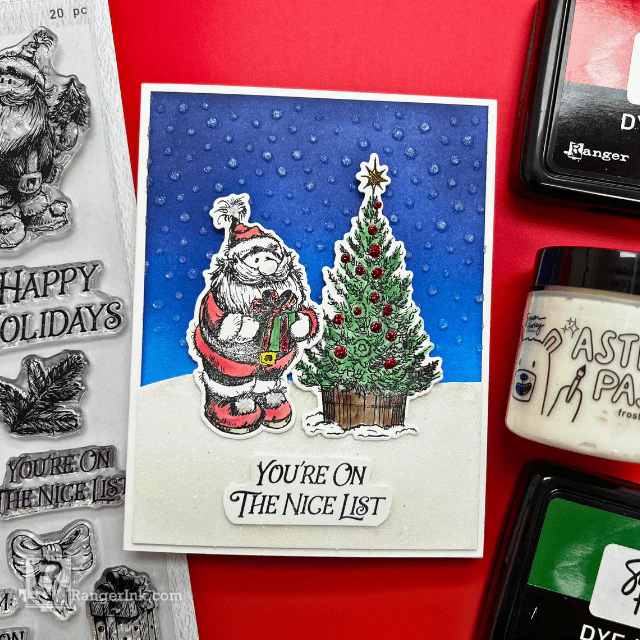
Simon Hurley create. Nice List Christmas Card by Asia Alberto
Santa’s checking his list, and this adorable card is a winner! Create festive fun with the latest Simon Hurley...
Read More
Simon Hurley create. Woodland Hello Card by Lieschen Harshbarger
Step into the woods with this enchanting card tutorial by Lieschen Harshbarger! Crafted using the Simon Hurley create...
Read More