


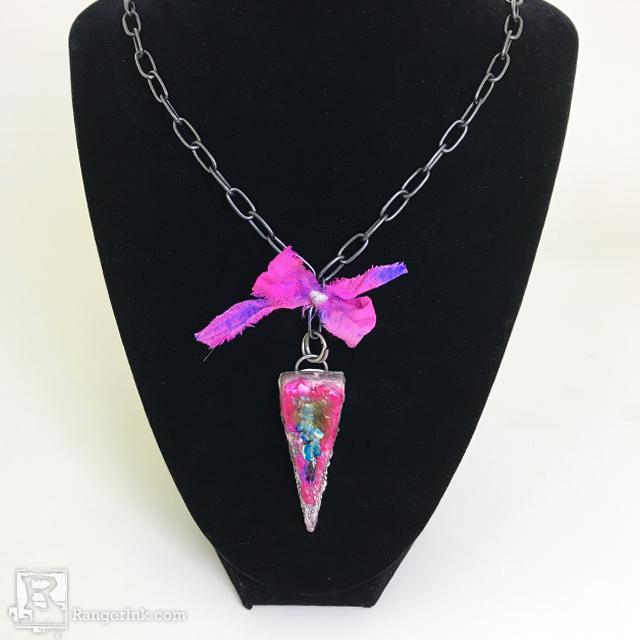
Combine ICE Resin and QuickCure Clay to create beautiful DIY Mixed Media Jewelry! In this tutorial, Daniela Mozo shares how she creates this colorful Faux Crystalized Stone Pendant. Add sparkle with German Glass Glitter, Alcohol Pearls and other accessories.
Faux Crystalized Stone Pendants by Daniela Mozo
- Materials
- Instructions
- ICE Resin®
- QuickCure Clay
- ICE Resin® Mixing Cups and Stir Sticks
- ICE Resin® Jewelry Mold
- ICE Resin® Tints: Hacienda
- ICE Resin® Iced Enamels: Pewter
- ICE Resin® Shattered Mica: Bronze
- ICE Resin® German Glass Glitter Shards: Sterling
- ICE Resin® Iced Enamels Medium
- ICE Resin® Brushes
- ICE Resin® Studio Sheet
- ICE Resin® Sari Ribbon
- Ranger Detail Blending Tool
- Tim Holtz® Alcohol Pearl: Intrigue
- Tim Holtz® Mixative: Rose Gold
- Tim Holtz by Tonic Studios Craft Pick
- Tim Holtz Distress® Micro Glaze™
- Ranger Heat It Craft Tool
- Rubber Gloves
- Toothpick
- Tape
Instructions

Step 2: Fill small triangle mold with QuickCure Clay.

Step 3: Remove Clay triangle from the mold.

Step 4: Use a Craft Pick to make a hole in the center. Make the edges of the hole jagged to give it some character.

Step 5: Refer to package instructions and cure the Clay with a Heat it Craft Tool.

Step 6: Using the Ranger Detail Blending Tool paint the top of the triangle with Intrigue Alcohol Pearl, and then the sides with Rose Gold Mixative.

Step 7: Paint the inside edges of the hole with Iced Enamels Medium using an ICE Resin Brush.

Step 8: Insert some Bronze Shattered Mica and Sterling Glass Glitter Shards into the hole.

Step 9: Place the triangle onto a piece to tape. Mix 1 oz of ICE Resin according to the package instructions. Pour 1/4 ounce of the mixed resin into a mixing cup. Put a drop of Hacienda ICE Resin Tint into the ICE Resin and mix. Pour tinted Resin into the hole of the triangle. Set aside and let cure 8-12 hours.

Step 10: Once the Resin is cured, brush some Iced Enamels Medium onto the bottom point and sides of the triangle. Apply some Pewter Iced Enamels to the triangle. Heat with a Heat it Tool until the Iced Enamels are melted.

Step 11: Attach a jump ring to the back of the pendant with some Quick Cure Clay. Heat the clay until cured.

Step 12: Add two jump rings, a chain and then tie a piece of Sari Ribbon formed into a bow on the chain and you are ready to wear your beautiful neckla

To give you some other ideas here are some other fun shapes that I made by molding them free hand.
