


Cheiron Brandon shows you how to use Seasonal Distress Crayons with Frosted Crystal Embossing Powder on this card resulting in a whimsical dreamy effect.

Seasonal Distress® Crayons Card by Cheiron Brandon
- Materials
- Instructions
Tim Holtz Distress® Halloween Pearlescent Crayon Set #1
Tim Holtz Distress® Halloween Pearlescent Crayon Set #2
Tim Holtz Distress® Holiday Pearlescent Crayon Set #2
Tim Holtz Distress® Frosted Crystal 62gr
Tim Holtz Distress® Waterbrush Detailer Tip
Tim Holtz Distress® Embossing Pen, 2pk
Tim Holtz Distress® Collage Medium
Tim Holtz Distress® Ink Pad: Black Soot
Ranger Mini Ink Blending Tool
Ranger Mini Ink Blending Tool Domed Replacement Foams
Tim Holtz Idea-ology Layers TH94076
Tim Holtz Idea-ology Kraft-Stock Stack Neutral - TH94111
Tim Holtz Idea-ology Kraft-Stock Stack Warm - TH94112
OTHER:
Tim Holtz Idea-ology Mini Fasteners, Clipping Stickers
Other:
Tim Holtz® by Tonic Studios Glass Mat
Instructions
Hi there, crafty friends! It’s Cheiron Brandon here and today I am thrilled to be sharing a project using the new Seasonal Distress Crayons. I have been lucky enough to play around with these crayons for the past few weeks and they have been an absolute joy to create with.
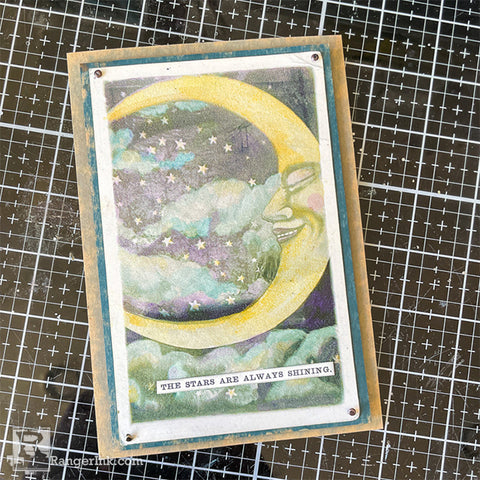
For my project today, I created a card using a piece of ephemera from the Tim Holtz Halloween Idea-ology Layers and combined it with Frosted Crystal to get a soft, beautiful effect that makes this card anything but Halloween. One of my favorite techniques for using Distress Crayons is coloring over Frosted Crystal. Let me show you how easy (and fun) it is to create!

Step 1: Gather your supplies. I used a piece of the Tim Holtz Halloween Idea-ology Layers, the new Distress Pearlescent Crayons, Distress Frosted Crystal and a Detailer Tip Waterbrush.

Step 2: Color over the image with your Distress Embossing Pen and emboss using Frosted Crystal. Heat it just until you see the image clearly. You can see the bumpy texture of the Frosted Crystal over the image. I left the border of the image untouched.

Step 3: Scribble your Pearlescent Distress Crayons onto the glass mat.
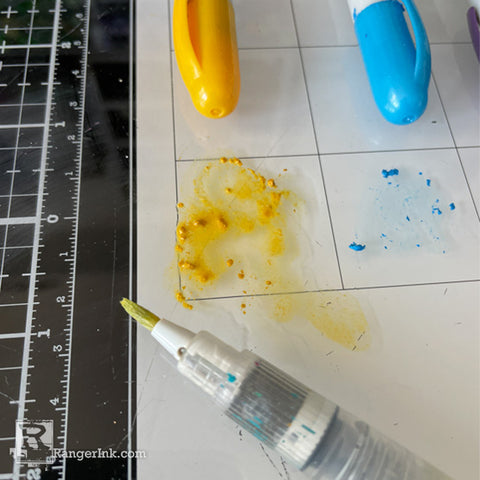
Step 4: Add some water to the crayon on your mat. I add just enough to make it a creamy consistency.

Step 5: Color in the image. I did one color at a time before moving onto the next.

Step 6: Add a second layer of color doing some shading and adding additional color (you can see that I added a bit of Flickering Candle and Hocus Pocus to my clouds and tiny dots of Flickering Candle to my stars). The addition of color really makes the image come alive.

Step 7: Ink the Clippings sticker with Black Soot Distress Ink and add to the ephemera layer using Distress Collage Medium.

Step 8: Add layer to a cardstock panel cut to 4 1/8 x 6 1/8 using mini fasteners. (You can also add adhesive to the back if you like).
Step 9: Add the layer you created to a card base measuring 4 ¼ x 6 ½ using foam tape.
Thanks for following along with my tutorial today. I hope you will try out this fun technique for yourself!
 My name is Cheiron Brandon. I live in Bayonne, New Jersey with my husband and our two adorable rescue pups, Big Boy and Oreo. I work in the financial district by day and love to play with stamps, ink and paint at night in my studio. I teach monthly card making and mixed media classes in NYC. You can find me on my blog at www.cheironbrandon.typepad.com and posting more often @cheiron on Instagram!
Related Posts
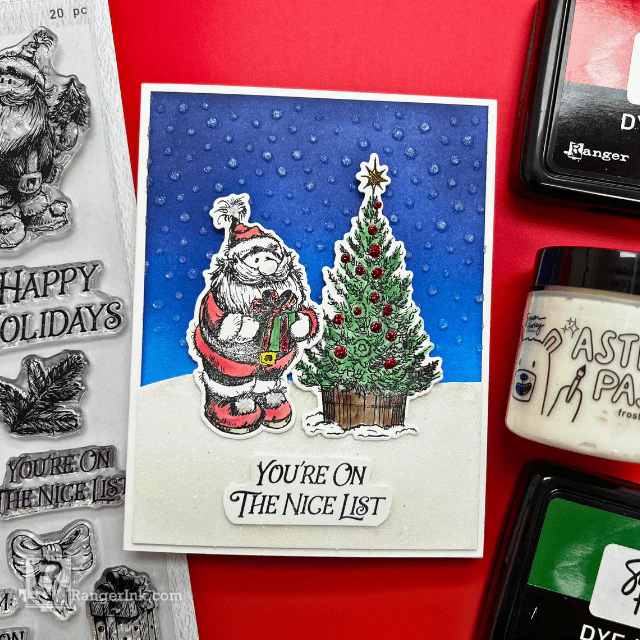
Simon Hurley create. Nice List Christmas Card by Asia Alberto
Santa’s checking his list, and this adorable card is a winner! Create festive fun with the latest Simon Hurley...
Read More
Simon Hurley create. Woodland Hello Card by Lieschen Harshbarger
Step into the woods with this enchanting card tutorial by Lieschen Harshbarger! Crafted using the Simon Hurley create...
Read More