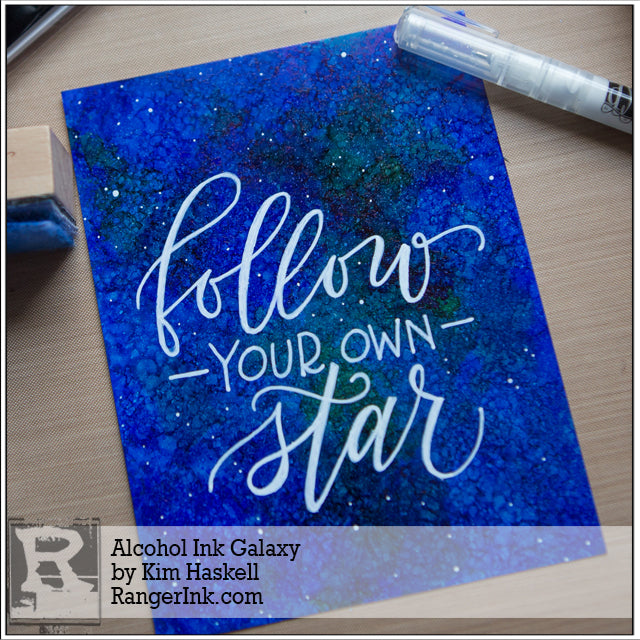
by Kim Haskell

Alcohol Ink Galaxy by Kim Haskell
- Materials
- Instructions
- Tim Holtz® Adirondack® Alcohol Ink Cardstock
- Tim Holtz® Alcohol Inks : Sunshine Yellow, Patina, Amethyst, Indigo
- Tim Holtz® Adirondack® Alcohol Blending Solution
- Tim Holtz® Adirondack®Alcohol Ink Applicator
- Ranger Pigment Ink Pads : Glacier White
- Dylusions Paint Pens : White Linen
- Ranger Non-Stick Craft Sheet™
- Toothbrush
Instructions

Galaxies have been a widely popular design element in the last couple of years. Their beautiful blend of color makes them a wonderful background on which to write or stamp an inspirational greeting. Below, I’ll guide you through the simple steps of layering Alcohol Inks to make a stunning galaxy background and then add a hand- lettered sentiment.

Step 1: Working on a Craft Sheet, apply the first layer of color. Beginning with Sunshine Yellow, add a couple drops of Alcohol Ink onto the Ink Applicator and swipe it onto the cardstock. Repeat with the remaining colors, working from light to dark in a random pattern and using a clean felt for each.

Step 2: Add several drops of Alcohol Blending Solution to a clean felt. Apply it over the entire surface of the cardstock using a dabbing motion only. This will cause the layer of color to lighten and blend slightly.

Step 3: Again, using a dabbing motion only, apply another layer of each of the Alcohol Ink colors from lightest to darkest. Dabbing instead of swiping on the color ensures a mottled, celestial effect is achieved for the final result.

Step 4: Dab on another layer of Alcohol Blending Solution. The colors should now be quite blended with no harsh lines between neighboring colors.

Step 5: Continue adding more color and blending with Alcohol Blending Solution until the galaxy is to your liking. Here, I wanted a darker effect, so I added more Indigo.

Step 6: To create background stars, lightly dampen the bristles of an old toothbrush and dip them into the pigment ink pad. Pointing the head of the toothbrush at your page, run your thumb over the bristles to splatter the cardstock.

Step 7: To complete your masterpiece, add a hand-written sentiment with the Dylusions paint pen. To create the look of modern calligraphy, first write in a flowy script style. Then thicken up the downstrokes, which are any lines that were made by moving the pen in a downward motion (toward your body). Use the paint pen to dot on some foreground stars as a final detail.


