


Hi Ranger fans! My name is Johnnie and I blog at Saved by Love Creations. I am as excited as can be to share my poinsettia wreath project with you. If you know me, you know I love to create with recycled materials, especially pop cans. Today, I am going to show you how to cut aluminum cans, color them with alcohol inks and combine them with some dollar store supplies to create a beautiful Christmas wreath for less than $3!

Aluminum Can Poinsettia Wreath by Johnnie Lanier
- Materials
- Instructions
- Ranger Non-Stick Craft Sheet™
- Tim Holtz® Alcohol Ink Applicator
- Ranger Glossy Accents™
- Tim Holtz® Adirondack® Alcohol Inks: Red Pepper, Oregano
- Aluminum Cans
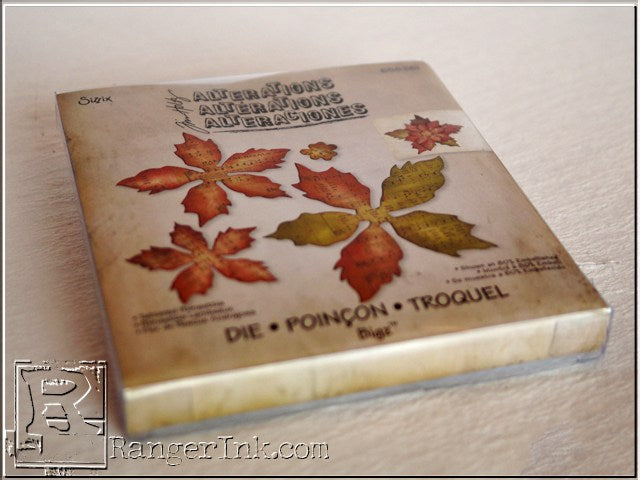
- Tim Holtz Sizzix Die Tattered Poinsettia
- Tim Holtz Sizzix Vagabond or die cutting machine
- Hot glue gun & glue sticks
- Wreath form and “Merry Christmas” decoration from the dollar store
Instructions
 The first step is cutting the aluminum cans so that you end up with rectangular sheets you can run through the die cut machine. (If you don’t have a die cut machine, there are tons of free poinsettia shape templates you can download, print and trace onto the can to cut by hand).
 Be very careful when cutting cans. The exposed edges can be sharp! Begin by inserting scissors into the mouth of the can and cutting through it down to the can’s side. My favorite scissors for cutting cans, and everything really, are Tim Holtz Kushgrip Snips. They go right through the aluminum, no problem.
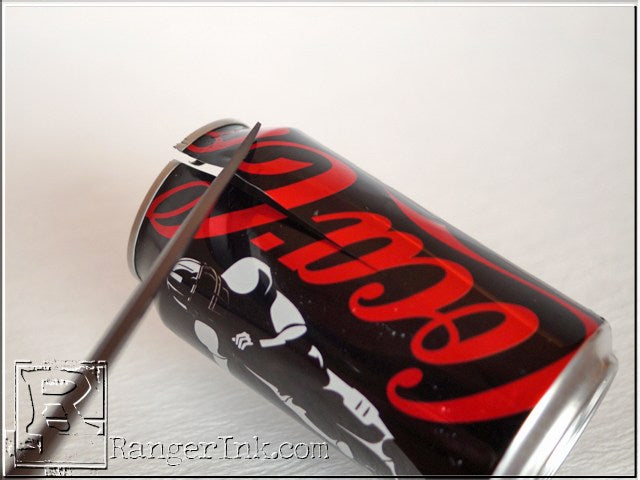 Cut around the can as shown to remove the top.
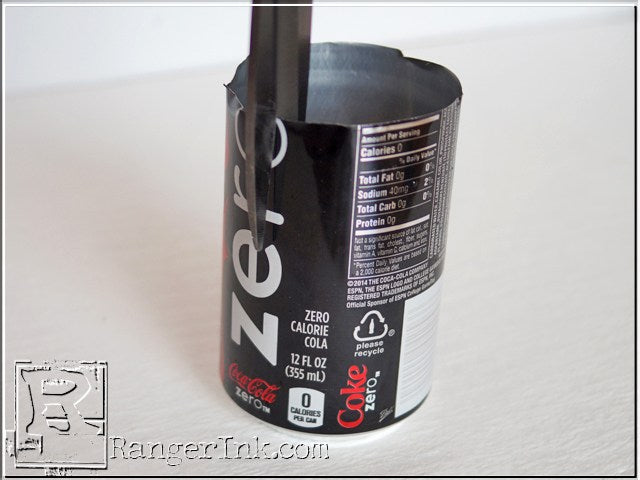 Next, cut down the side of the can to the bottom.
 Cut around the can to remove the bottom as shown.
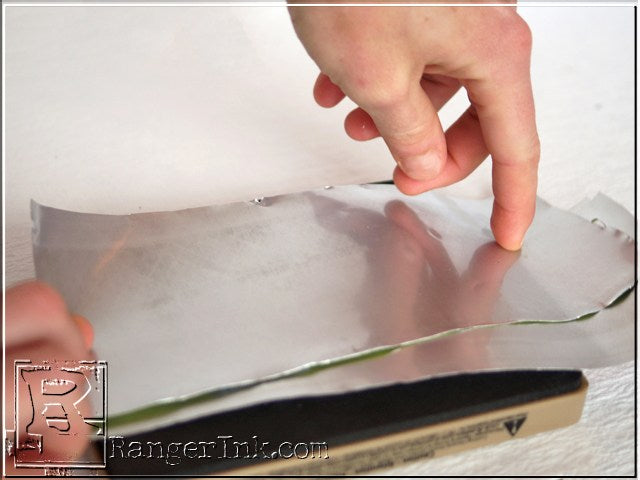 You are left with a rectangular sheet that can be die or cut by hand.
 The die cuts 4 layers for each flower. I used 12 flowers to create the wreath.
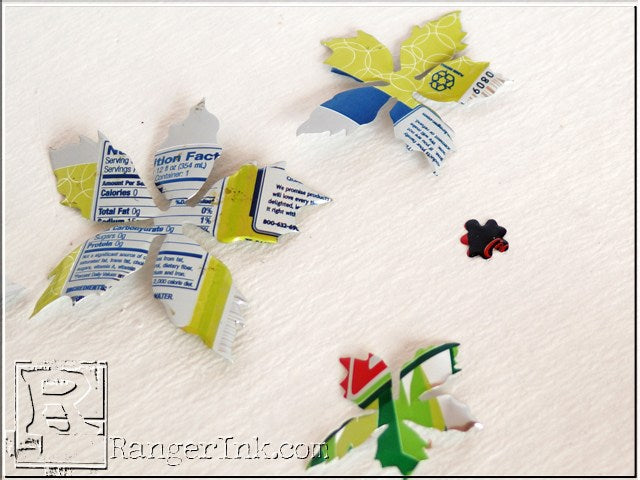
 Once your shapes are cut, it is time to color them! I love alcohol inks for this. They are so vibrant, and are made for non-porous surfaces like metal. I started with the bottom (largest) flower layer using Oregano for the leaves as shown. Working in a non-stick craft sheet, just place a line of ink on the felt applicator and dab the color onto the leaves.

 Color the red petals the same way, using Red Pepper. Use this on the remaining 2 petals on the bottom layer, and the entire top three layers.
 Poke holes in the 3 bottom layers using the needle tool.
 Attach the 3 bottom layers together with Tim Holtz Long Fasteners.
 Use Glossy Accents to glue top layer onto the Long Fastener as shown.
 Apply Gold Ice Stickles to the top layer for the yellow center of the poinsettia.
 Hot glue the finished poinsettias onto the wreath form. This one I found on a recent dollar store trip. Add burlap ribbon to the top before placing flowers there.
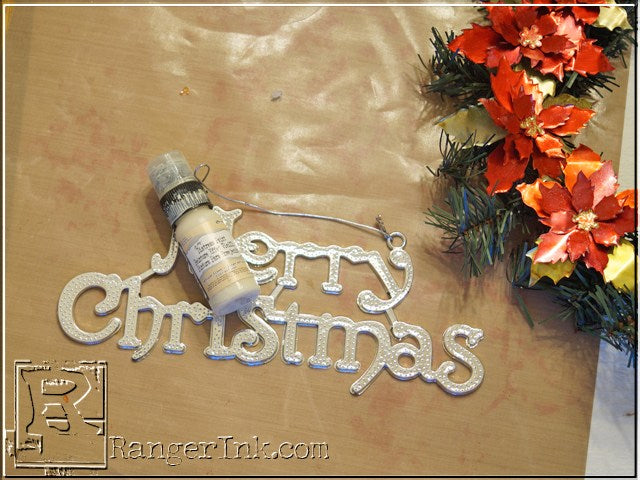 This “Merry Christmas” decoration I found at the dollar store was screaming for some distress paint to make it perfect for my poinsettia wreath! It had a felt snowman that was easily removed. I went over it with 2 coats of Antique Linen and attached it to the burlap ribbon with clear string.
 Adhere the decoration to the wreath.
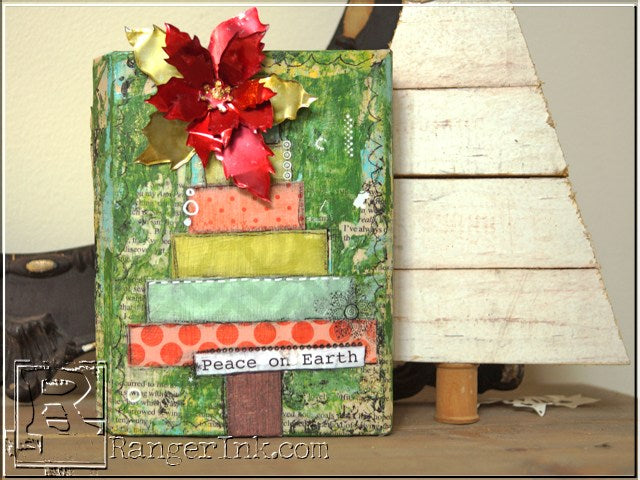 Not in the market for a wreath? These recycled can poinsettias are great for embellishing your art projects too! Just adhere it onto your piece with a foam square or Glossy Accents.

Related Posts

Archival Ink & Stickles 'Stay Curious' Card by Miriam Prantner
Build beautiful depth with monochromatic stamping! Miriam Prantner layers Archival Inks in coordinating shades to create a rich, detailed...
Read More
Dylusions Pastel Rainbow Notecards by Jess Peters
Soft pastel rainbows, playful splatter, and a handmade touch make these notecards a joy to create and send! 🌈...
Read More