by Audrey Pettit

December Greetings Gift Tags by Audrey Pettit
- Materials
- Instructions
- Ranger Artist Brush Set
- Ranger Heat it™ Craft Tool
- Ranger Non-Stick Craft Sheet™
- Ranger Multi-Medium: Matte
- Tim Holtz Distress® Glitter Dust
- Tim Holtz Distress® Splatter Brush
- Tim Holtz Distress® Sprayer
- Tim Holtz® Distress Markers: Festive Berries, Mowed Lawn, Gathered Twigs, Pumice Stone
- Archival Ink™ #0 Pads: Jet Black
- Tim Holtz® Distress Ink Pads: Brushed Corduroy
- Ranger Watercolor Paper
- Tim Holtz by Stampers Anonymous: Christmas4 Cling Stamps
- Tim Holtz Alterations by Sizzix: Tag Collection Die Set
- Tim Holtz Idea-ology Seasonal Chit Chat Stickers, Linen Ribbon, Crinkle Ribbon
- Scalloped Border Punch
Instructions

Everybody needs gift tags at the holidays, right? Well I’ve got some bright and festive ones to share with you today, along with a tutorial for creating a fun and funky plaid background made with Distress Markers.
 This plaid technique is so easy to do, and as always when working with Distress and water, the outcome is just a little bit magical.
 You’ll be amazed at the transformation that takes place when water hits the markers. And with the huge range of colors of Distress, you can easily create a plaid to suit any theme or style you choose. Let’s take a closer look.
 Step 1: To begin, cut a piece of Watercolor Paper that’s large enough to die cut as many tags as you’ll want to create. I chose a medium sized tag from the Tag Collection die cut, and cut a sheet of paper large enough to die cut four tags.
 Step 2: Select three or four Distress Markers to work with. I chose Festive Berries, Mowed Lawn, and Gathered Twigs. Using both the brush tip and the fine tip of the markers, draw lines of different thicknesses down the length of the paper. Repeat the process across the width of the paper, too. You can use a ruler for this step, if you wish. But I liked the organic look of the free flow lines.
 Step 3: Once you have all your lines drawn, spray the paper heavily with a Distress Sprayer until the marker colors begin to run and bleed.
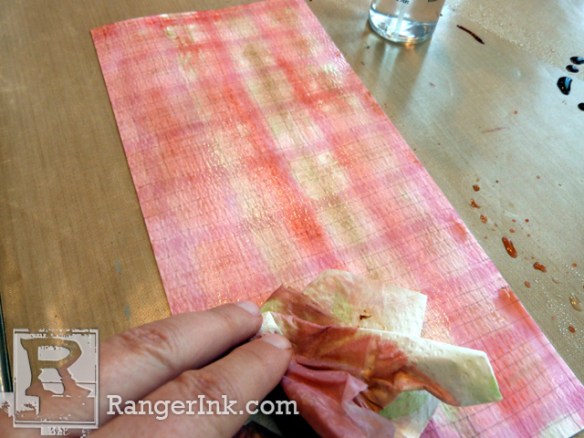 Step 4: Blot the paper lightly with a paper towel or clean cloth to remove some of the excess water and ink. And then set the paper aside to dry completely, or speed up the process with a Heat it Tool.
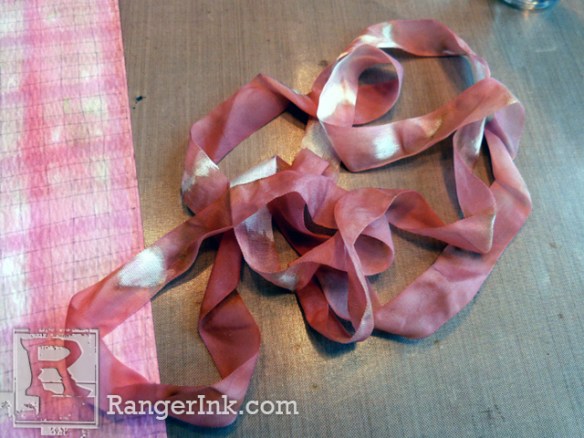 Step 5: Cut approximately 24” of crinkle ribbon and use the ribbon to sop up any remaining ink and water mixture left on the Craft Sheet. Set the ribbon aside to dry.
 Step 6: Die cut the Watercolor Paper using the tag die of your chose. And then ink the edges of the tag with Brushed Corduroy Distress Ink using an Ink Blending Tool with Foam.
 Step 7: Stamp holiday images onto the center of the tags using Jet Black Archival Ink.
 Step 8: Using a Pumice Stone Distress Marker, outline the images, including the blueprint lines and boxes.
 Step 8b: Mix a bit of Brushed Corduroy Distress Ink with water on your Craft Sheet. Pick up the ink with the Distress Splatter Brush, and flick the mixture onto your tags. Allow the flecks to dry.
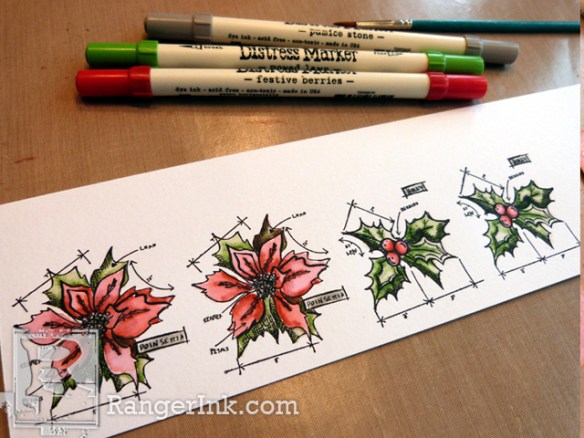 Step 9: Stamp the holiday images again onto Watercolor Paper. Watercolor the images using the same Distress Markers you used for the plaid background. To watercolor, I added a bit of marker color directly onto the images, and used a paintbrush dipped in water to smooth out the ink.
 Step 10: Fussy cut the images.
 Step 11: Dip the end of your paintbrush into Multi Medium Matte, and dab the adhesive onto a few small areas of the images. I added adhesive to the center of the poinsettias and to a few edges of the holly leaves. Cover the adhesive with Distress Glitter.
 Step 12: Adhere the fussy cut images onto the stamped images using Foam Adhesive, making sure to line up the images. Punch a scalloped border onto a thin strip of Kraft Cardstock. Ink the strip with Brushed Corduroy Distress Ink using an Ink Blending Tool. Adhere the scallop to the bottom of the tag, and trim the excess off the sides.
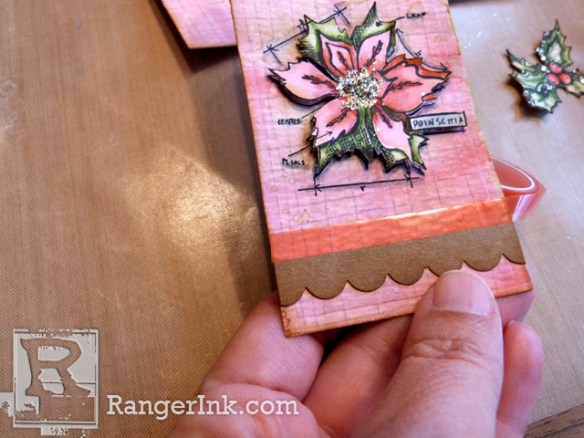 Step 13: Apply Wonder Tape directly above the scalloped border, trimming the excess off the sides.
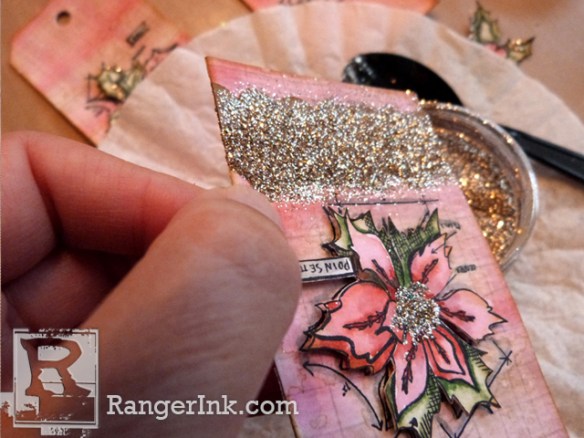 Step 14: Peel off the top protective liner from the tape, and cover the exposed tape with Distress Glitter. Shake off the excess.
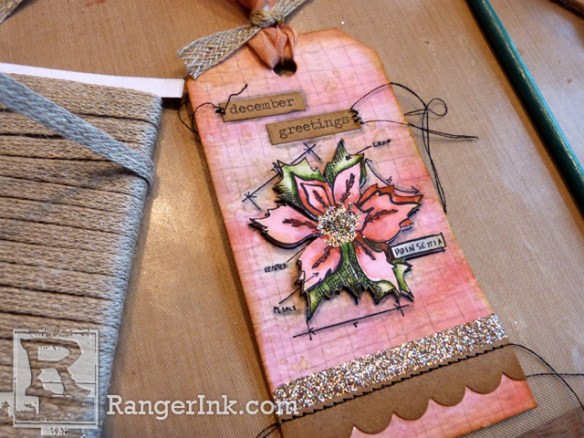 Step 15: Add seasonal Chit Chat stickers to the top of the tag. Machine stitch the stickers and the scalloped border, if desired. Cut the dyed crinkle ribbon into smaller pieces and thread them through the top of the tag openings. Tie with a small piece of Linen Ribbon. Fray the edges of the Linen Ribbon.
 Enjoy!


