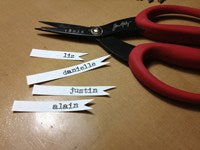
Distress Illuminated Autumn Place Cards By: Ranger | February 12, 2012 Home Decor | Tim Holtz® Distress A beautiful Autumn craft project by Tim Holtz. Materials Instructions Tim Holtz® Distress Stains: Brushed Corduroy, Walnut Stain Tim Holtz® Distress Inks Ranger Glossy Accents™ Ranger Wonder Tape™ Ranger Heat it™ Craft Tool Ranger Non-Stick Craft Sheet™ Ranger Ink Blending Tool & Foam Tim Holtz® Idea-ology® Grungeboard Basics Tim Holtz® Idea-ology® Memo Pins Tim Holtz® Idea-ology® Kraft Glassine Tim Holtz® Alterations™ by Sizzix® Twigs On the Edge Die Tim Holtz® Alterations™ by Sizzix® Mini Tattered Leaf Die Tim Holtz® Alterations™ by Sizzix® Base Tray Tim Holtz® Alterations™ by Sizzix® Vagabond Tim Holtz® by Tonic Studios® Kushgrip Snips Black battery-powered tealight Instructions Created by Tim Holtz Step 1: Remove a sheet of Kraft Glassine from pad and crumple it to create wrinkles. Step 2: Apply Glossy Accents to a sheet of Grungeboard. Step 3: Adhere Kraft Glassine to Grungeboard, pressing flat to secure it to the Grunge. Step 4: Die cut a mini Tattered Leaf die using Base Tray and Vagabond. Step 5: Die cut a plain piece of Grungeboard using Twigs On the Edge Die. Step 6: Stain both sides of Grunge using various brown tones of Distress Stain. Step 7: Shake Perfect Pearls Mist and mist both stained sides of Grunge while wet. Step 8: Dry Grungeboard with Heat It Craft Tool. Step 9: Apply a strip of Wonder Tape along back bottom edge of Grunge border. Step 10: Remove tape backing and wrap around bottom of tealight to adhere (trim excess Grunge if necessary). Step 11: Attach Memo Pin to Tattered Leaf by sliding leaf through top ring. Step 12: Print names on cardstock from computer, cut names into strips and snip flag tails on one end. Step 13: Ink with various Distress Ink colors using Ink Blending Tool. Step 14: Apply a small amount of Glossy Accents to back of flag on straight end. Step 15: Wrap around bottom stem of leaf to secure. Step 16: Insert Memo Pin into “flame” of tealight to finish.