Instructions

Step 1: Cut four, 2 1/2” squares of Watercolor Cardstock. Use a Distress Palette Knife to spread Distress Texture Paste, Black Opaque over stencil pattern. Clean stencil and palettes knife right away or submerge in water to clean later.

Step 2: Choose four colors of Distress Mica Stains. I chose Specimen, Phantom Mist, Fallen Acorn, and Mulled Cider based on the patterned paper I chose. NOTE: making swatches ahead of time was super helpful when choosing the colors to use.

Step 3: Once the Black Opaque Texture Paste is dry, spray each card with one of the Mica Stains.

Step 4: For this project, I am using one Etcetera large Square Panel and one package of Large Tiles.

Step 5: Adhere each card to an Etcetera Large Tile with Collage Medium Matte. Once secure, add Walnut Stain ink to the edges of the Tile with a Blending Tool.

Step 6: Repeat the process using five more Etcetera Tiles, only this time use patterned paper. This faded rose paper comes from the idea-ology Halloween Backdrops pack. Once the paper is adhered with Collage Medium, use a Sanding Disk on a Blending Tool to sand all edges of the paper. Cover each square with a coat of Collage Medium to seal.

Step 7: Use a Blending Tool to add Walnut Stain Ink to the edges of each Tile.

Step 8: To create the substrate, use a large Etcetera Square Panel (8.5 x 8.5”) and any paper from the Halloween Backdrops pack. I did not cover the center since it will be covered by the tiles. In fact only 1/2” will show on the edges.

Step 9: Use a Walnut Stain Distress Crayon to cover any white showing on the edges (from the paper being cut to size).

Step 10: Adhere Etcetera Tiles to the panel:
-
Adhere all patterned paper Tiles with Collage Medium
-
Adhere Mica Tiles with Foam squares (so each Mica Tile will be raised off the substrate).
TIP: I cut two 1/2” strips of chipboard to use as guide. Lay the 1/2” strip on two edges of the panel. This will give you the exact placement for the corner tile. All other tiles work outwards from the first.

Step 11: Once you are done adhering all 9 tiles, you can remove the guides.

Step 12: You can see the different levels created by adhering the tiles two ways.

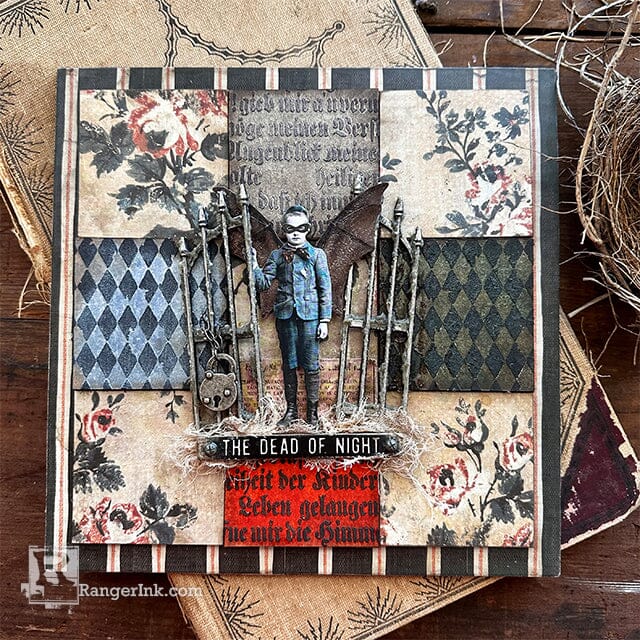
Step 13: FOCAL POINT - Liberally wipe Crypt Grit Paste onto the idea-ology Gothic Gates. Set aside to dry.

Step 14: Once dry, wrap a small piece of chain around the gate. Use needle nose pliers to open the jump ring and connect the ends of the chain to the lock.
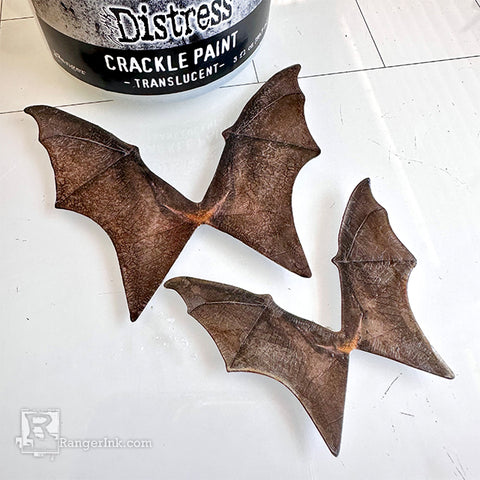
Step 15: Add Translucent Crackle Paint to a set of bat wings (idea-ology Halloween Layers + Paper Dolls pack), set aside to dry. The Crackle Paint leaves a textured crackle on the surface that makes the bat wings look realistic. NOTE: I couldn’t decide what size I wanted to use so I added Crackle Paint to two sizes then I can choose later.

Step 16: Use Distress Crayons and a Detailer Water Brush to tint the Paper Doll of choice. You can also use a cotton swab to smooth out the color on larger surfaces like clothes.

Step 17: Add bat wings (I went with the larger ones) and a mask from the Halloween Sticker Book. I added three DOUBLE STACKS of foam squares to the back of the boy.

Step 18: Use the Blending Tool with Sanding Disk to sand the edges of the word stick. Ink with Walnut Stain Distress Ink, then add Hardware Heads to each end with Collage Medium. Let dry.

Step 19: Cut a small piece of ephemera from the cigar box from the Layers + Paper Dolls pack.

Step 20: Now you have everything you will need to create the focal point on your project. I did use more idea-ology Mummy Cloth than is shown here, but this is a first piece you will need in the collage.

Step 21: Lay out the complete design before adding Collage Medium. Double stacks of foam squares are needed to raise the boy off the background (remember the tile directly behind him is one of the low ones). This will allow the left wing and hand to slip under the gate so it appears as if the boy is holding the gate to push it open. I used the cut out ephemera card to cover the area directly behind his feet.
Once the Collage Medium has been added, set project aside to dry completely before standing up.