


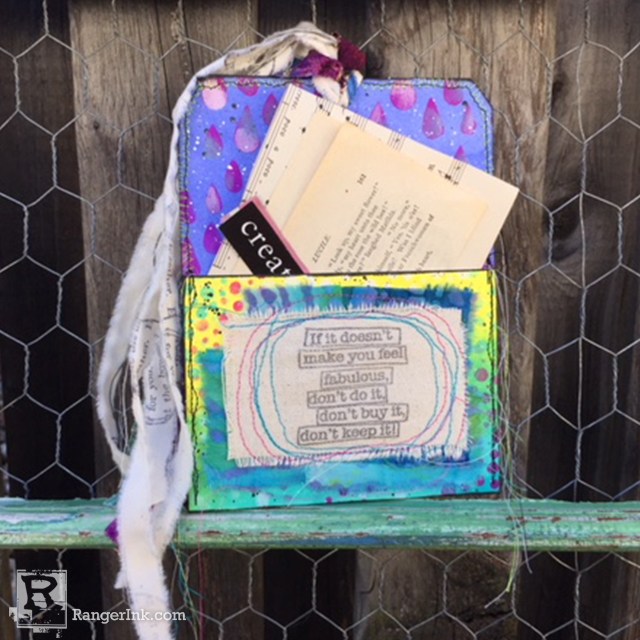
No secret here – I am addicted to art tags of all sizes, shapes and colors. They are so versatile and I find myself tucking them in my art journal quite often. Today I am showing you how I made this Pocket Tag with the Dylusions line from Ranger.

Dylusions Pocket Tag by Kristi Nazzaro
- Materials
- Instructions
- Dylusions Journaling Tags
- Dylusions Paint: Periwinkle Blue, Calypso Teal, Bubblegum Pink, Lemon Zest, Black Marble, White Linen
- Dina Wakley Media Acrylic Paints: Turquoise
- Dylusions Stamps: Starstruck, Quotes
- Dylusions Stencils: Small Raindrops, Small Bubbles
- Ranger Mini Blending Tool with Foam
- Archival Ink™ #0 Pads: Jet Black
- Tim Holtz by Tonic Kushgrip Snips
- Brother Sewing Machine Model JX2517
- Makeup Sponge
- Scrap Fabric
- Ribbon
- Canvas Pieces
Instructions

Step 1: Using the Mini Ink Blending tool I applied paint on both the front and back of a large Journaling Tag. Colors used: Periwinkle Blue, Calypso Teal and Lemon Zest. Because I wanted the front of the pocket to be a different color than the top of the tag I kept the color scheme the same on both sides. Allow the paint to dry completely.

Step 2: I folded the bottom of the tag up about half way. I am not one to measure so I eyeballed about how large I wanted my pocket to be.

Step 3: I stenciled both the front and back of the tag using a piece of a makeup sponge. I used the small bubbles stencil from the Quotes and Bubbles set for the entire tag avoiding the area right above the pocket. For that area I used the small Raindrops stencil.

Step 4: I applied Black Marble paint around the edges of both sides of the tag with my blending tool.

Step 5: Using a small paint brush, I splatter painted the front and back of the tag with White Linen Paint. Set the tag aside to dry.

Step 6: I always have scrap pieces of fabric and canvas in my stash. As the tag was drying I stamped my sentiment from the Quotes and Bubbles set on to a piece of scrap canvas with Jet Black Archival Ink.

Step 7: I used the Dylusions Starstruck Stamp Set to stamp small word bubbles onto a piece of cream colored scrap fabric.

Step 8: After the ink dried, I tore the fabric into strips.

Step 9: I found a few small pieces of batik fabric in my stash. I tore them so the edges were frayed and laid my stamped piece of canvas on top. Using my sewing machine I stitched the canvas and fabric scraps onto the front of the pocket of my tag. I am not able to completely sew a straight line which has its advantage in mixed media. I embrace the wonky look of sewing around in a circle over and over on the canvas and fabric pieces.

Step 10: Using different color threads I stitched the pocket together and went all around the edge of the entire tag. Again not worrying about the perfection of a straight line but more about making sure the pocket would hold.
Step 11: I used the torn pieces of stamped fabric as well as some ribbons from stash to make the tie up top.
Step 12: Last but not least I filled the pocket with a few collage pieces to be used for another project. I hope you enjoyed this tutorial and look forward to seeing what you make with your Dylusions products.

Related Posts

Painting with Liquid Pearls by Miriam Prantner
A little Liquid Pearls magic goes a long way! Miriam Prantner keeps this card simple and stunning by painting...
Read More
"My Cup of Care" Journal Page with Dylusions Pastel Paints by Miranda van den Bosch
Read More
Drawer Title
- Choosing a selection results in a full page refresh.