


by Anna-Karin Evaldsson

Glossy Journey by Anna-Karin Evaldsson
- Materials
- Instructions
- Dylusions Large Creative Journal
- Ranger Specialty Stamping Paper
- Ranger Gloss Paper
- Vintage
- Tim Holtz Distress Ink: Black Soot, Iced Spruce, Embossing Ink
- Tim Holtz Distress Markers: Tattered Rose, Milled Lavender, Broken China
- Archival Ink: Jet Black, Red Geranium
- Embossing Powder: White
- Ranger Glossy Accents™
- Ranger Multi-Medium
- Ranger Mister
- Ranger Brayers
- Ranger Mini Blending Tool
- Ranger Non-Stick Craft Sheet™
- Ranger Heat it™ Craft Tool
- Tim Holtz idea-ology – Pocket Cards, Occasions Found Relatives, Deco Sheets, Paper Strings Stripes, Journeyman Tissue Tape, Tiny Attacher, Sanding Grip
- Tim Holtz Sizzix Alterations- Tiny Shapes, Tiny Tabs & Tags, Adventure Words Script
- Tim Holtz Stamper’s Anonymous– Correspondence, Documented, Life Quotes, Perspective, Cityscapes, Handwritten Thoughts, Mesh & Linen, Dots & Floral, Cracks & Specks, Wallpaper & Wood, Graph & Croc, Remnants, Typography
- Tim Holtz Tonic– Craft Pick, Paper Distresser
Instructions
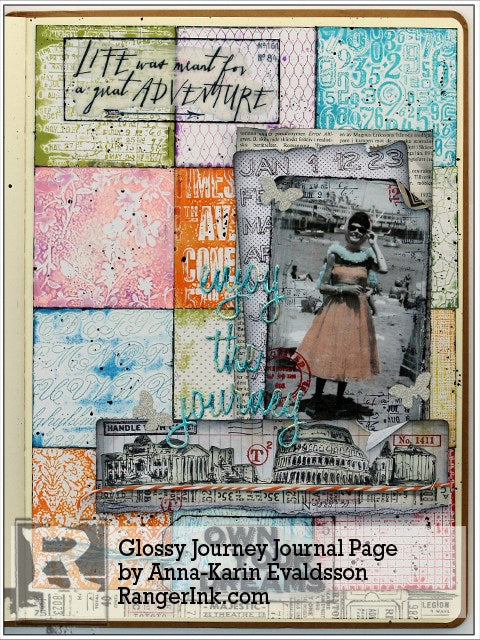 Hello everyone! It is Anna-Karin here with you, and I am so happy to be a guest at Ranger’s blog. My very first inkpad, years ago when I started stamping, was made by Ranger and I hardly ever do a project which doesn’t contain one or many products by Ranger. In this tutorial, I will use the new dye ink pads together with glossy cardstock and stamping to create a vibrant textured background. We will also do a bunch of other fun techniques.
 I made an art journal page in my large Dylusions journal, but the techniques work just as well for any type of project. I love dye inks because they are so versatile and work for many techniques. Their translucent qualities are also lovely. The new dye ink pads are a little different from many other dye inks in that they are permanent and waterproof. There are 12 vibrant colours.
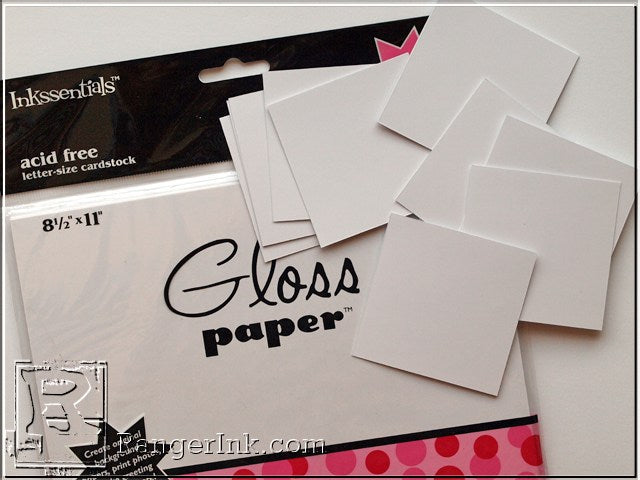 Dye ink looks wonderful on glossy cardstock. Cut 12 squares of glossy cardstock. These are 2.63 in, but the size would depend on your project.
 Stamp the squares with different background stamps, using Distress Embossing Ink and heat emboss with white embossing powder. You can also use clear powder, for the same effect.
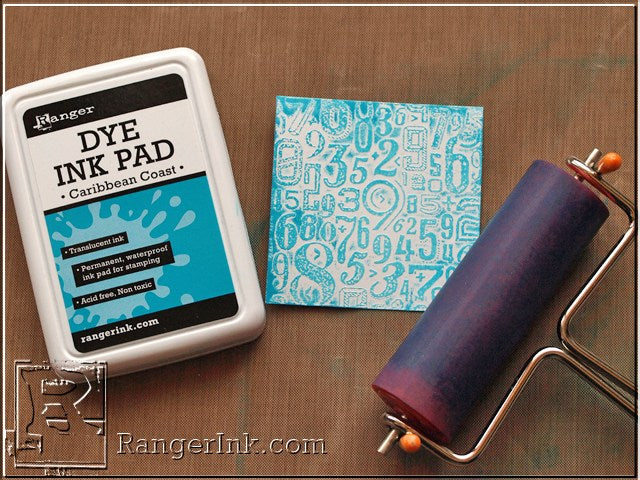 Ink up an Inky Roller Medium by rolling it over the ink pad several times, until the coverage on the brayer is relatively even. Gently roll the brayer over the embossed paper. The ink will mainly get stuck on the embossed areas, but don’t worry if some end up on the glossy cardstock, since that just adds to the texture.
 Continue with the other squares, using: Cheese Puff, Electric Lime, Pink Gumball, Caribbean Coast, Lemon Twist, Grape Soda, Blue Ribbon and Lily Pad inks. I used the first two inks and Caribbean Coast twice. Love the fun names of the colours. Normally dye inks wouldn’t stick to the embossed areas, you’d be able to just wipe it off. But since these inks are permanent and waterproof, they stick to the melted embossing powder. Pretty cool.
 Add a thin black border by swiping the papers across a Black Soot ink pad. Wipe with tissue paper to remove any black ink on the embossed areas.
 Adhere the squares in your art journal, or on a card or scrapbook base, and splatter with Black Soot paint. Place a pool of paint on your craft sheet, add a tiny bit of water to the paint, pick up with a paint brush and tap the handle of the brush to create splatters.
 I picked a Found Relative card that fit with the theme of my layout. Tint areas of the image with Distress Markers.
 Distress the edges of the card with a Craft Pick and Sanding Block.
 Distress the edge with a distress tool. Ink with Black Soot.
 Stamp the image with Jet Black and Red Geranium Archival Ink.
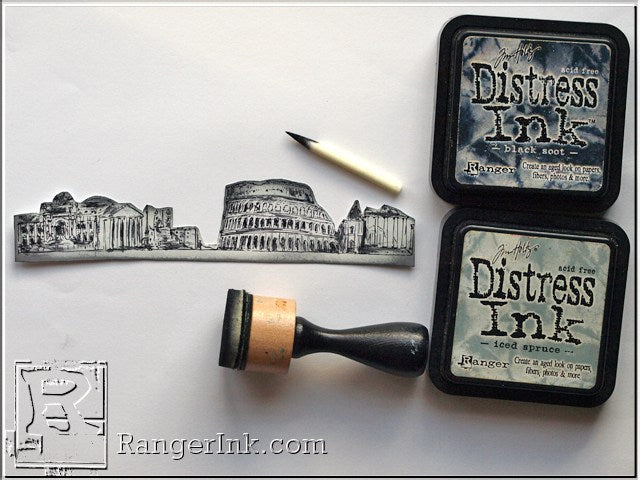 Stamp a cityscape on Specialty Stamping Paper with Jet Black ink. Colour it with Iced Spruce and Black Soot ink, using a mini ink blending tool and a Craft Nib. It is easier if you use the Craft Nib Holder for the craft nib, but mine was hiding somewhere on my desk.
 Die cut a small tag from shrink plastic and stamp with a sentiment. Stamp another sentiment on a piece of shrink plastic. We are not going to shrink these pieces, but the shrink plastic also works great as a sturdy transparent surface to stamp on.
 Swipe white paint under the sentiments and black paint around the edges. I also added a few more stamps.
 For the title, adhere an Adhesive Sheet to cardstock and die cut words from this.
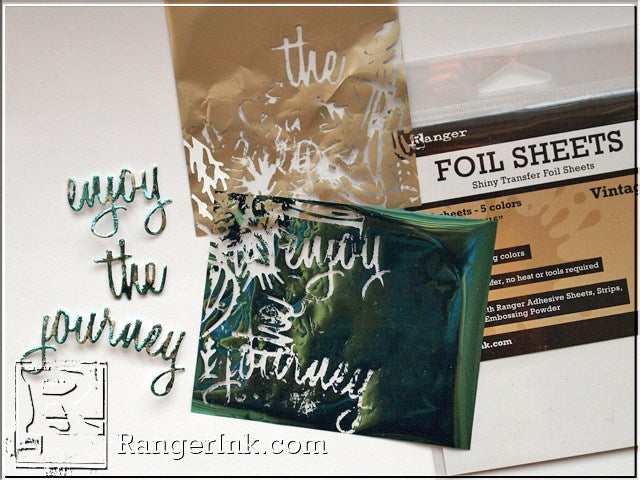 Remove the protective layer and press the word here and there on the matte side of a gold Foil Sheet. Place on the matte side of the turquoise sheet and rub to transfer foil to all the areas not yet covered by the gold. I used these foil sheets for a prior project too, you can clearly see where the foil has been removed.
 Layer the focal image on old dictionary paper and a Pocket Card. Glue the title next to it with Glossy Accents.
 Here you can see a close up of the multi-coloured foil word.
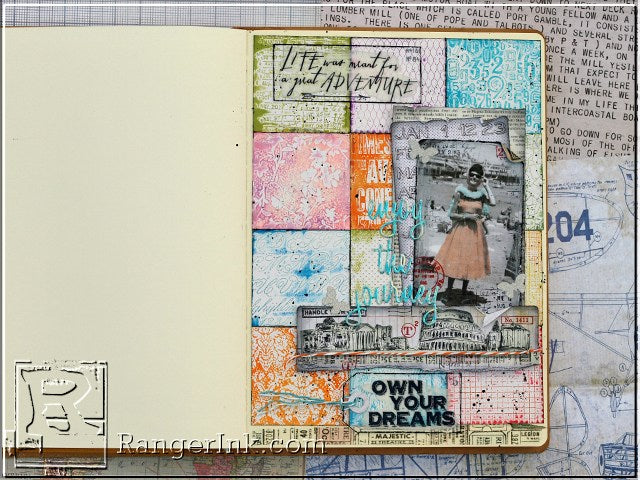
 The embossed and inked panels look so nice, I almost didn’t want to cover them up.
 Glue the shrink plastic to the page by adding a little bit of matte multi medium behind the parts with paint. That way, the adhesive won’t show at all.
 Glue the cityscape to an inked, torn and stamped piece of Pocket Card. Add a strip of tissue tape and twine.
 Die cut tiny butterflies from a silver Deco Art sheet, for a little bling.
 This technique would work great as a background of a card, for example. You don’t have to do the square grid design, instead, just make one larger panel. Or you could die cut smaller shapes from an embossed and inked paper. There are lots of possibilities with this fun technique.

I hope you enjoyed this tutorial!
Happy crafting!

Related Posts

Colorful Layering with Dina Wakley Transparencies & Paints by Laura Dame
Let your creativity fly with this bold and textured burlap page by Laura Dame! Featuring Dina Wakley Media...
Read More
Creative Fun with Dina Wakley Media Canvas Pages by Laura Dame
Unleash your free spirit on canvas! In this tutorial, Laura Dame creates a vibrant expressive journal page using...
Read More