


Turn a new leaf in cardmaking! Discover the magic of Liquid Pearls with Kimberly Boliver as she shares three techniques in this fall-inspired gratitude card tutorial.

Liquid Pearls Grateful Leaf Prints Card by Kimberly Boliver
- Materials
- Instructions
Other:
91% Alcohol for spray bottle
Instructions
I just love playing with liquid pearls. The shine they add to a project, levels it up a notch every time! I am going to share with you three ways to use Ranger Marigold Liquid Pearls on this festive fall card.
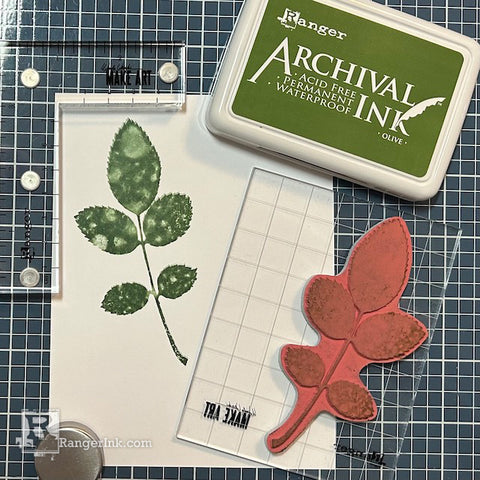
Step 1: Using the Perfect Stamp Positioner, ink up the five leaf stamp from the Leaf Prints stamp set with Olive Archival ink. Spritz it once with a sprayer filled with alcohol, then stamp it on a piece of Perfect Cardstock.
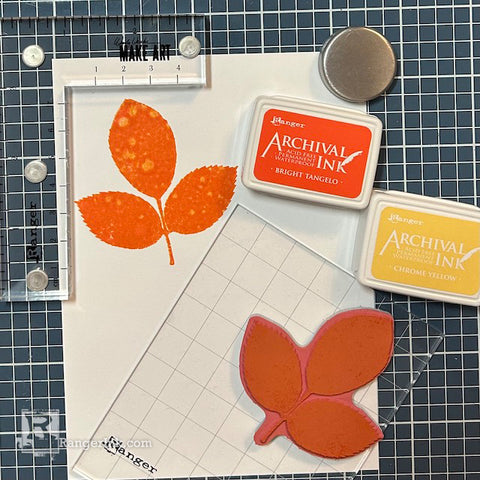
Step 2: Using the Perfect Stamp Positioner, ink the three leaf stamp with Bright Tangelo Archival Ink and spritz with alcohol. Keep Stamp Positioner in place and restamp the leaf inked up with Chrome Yellow Archival Ink spritzed with alcohol. Repeat this step so you have two orange leaf sprigs.

Step 3: Die cut all three leaf sprigs using the dies from the Leaf Prints Stamp and Die Set.
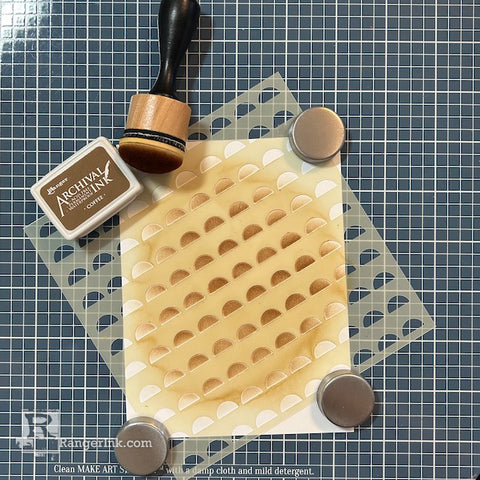
Step 4: Use the Make Art Stay-tion to hold the Flip Flop Circles stencil in place over the Perfect Cardstock panel. Blend Coffee Archival Ink over part of the stencil using the Ink Blending Tool. Flip the stencil over and blend Coffee Archival Ink to complete the circle.

Step 5: Keeping the stencil in place, squeeze Marigold Perfect Pearls on a palette knife and spread over the center of the stencil. Remove the stencil and let the panel dry while cleaning the liquid pearls off the stencil. Once the panel is dry, cut down to 4” x 5 ¼”.

Step 6: Squeeze a pea size drop of Marigold Liquid Pearls on the craft mat and water it down with a couple of drops of water. Mix using the ½” brush from the Artist Brush set. Paint the entire border of a 4 ¼” x 5 ½” sheet of Distress Watercolor Paper. Paint a ½” strip of watercolor paper with the remaining paint for the layer that will be glued behind the sentiment.
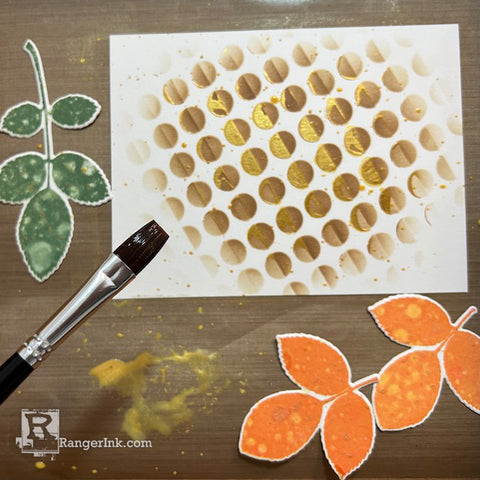
Step 7: Lay the Craft Mat in a splatter box and put the leaves along with the stenciled panel on the craft mat. Mix water with Marigold Liquid Pearls on the craft mat and load the paint brush. Tap the top of the brush over the leaves and stenciled panel to get splatters on each. Continue filling the brush and tapping until you are happy with the amount of splatters.
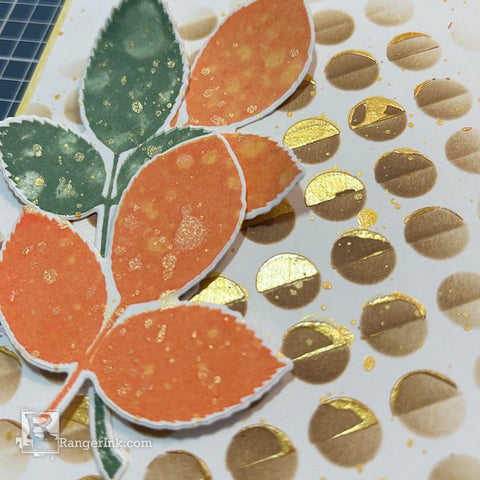
Step 8: Once everything is dry, assemble the card. Adhere the stenciled panel on top of the watercolor panel. Layer the leaves on top of each other, gluing the bottom two sprigs to the stenciled card panel. If you glue the sprigs on the stems and bottom leaf, you can curl up the top leaves for some dimension. Add foam tape to the top leaf sprig and adhere to the card.
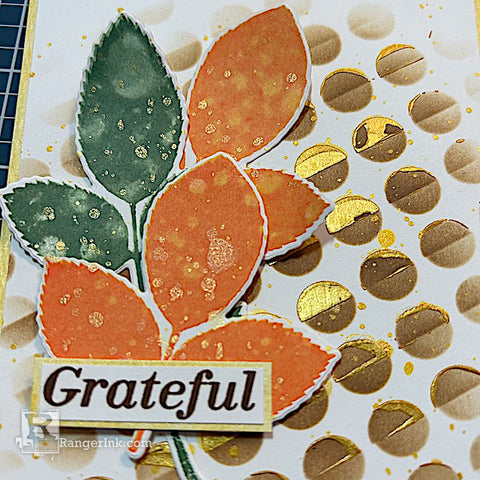
Step 9: Stamp the word “Grateful” from the “Fall Sampler” stamp set on Perfect Cardstock using Coffee Archival Ink. Trim it down and adhere it to the reserved strip of watercolor cardstock with the liquid pearls painted on it. Adhere it to the group of leaves, then glue the completed panel to a Perfect Cardstock White Card base.

 My name is Kimberly Boliver. I am a south Jersey Girl now living in Delaware. I love the beach and paper crafting in my downtime when I am not working as a Security Officer. I have been hoarding, I mean crafting in my craft room for over 25 years and love sharing what I have created with others. I am most active on Instagram @KimmieB16, but you can find me on YouTube as well as my blog.