


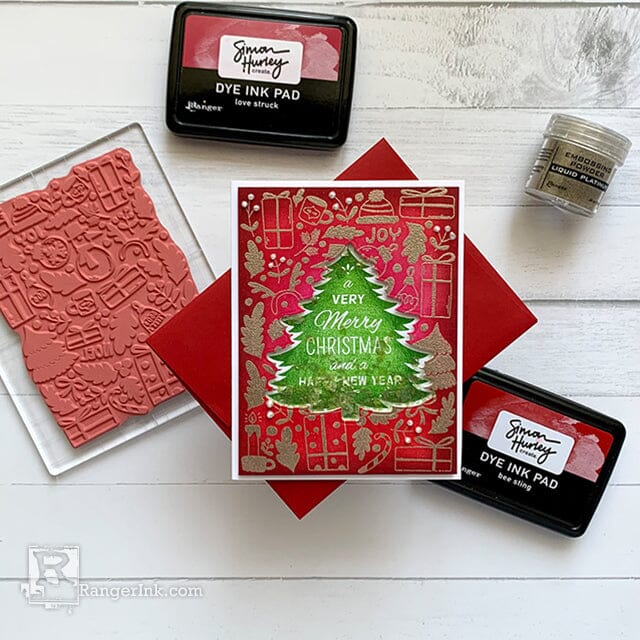
Get ready to be inspired! Follow along as Lieschen Harshbarger demonstrates how to create a stunning Christmas shaker card using the latest products from Simon Hurley create. This festive project is sure to impress and delight this holiday season.
Free Shipping On All Orders Over $49.99
Instructions
Hello crafty friends! I have been enjoying making Christmas cards this month – more now with Simon Hurley’s latest release! I made a fun shaker card using the Winter Things background stamp and the Retro Holiday stamp and die set. I hope you enjoy this tutorial as much I enjoyed making today’s card.
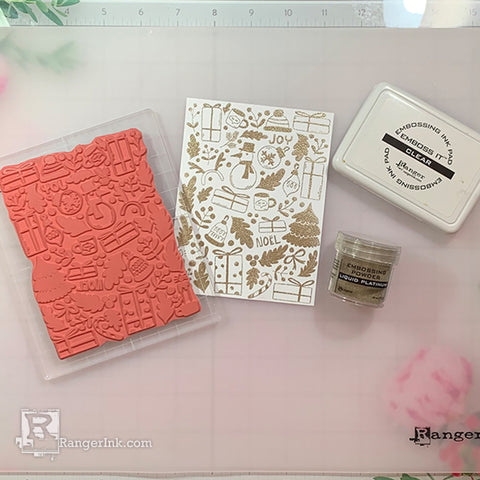
Step 1: Start by trimming a piece of Stark White Cardstock measuring 4x 5¼ that would go with an A2 card base. Then, place the background stamp from the Winter Things stamp set on the 5x6 acrylic block. Next, ink up the stamp with the Emboss It Clear pad to heat emboss the image with Platinum Embossing Powder.
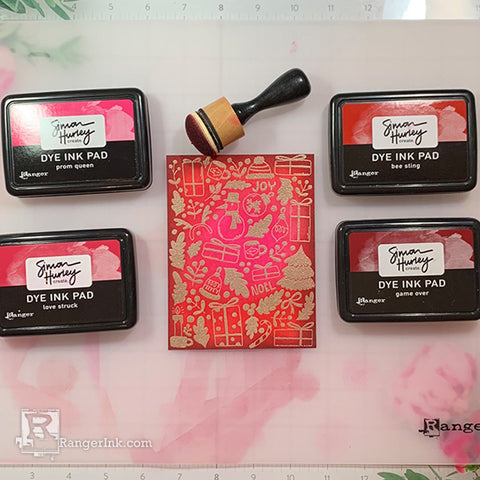
Step 2: After the heat embossing is done, ink the background from the inside out. Starting with Prom Queen, Love Struck, and then Bee Sting. Then use Game Over around the edges of the front panel.
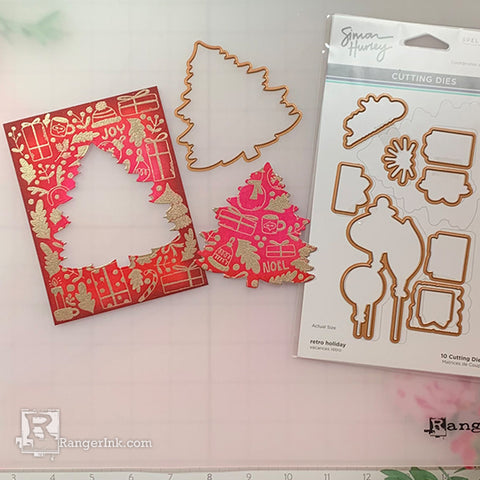
Step 3: Use the tree shape die from the Retro Holiday set and place it in the middle of the inked background from step 2. Then run it through a die cutting machine. You could use the tree die cut to make another card!

Step 4: On a separate piece of Stark White Cardstock measuring 4x5¼, place the inked background from step 3 onto the new front panel piece. Then, use a pencil to trace the tree shape. This will be a guide to know where to stamp the tree stamp from with Retro Holiday stamp set.
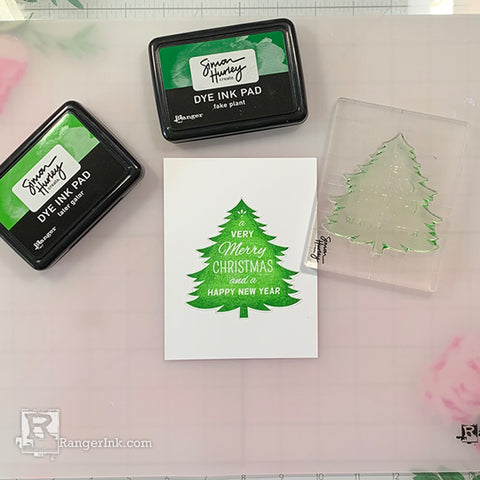
Step 5: After the tracing is done, place the tree stamp image from the Retro Holiday stamp set onto an acrylic block to stamp the image onto the card stock using Later Gator ink pad. Use the Fake Plant ink pad only around the edges of the Christmas tree.
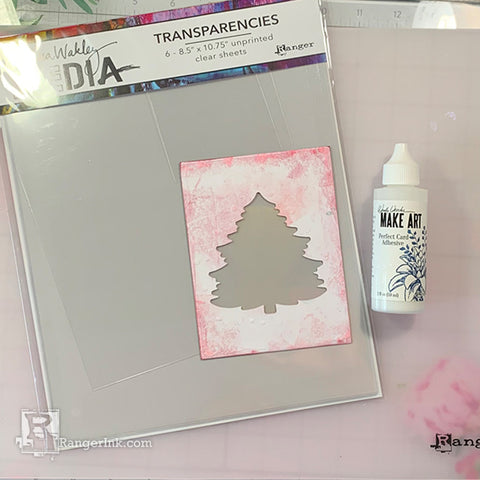
Step 6: Trim a piece of Dina Wakley Media Clear Transparencies measuring 4x5¼ and glue it to the back of the die cut front panel piece.
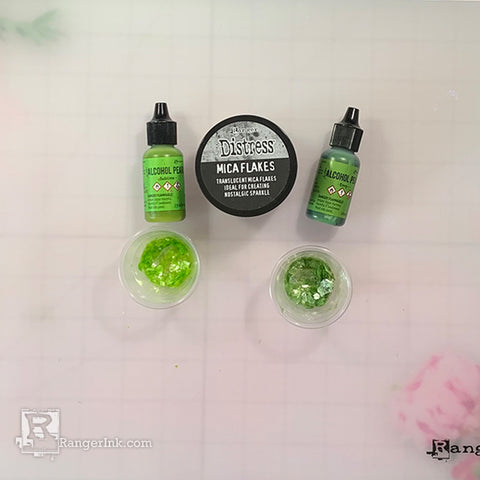
Step 7: Use two plastic cups and put Tim Holtz Distress Mica Flakes in each of them. Then, in one cup put a couple of Sublime alcohol pearls and in the other put some Envy alcohol pearls. Stir them each with a popsicle stick or the end of a paint brush.

Step 8: Assemble the card. Place mica flakes on the stamped Christmas tree image. Then use foam adhesive on the heat embossed/inked background and tape it to the other front panel piece so that you can see the Christmas tree image. Next, glue the front panel piece to the A2 card base. Place White Opal liquid pearls on the holly berry images.

Step 9: Next, pair the card with a matching envelope. Now the card is ready to be sent to a loved one during the holiday season.
 Hi! My name is Lieschen Harshbarger. I’m married to my best friend and even though we don’t have children yet, our dog Sophie fills our hearts with lots of love and joy. By day, I work for the State of Texas, but during my evenings and weekends you’ll find me in my craft room – making cards and trying out new techniques with my crafty supplies. I enjoy being creative, but mostly I have enjoyed getting to know others and learning fun new things in this wonderful crafty industry! You can see more of my crafty projects on my blog Harshgurl and Instagram at @harshgurl.
