by Tammy Tutterow

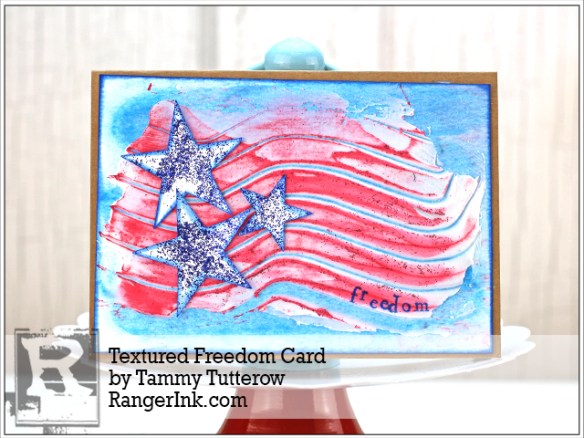
Textured Freedom Card by Tammy Tutterow
- Materials
- Instructions
- Ranger Palette Knife Set
- Ranger Texture Tools
- Tim Holtz Distress® Sprayer
- Ranger Heat it™ Craft Tool
- Ranger Mini Blending Tool
- Ranger Non-Stick Craft Sheet™
- Ranger Texture Paste
- Stickles™ Glitter Glue: Tickled Pink, Blue Bayou
- Ranger Watercolor Paper
- Tim Holtz by Sizzix: Stacked Stars Die
- Hero Arts Printer's Tape
Instructions

Summer is coming and with it there will be BBQs and picnics and lots of red, white, and blue! One of my favorite treats for holiday cook outs are the cupcakes! My local grocery store always has cupcakes with white frosting with hints of red along the edges. They are topped off of with sparkly blue stars on picks.
Today I am sharing a quick and easy card that borrows inspiration from those cupcakes. You could use this for cards, invitations, or even party decor!
 Step 1: Scribble Blue Yonder paint onto a 4” x 6” piece of watercolor cardstock.
 Step 2: Spray water onto the paint. Water will help blend out and soften the look of the paint.
 Step 3: Blot the excess water with a dry cloth. (My towel had red paint on it that transferred onto my card. I decided to embrace it rather than start over.) Dry the cardstock with a heat tool.
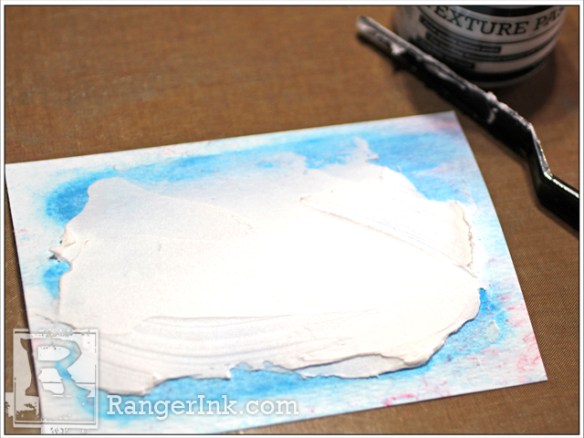
 Step 4: Use a palette knife to spread Texture paste on the cardstock over the blue paint.
 Step 5: Dab Classic Cherry paint generously on a Texture Tool.
 Step 6: Drag the Texture Tool through the Texture Paste in a wave pattern. The paint should be on the side of the tool that is facing the direction you are dragging. The paint will transfer onto the edges of the Texture Paste design. Set the cardstock aside to dry.
 Step 7: Spread Blue Bayou Stickles on a scrap piece of watercolor cardstock. Set aside to dry.
 Step 8: When the Texture Paste is dry, you can add additional paint color if desired. To apply the paint, dab paint onto your craft sheet. Place a clean foam on an ink blending tool. Pick up the paint with the foam. Skim the paint onto the raised areas of Texture Paste. Use a light hand and don’t push down on the foam to keep the paint on the raised areas only.
 Step 9: To add a bit of sparkle, you can add Stickles over the paint. Squeeze the Stickles onto the craft sheet. Add a clean foam to an ink blending tool. Pick the Stickles up with the blending tool and skim over the paint.
 Step 10: Die cut stars from the cardstock with Stickles on it.
 Step 11: Use an ink blending tool to apply Blue Ribbon ink to the edges of the stars and the piece of cardstock. (I trimmed my cardstock down slightly to remove the excess white border I had and to be sure it fit well on my card front.)
 Step 12: Adhere the stars to the cardstock.
 Step 13: Use letter stamps to add a sentiment to the cardstock piece using Blue Ribbon ink. (YES! You can stamp on Texture Paste!)
 Step 14: Adhere the finished cardstock piece to the front of a blank card.
 Step 15: How fun and simple was that? I don’t know about you, but I am hungry for one of those cupcakes now!


