


Ranger Signature Artist Wendy Vecchi shares an art tag tutorial for a tag that is The Sweetest!

The Sweetest Tag by Wendy Vecchi
- Materials
- Instructions
- Wendy Vecchi Archival Ink™: Tea Rose, Fern Green, Watering Can, Buttercup, Tree Branch
- Archival Ink™ Jet Black
- Tim Holtz® Distress Ink:Wild Honey, Squeezed Lemonade, Abandoned Coral, Brushed Corduroy
- Ranger Foil Sheets
- Ranger Adhesive Strips
- Ranger Adhesive Foam Rolls
- Dina Wakley Media Palette Knife
- Ranger Heat it™ Craft Tool
- Ranger Non-Stick Craft Sheet™
- Ranger Mini Blending Tool
Instructions
 Swipe Squeezed Lemonade, Abandoned Coral and Wild Honey distress pads onto the craft sheet and mist with water. Swipe the tag thru the ink and dry.
 Working on the BACK of the tag, trace the largest heart with a waterproof pen & cut out.
 Turn the heart right side up and place in the embossing folder on the debossed side. Trace around the heart with the pen.
 Make a loop of painters tape to hold the heart in place.
 Lay the heart in the traced pattern.
 Lightly rub the Collage glue Stick over the raised embossing folder and lightly spread with your finger.
 Add glue to the area that will come in contact with the heart.
 Close the embossing folder and run thru the Vagabond. This will add the glue to the recessed areas, which will hold the foil in place.
 With the heart still in the embossing folder, add a piece of foil sheet large enough to cover the heart.
 Close the embossing folder and run thru the Vagabond again.
 Now the heart will look like this…
 with the foil pressed into the recesses of the heart.
 Swipe Tree Branch and Buttercup onto the craft sheet and add rubbing alcohol. Use a palette knife or craft stick to mix the ink into the alcohol.
 Lay the 5 1/2 inch tall tag in the inky solution. Dry.
 Scoop up the extra ink with the tag, hold the tag upright to allow the ink to drip. Dry.

 Stencil Tea Rose thru the Old Ledger stencil on 3 areas of the tag.
 Use Jet Black to stamp the sentiment toward the bottom of the tag, leaving room for the stripes stamp.
 Use Fern Green to stamp striped borders at the top and bottom of the tag.
 Lay the heart in place to determine where to stamp the chain. Ink the chain stamp with Jet Black and stamp.
 LIGHTLY stencil thru the checkmate stencil with Watering Can.
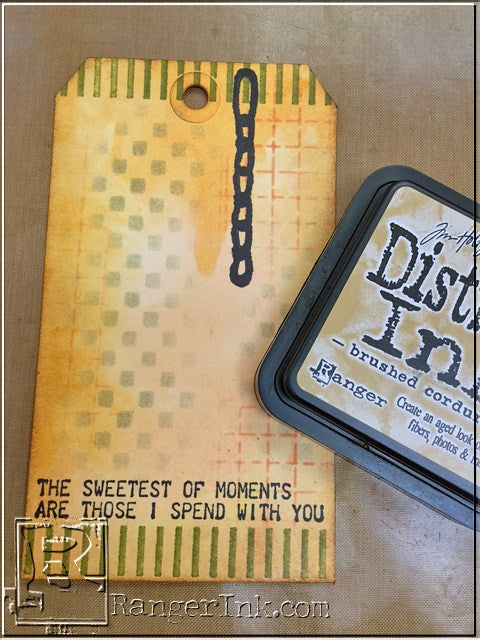 Ink the tag edges with Brushed Corduroy to darken them.
Cover a sheet of Clearly for Art with newsprint, using Glue N Seal. Apply a thin layer, add the newsprint, brayer (or just rub it with your hand) and give it a quick dry with the Heat-It tool.
 Use Jet Black to stamp the Marigold 3 times onto the newsprint. Cut out the images as shown in the photo. Cut one full image, one smaller and the third as shown. Ink the 3 pieces with Buttercup and lightly add Tea Rose to create shading and variation in the color.
 Heat the 3 layers to soften the Clearly For Art. This allows the petals to be shaped.Assemble the flower with Foam Adhesive between the layers.
 The completed flower looks very realistic.
Use Jet Black to stamp the hydrangea leaves onto the newsprint.
 Cut out the 2 larger leaves and ink with Fern Green. Heat to soften the CFA, then shape the leaves and add under the marigold.
 Test drive the heart and the marigold to determine where to stamp the flourishes. Use Jet Black to stamp the flourishes.
Ink the spatter stamp with Tea Rose and stamp randomly over the tag.
 Add adhesive strips to the back of the heart and glue to the tag, so that it is hanging from the chain.
Use foam tape to add the marigold over the heart.
Define the borders with the ruler and the Stabilo pencil. Lightly smear the pencil mark by rubbing over it with your finger.
Add glaze pen dots to accent the striped borders and the marigold center.
Accent the chain with a mini fastener.
 Here’s the finished tag.
Things to note:
- The foil pressed into the debossed areas is really cool and changes up the look of the embossing folder. Foil is super trendy these days!
- Archival inks were used 4 ways on this tag…for stamping, for stenciling, to ink and to create the background.
- I’ve said it before, but I’ll say it again…GLUE N SEAL is THE BEST adhesive for paper! It works on any surface that you want to add paper to and it doesn’t bubble the paper.
- Foam Adhesive is an excellent adhesive to use with Clearly For Art. It has a very strong adhesive and it adds the perfect amount of dimension between layers.
- Stencils can be used as a template to create custom embellishments. It’s super simple to trace & cut!
- Clearly For Art and newsprint are the perfect pair. Clearly For Art is very strong and great for adding dimension. The newsprint accepts both distress and archival inks very well and because it’s white, the ink colors are true.
- Rubbing (isopropyl) alcohol will remove archival inks from stencils and also the pen marks from the embossing folder.
- Remember to mix & match stamps with other stamps, to give images a fresh look.

Related Posts

Dylusions DIY Christmas Gift Wrap & Tags by Jess Peters
Dress up your holiday gifts with this Dylusions DIY Christmas Gift Wrap & Tags by Jess Peters! Using Dylusions...
Read More
Tim Holtz Distress Mini Oxides Christmas Wreath Card by Dominique Bennani
Step into a Winter Wonderland with this charming Christmas wreath card created by Dominique Bennani using the latest...
Read More