by Tammy Tutterow

Summer Wild Flowers Card by Tammy Tutterow
- Materials
- Instructions
- Liquid Pearls: Watermelon, Coral, Lemon Chiffon, Garden, Robin's Egg, Blackberry
- Tim Holtz Distress Ink: Squeezed Lemonade, Tumbled Glass
- Ranger Cut n’ Dry™ Foam and Felt Pads
- Ranger Wonder Tape™
- Tim Holtz Distress® Sprayer
- Ranger Mini Blending Tool
- Ranger Non-Stick Craft Sheet™
- Ranger Heat it™ Craft Tool
- Tim Holtz Sizzix Alterations: Tattered Garland
- Tim Holtz Kraft-Core Cards: Nostalgic
- Tim Holtz Stampers Anonymous Layering Stencil: Blossom
- Tim Holtz Idea-ology: Word Band, Long Fasteners
Instructions
 Yesterday we debuted 6 new shades of Liquid Pearls that are bright and perfect for summer themed projects. Today we have a quick, easy, and colorful card to share that features the new colors!
 Begin with a piece of manila cardstock sized to fit your favorite size of card. Use an ink blending tool to apply Tumbled Glass and Squeezed Lemonade Distress Ink onto the manila cardstock.
 Mist water into your hand. Flick the water onto the inked piece of cardstock. The water droplets will create spots in the ink.
 Blot the excess water with a dry cloth. Dry the cardstock with a heat tool.
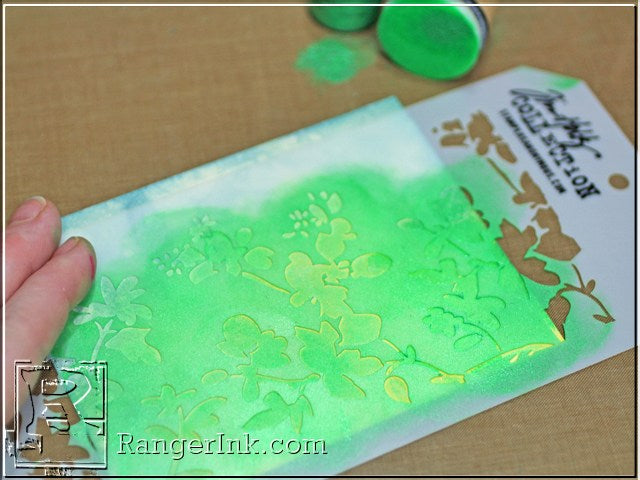
 Squeeze Garden Liquid Pearls onto your craft sheet. Dab an ink blending tool into the Liquid Pearls. Blot the sponge onto the craft sheet so that the Liquid Pearls is spread onto the sponge evenly.
 Place the Blossom Layering Stencil over the inked piece of manila cardstock. Blot the Garden Liquid Pearls over the manila cardstock through the stencil.
 Continue applying the Garden Liquid Pearls until the design has been stenciled onto the cardstock.
 Place the stencil back over the manila cardstock piece. You may want to tape it in place on your craft sheet.
 Cut small pieces of Cut n’ Dry Foam to use as paint applicators. Use the foam to apply the assorted colors of Liquid Pearls onto the manila cardstock through the stencil.
 Wipe away excess Liquid Pearls from the surface of the stencil quickly. If the Liquid Pearls dry on the stencil it will not affect future use of the stencil but will make it more colorful!
 Use the foam pieces to apply Liquid Pearls to a scrap piece of manila.
 Die cut small flowers and leaves from the manila when the Liquid Pearls have dried.
 Ink the edges of the die cuts, manila cardstock piece, and a cardstock card with your favorite brown Distress Ink (Gathered Twigs shown).
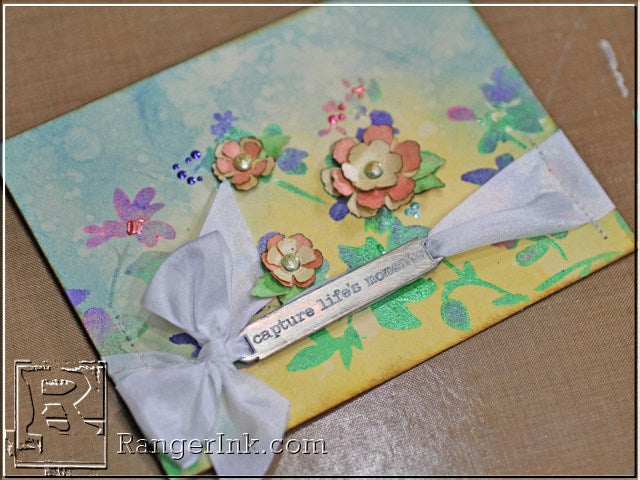
 Layer the flowers and leaves, placing a brad in the center of each. Attach the assembled flowers to the front of the card.
 Add a drop of Lemon Chiffon Liquid Pearls to the center of each flower on top of the brad. Alternately, you could sponge Liquid Pearls onto the top of the brads before assembling. Add small dots of Liquid Pearls randomly around the flowers to add more color and dimension.
 Place a Word Band embellishment on a piece of wide ribbon. Wrap the ribbon around the card front when the Liquid Pearls have dried. Tie the ribbon into a bow. Add machine stitching along the edges of the card for added interest.
 Adhere the finished card front to the cardstock card.
 Aren’t the shimmery bright colors so pretty? They are so perfect for summer projects! And could Liquid Pearls be any more versatile? Use it for dimensional drops, to add color to metal embellishments, spread on cardstock to create your own shimmer cardstock, and even dab it on through stencils! There sure is a lot of creativity in that tiny little bottle!


