


In this video tutorial, Kimberley Deene Langlois shows you how use the Tim Holtz® Alcohol Ink Blower to create this beautiful soft-flowing flower with Alcohol Pearls, Mixatives, and Alcohol Inks.
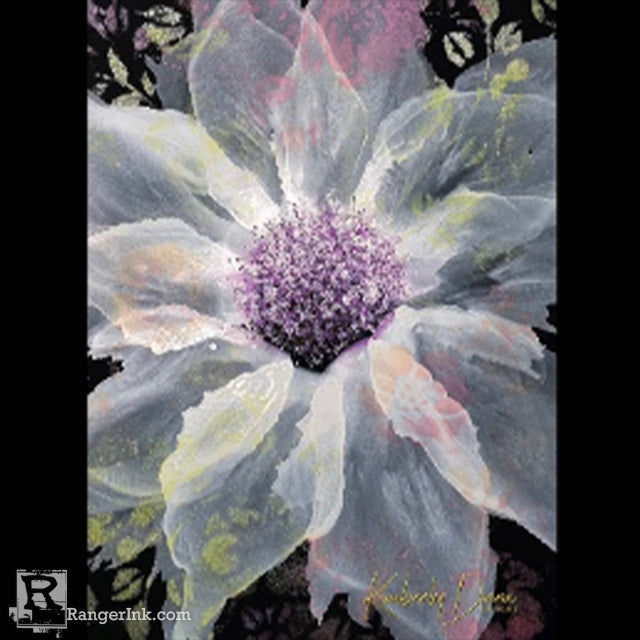
Air Blown Alcohol Ink Flower by Kimberly Deene Langlois
- Materials
- Instructions
Other:
Isopropyl Alcohol
Small Dispenser Bottle for Alcohol
Micro Makeup/Dental Tools
Paper TowelsGloves
Instructions
Step 1: Apply a few drops of yellow Alchemy Pearl Ink to the Applicator Tool, blot it off on a paper towel, and then begin stamping the ink on top of the stencil to create a background on the black cardstock. Do the same with the pink Intrigue Pearl ink until you’re satisfied with the background.
Step 2: Drop a circle of Boysenberry Alcohol Ink onto the paper and let it dry.
Step 3: Drop Snow Cap Mixative along the edge of the Boysenberry, add a few drops of alcohol, and then use the blower tool to blow the ink outward to create a petal. Do that all the way around the purple “Boysenberry” center. You can go around again to create layers of petals if you’d like. Note that the more alcohol you use, the more transparent the petals will be.
Step 4: Put Snow Cap in a palette and use a micro dental/makeup tool to begin creating the center. Remember to think about where the light is coming from and make that the brightest area. To create nice dimension, it’s best to have the transition from light to dark very gradual. You can pull the fuzzy tip off the tool and drag it through to center to create texture and the look of little stamens.
Please reach out to me if you have any questions.
https://www.Instagram.com/kimberlydeenedesign
https://www.Facebook.com/kimberlydeenedesigns
 Kimberly Deene Langlois is a self-taught mixed media artist residing in Raleigh, North Carolina. In 2017, she left a 30-year career in the insurance industry and now works full time in her backyard art shed painting and teaching workshops, both online and in person. Kimberly has experience in a variety of mediums; however, her true love is for the contemporary use of alcohol ink. Her series of impressionist blooms showcases the vibrancy and organic flow of this medium. The centers of her flowers carefully capture the light and have a three-dimensional aspect which is a common thread in her work. When she’s not painting or teaching, Kimberly enjoys live music events with her husband and friends, spending time with family, and running behind her toddler grandson. She feels her life journey has now landed her in a place doing exactly what she was always meant to do.
