


By Wendy Vecchi
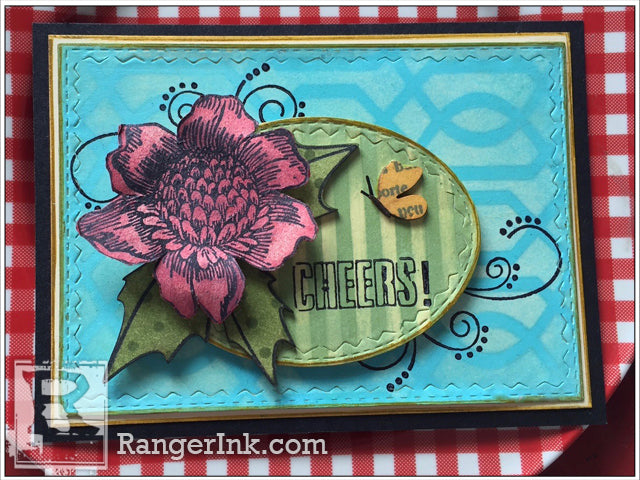
Cheers Card By Wendy Vecchi
- Materials
- Instructions
- Ranger Heat it™ Craft Tool
- Ranger Non-Stick Craft Sheet™
- Ranger Mini Blending Tool
- Ranger Adhesive Foam Rolls
- Ranger Multi-Medium Matte
- Dylusions Paint Pens: Black Marble
- Tim Holtz® Distress Marker Ground Espresso
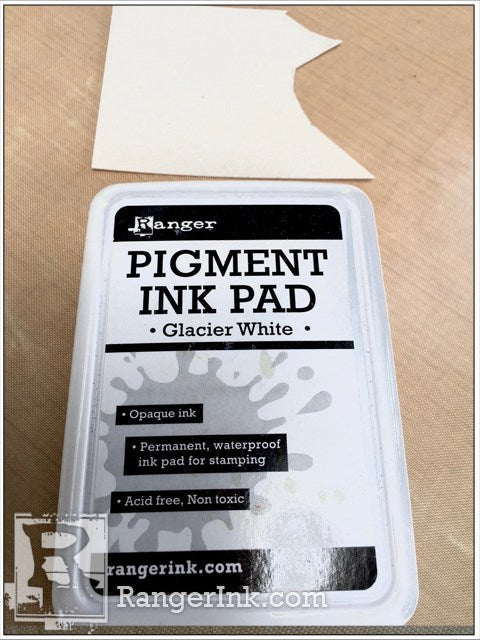
- Ranger Pigment Ink Pads Glacier White
- Archival Ink™ #0 Pads Jet Black
- Archival Ink™ Designer Series: Wendy Vecchi: Red Geranium, Leaf Green, Fern Green, Garden Patina, Sunflower, Watering Can
- Stampers Anonymous/wendy vecchi studio 490 Clearly For Art (clear), Newsprint paper
- Stampers Anonymous/wendy vecchi studio 490 Stencils: Yikes Stripes, Cable Knit, Lots Of Dots
- Stampers Anonymous/wendy vecchi studio 490 stamps: Art From Us, Garden Fresh (Stamp-it Stencil -it), Les Roses Background Stamp, Flourish from Paper Doll Art (SCS125), Holly Holiday Icons (Stamp-it Stencil-it)
- Stampers Anonymous/wendy vecchi studio 490 Mat Minis: Butterflies, Holly with Berries
- Tim Holtz Alterations by Sizzix: Vagabond Machine, Stitched Rectangles, Stitched Ovals
- Tim Holtz by Tonic Studios: Kush Grip Snips
- Misc: Rubbing Alcohol (isopropyl), Black Cardstock
Instructions

My best studio days involve trying new techniques. This is what I truly LOVE. I like to discover new ways and different combos, when using Ranger products. Today’s technique is all about using Glacier White Pigment ink with my gorgeous archival colors to change them from transparent to chalky/pastel colors. Ready…set…GO!
 Step 1: Use manila cardstock to die cut an oval and a rectangle. The oval I chose is 2-3/4 inches and the rectangle is 4-3/8 x 3 inches.
Step 2: Tap the Glacier White pad over both pieces, to cover them with ink and dry.
 Step 3: Use the Blending Tool with Foam to ink the rectangle with Garden Patina and dry.
 Step 4: Use the Blending Tool with Leaf Green to ink the oval and dry.
 Step 5: Since Archival Inks are waterproof, any techniques using Archival Ink will use rubbing alcohol.
 Step 6: Here’s a little tip…I like to make a loop of tape with painters tape or washi tape. Place that on the Craft Sheet and place the surface over it. Now it’s nice and secure and it stays in place perfectly, giving you two hands to work with!
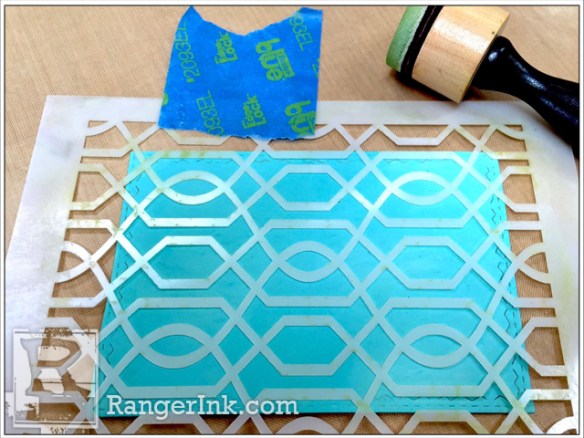 Step 7: With the rectangle in place over the tape, place the Cable Knit stencil over the rectangle and keep it in place with a piece of tape. MOISTEN the Blending Tool with rubbing alcohol and rub over thru the stencil to remove/lighten the Archival Ink. Dry.
 Step 8: Now the rectangle looks like this.
 Step 9: Place the oval over the tape, then the Yikes Stripes stencil and again, with an alcohol MOIST Blending Tool, rub over the stencil to remove the Archival ink. Dry.

Step 10: Use about a 2-1/2 inch square of Clearly For Art that has been covered with Newsprint Paper. Tap the Glacier White Pad over the Newsprint and dry.
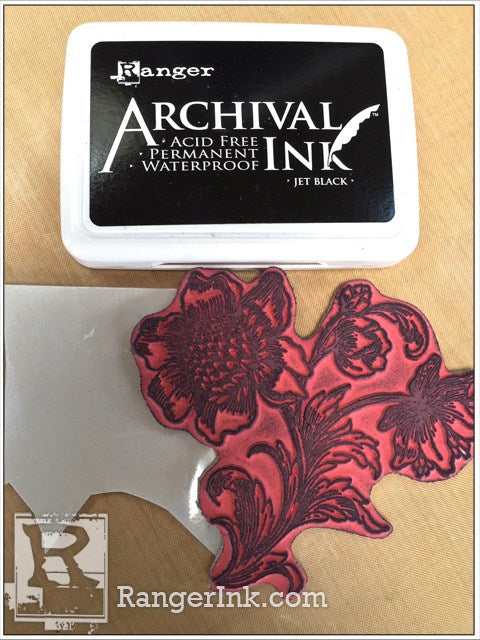
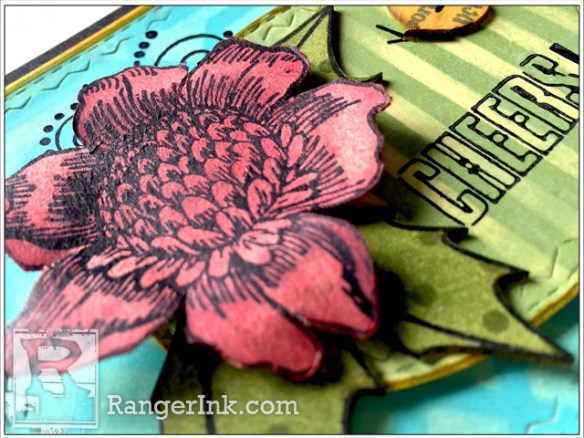
Step 11: Use Jet Black to stamp the large flower onto the Newsprint and dry.
Step 12: Cut out the flower, then ink with Red Geranium. Heat the flower to soften the CFA, then shape the flower to create dimension.

 Step 13: Ink the holly stamp with Jet Black, then place the coordinating Mat Mini Holly onto the stamp, press, remove and dry. Ink over the leaves with Fern Green, then add dots with the Lots of Dots stencil, using Fern Green and dry.

Step 14: Use the Tarnished Brass paint dabber to edge the oval and the rectangle and dry.
 Step 15: Test drive the placement of the components and this will determine where to stamp CHEERS! Use Jet Black to ink the stamp and dry.
 Step 16: Ink a small portion of the Les Roses background stamp with Watering Can and press the Mat Mini butterfly onto the inked stamp. Dry.
 Step 17: Ink the butterfly with Sunflower and dry. Use the Distress Marker to color the body of the butterfly.
 Step 18: Ink the flourish stamp with Jet Black and stamp in the corners as shown. Dry.
Step 19: To assemble, add foam adhesive under the oval and under the flower. Use Multi Medium to glue the holly to the oval. Use the black paint pen to draw antennae for the butterfly, then glue the butterfly in place with Multi Medium.
 Step 20: Cut another piece of manila cardstock about 1/4 inch larger than the die cut rectangle. Edge the base with the Tarnished Brass Paint and dry. Add to a black cardstock card.

Things to note:
1. Archival inks are a permanent, transparent, waterproof ink. When applied OVER Glacier White pigment ink, they change to a very cool cloudy pastel ink. The Glacier White pad basically doubles your Archival color options! They can be transparent or pastel/cloudy.
2. The Glacier White is a GREAT white ink for stamping over dark surfaces.
3. Pigment pads dry out quicker than distress or archival pads. You’ll want the reinker FOR SURE! TRUST me on this one!
4. Anytime Archival Ink is applied OVER Glacier White, remember to dry the ink with each application. The pigment ink slows the drying time of the Archival Inks.
5. So, are holly leaves just for holidays? I think not! When used in a non-holiday project, they look like every day leaves!
6. When moistening the Blending Tool with rubbing alcohol, make sure it’s MOIST, not super saturated. Excess fluid will seep under the stencil if it’s too wet.
7. Keep in mind that alcohol evaporates rather quickly, so depending on the size of the surface, more alcohol may be needed to be added to the Blending Tool. Any percentage of rubbing alcohol will work with Archival Ink techniques. Whatever you get is fine.
8. Using just a part of a rubber stamp gives so many options. This flower is really a tiny part of the stamp I chose. Look at what you have and how it can be used in another application to totally change it up.

Related Posts

Make-It™ Dimensional Waves Beach Card by Miriam Prantner
Catch those summer vibes! Miriam Prantner created this fresh and dimensional beach-inspired card using the Make It Wavy...
Read More
Grungy Rainbow Journal Page with Dylusions Ink Sprays by Jess Peters
Bold color, grungy texture, and tons of personality come together in this vibrant journal page by Jess Peters!...
Read More