


Candy was inspired by Tim Holtz’ Faux Batik technique to make this luxurious fall scarf.
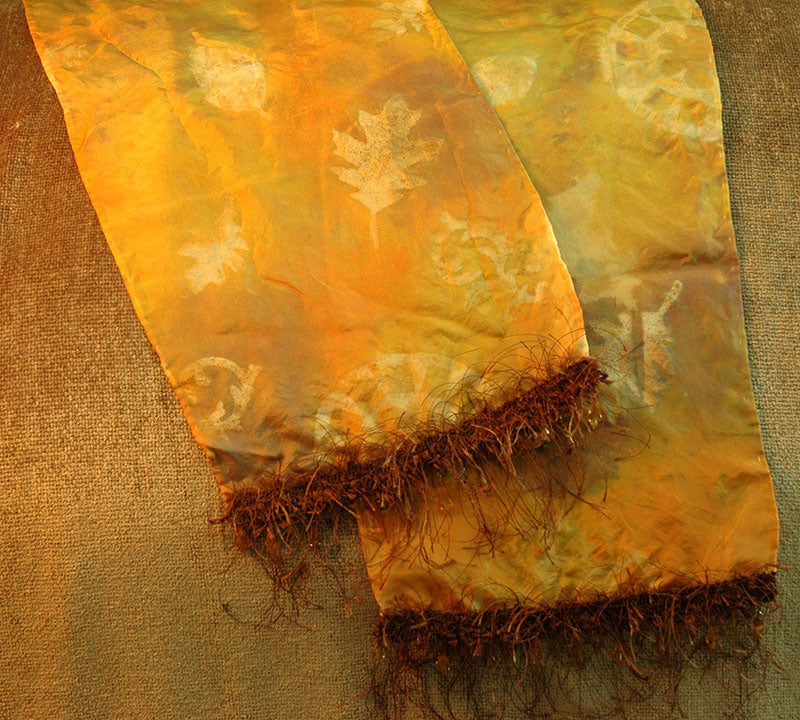
Colorwash Autumnal Faux Batik Scarf by Candy Colwell
- Materials
- Instructions
Instructions
- Prepare three work areas for this project: one for stamping your images, one for ironing the fabric and one for rinsing out the Color Wash.
- The stamping area should have a Non-Stick Craft Sheet underneath and room to stamp several images at a time.
- The ironing area should have two pieces of blank newsprint large enough to cover the fabric ready-one will be underneath the wet fabric, the other will be placed over the set fabric. I also put a piece of Parchment Paper or something that is nonporous underneath the newsprint to protect my ironing surface.
- The rinsing area should be a deep bowl or a sink that has a little cold water in it. I also like to add a little vinegar to the water to help set the color. (You may need to rinse a few times, so if you can use a sink that is the best option).
- Lay the silk or sheer fabric on top of the Non-Stick Craft Sheet. (Use sheer fabric so that the Embossing Ink can soak all the way through and transfer the image to both sides of the fabric).

- Ink the foam stamps and press them onto the fabric in a random pattern. You may want to stamp off of the fabric as well so that the design runs off of the fabric. (Foam stamps with larger images work best for this technique). Work in small sections; especially if the weather outside is very hot and dry. This will allow you heat emboss your images before the Embossing Ink dries.

- Sprinkle the Clear Embossing Powder over the stamped images. You can either pour the Embossing Powder out of the jar or put the Embossing Powder into a little plastic bottle that allows you to control the spray of Embossing Powder a little better. Start at the top of the images and sprinkle the powder. Then hold up that end of the fabric and allow the Embossing Powder to roll down the fabric, covering the ink stamped images as it passes over them. Have a tray at the bottom to catch the extra Embossing Powder and you can return it to the jar for later use. Or, you can simply have a sheet of paper at the bottom to catch the excess powder and return it to the jar.
- Lift the scarf and lightly shake off any remaining powder then lay scarf flat on top of the Non-Stick Craft Sheet.

- Using the Heat It Craft Tool, gently heat the embossing powder to melt it. Be careful as the fabric is sheer and will scorch if you leave the heat in one area too long. I like to lift the fabric up and allow the hot air to pass through the scarf as I am heat setting it. If you leave the scarf on the Non-Stick Craft Sheet, don’t worry if you see brown coming up from the image. That is simply the Non-Stick Craft Sheet.
- Repeat this process until you have stamped and heat embossed the entire scarf.
- PUT ON Latex or protective gloves and keep them on for the rest of this technique.

- Choose the colors of Color Wash that you want to use on your scarf and begin spraying the colors onto the scarf. Don’t worry about overlapping colors or missing areas of the scarf. You can simply spray more color or spray some water to allow the colors to wick together. You will see that the heat embossed areas are resisting the Color Wash.
- As you are working, you can lay sprayed portions of the scarf over other sprayed areas. That will allow the colors to blend even more. Continue spraying until the scarf is covered.
- Move to the ironing area and lay the wet scarf directly onto the newsprint piece of paper that is waiting on your ironing board or padded surface. Try to flatten out the fabric as much as possible then place the other piece of newsprint over the top of the scarf.

- The iron should be on a hot and dry setting. Run the iron over the top of the newsprint, being careful not to let it set too long in one area. Keep moving the iron over the newsprint until the entire top has been completely ironed (to help set the color). You can lift the newsprint to check on the design. If the newsprint sticks, just run the iron over it some more to further melt the Embossing Powder that is being absorbed into the newsprint. Then lift the paper again.

- Keep the scarf in between the pieces of newsprint and turn them over. Repeat the ironing on the underside of the newsprint. Now begin to remove the newsprint as you continue ironing down the scarf. If the Embossing Powder seems to stick to the newsprint as you are lifting it up, just reheat with the iron and remove the paper. Sometimes you can get some really colorful designs ironed into the newsprint. You can use those designs on other craft projects.

- Take the ironed scarf over to the rinsing area. Put the scarf down into the bowl or sink and the water will immediately start to change color. This is the excess dye from the Color Wash. Continue rinsing the scarf until the water seems to run fairly clear.

- Let the scarf air dry. After it is dried, you can either iron it again or just let it dry naturally and have those awesome wrinkles.

- As a finishing touch, you can add trim to the edges. Here, I have hot glued a beaded trim on the bottom of the right side of the scarf and hot glued the eyelash trim on top of that.
