


Hi there. It’s Cheiron here, with a fun Halloween journal page. I am always looking for ways to stretch my supplies, and this time I’m turning some new Dina Wakley stamps into little pumpkins.

Dina Wakley Halloween Page by Cheiron Brandon
- Materials
- Instructions
- Dina Wakley Media Journal
- Dina Wakley Media Heavy Body Acrylic Paints : Night, Blackberry, Lime, Cheddar, Lemon, Gilt, White
- Dina Wakley Media Stencils & Masks :Swirling Dashes, Medieval Crosses, Honeycomb
- Dina Wakley Media Stamps : Oops Oh Well, Splatter Girl, Text and Scribble
- Tim Holtz® Distress Collage Mediums
- Archival Ink™ #0 Pads : Jet Black, Monarch Orange, Vermillion
- Ranger Ink Blending Tool & Foam
- Ranger Craft Tags : Manila
- Tim Holtz Stamp Platform
- Tim Holtz Halloween Clippings Sticker
Instructions

Step 1: I have used up all the double watercolor paper layouts in my Dina Wakley Media journal, so for this page I decided to use a watercolor page and a burlap page, which seemed like the perfect surface for fall.

Step 2: I painted the watercolor page and a tag with Night paint, which is a wonderful color for my Halloween background.

Step 3: I then used different sizes of the Swirling Dashes stencil to create marks on my background with Blackberry and Lime Paint using a foam blending tool.

Step 4: Continue applying the paint through the stencil with the same paint colors on the burlap side.

Step 5: Add the same marks to the tag as well.

Step 6: I also added some marks with Gilt paint to my journal and tag as well to give it a little more contrast.

Step 7: Then I used the foam applicator to apply the Gilt paint to the edges of my tag.

Step 8: I used the stars from the Splatter Girl set to create some more marks on my pages with White paint.

Step 9: Be sure to wash your stamps off as soon as you are done so the paint does not dry on them.

Step 10: Next, it’s time to create the paper to stamp the pumpkins on. I started with a piece of deli paper and used the Honeycomb stencil with some Lemon paint to create my first layer.

Step 11: Then add more layers to the paper. I used Cheddar paint with the Medieval Crosses stencil to create my second layer. Continue adding layers with stamps and stencils until your paper is mostly covered. I used Text and Scribble stamps and the Swirling Dashes stencil to complete my paper.

Step 12: Next stamp the moon faces from Oops Oh Well using the Tim Holtz Stamp Platform using Jet Black Archival Ink.

Step 13: Using Distress Collage Medium, adhere your deli paper to a piece of white cardstock. Once it has dried cut out the faces making sure to cut out a little pumpkin “stem” the top. I adhered one of the pumpkins to my tag, and colored the “stem” with Lime paint.

Step 14: Cut out the remaining pumpkins and give them stems too.

Step 14: Adhere the pumpkins and the pumpkin tag to your page. Finish off the page with some Tim Holtz Halloween Clippings stickers.


Related Posts

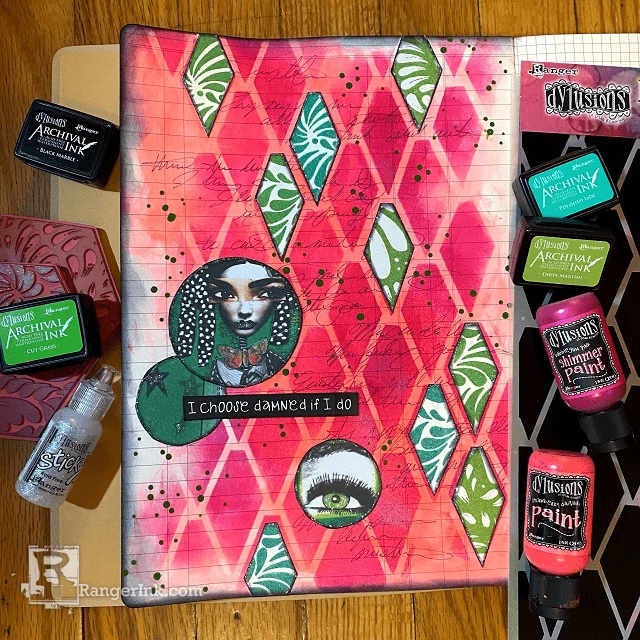
Dylusions Archival Ink Damned If I Do Journal Page by Jess Peters
Explore the latest Dylusions products in this journal page tutorial with Jess Peters! Crafted in the new Large Ledger...
Read More
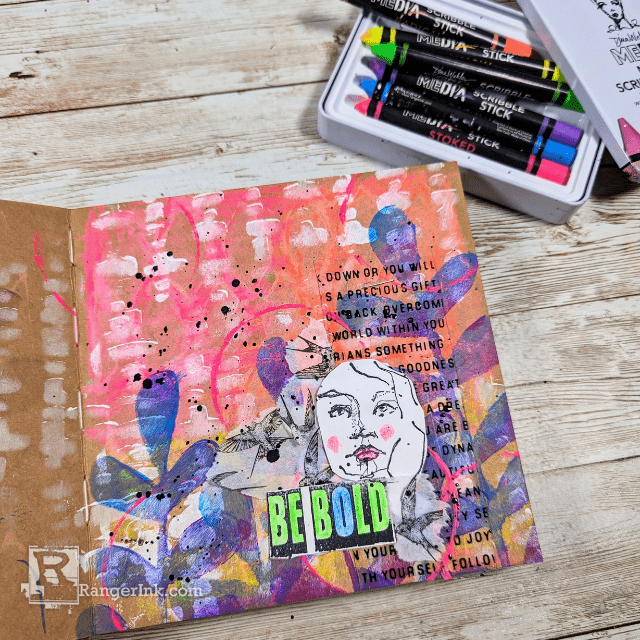
Unleash Creativity with Dina Wakley Neon Scribble Sticks by Laura Dame
Illuminate your journals with bursts of color and energy using the dynamic Dina Wakley MEdia Neon Scribble Sticks! Join Laura...
Read More