


In this tutorial, Jess Francisco shares how she uses Simon Hurley create. products to create a beautiful encouragement card. Create watercolor flowers using the Flower Garden Background Stamp and Simon Hurley create. Dye Inks for the perfect feminine accent!

Hugs Card by Jess Francisco
- Materials
- Instructions
- Simon Hurley create. Stamp Sets:
-
Simon Hurley create. Background Stamp: Painted Lines; Garden Flower
Simon Hurley create. Dye Ink Pads: Overzealous, Remember Me, Triple Berry, Rosy Cheeks, Woof!
Simon Hurley create. Stark White Cardstock
Ranger Archival Ink Pad: Jet Black
Ranger Matte Multi Medium
Tim Holtz Distress® Sprayer
Ranger Enamel Accents: Black Tie
Ranger Adhesive Foam Roll: White
Tim Holtz Stampers Anonymous Grid Stamping Blocks (9pc)
Scissors
Accent Fibers
Instructions

Step 1: To get started, choose a few Simon Hurley create. Dye Ink Pad colors you love. Ink up the Flower Garden Background Stamp with two of those colors. Start with the lightest colors and ink a few areas of the background stamp, then come in with the second color and fill in the remaining areas. This way, your ink pads won’t get contaminated and you get a nice blend of color throughout the stamp.

Step 2: Use the Distress Sprayer to get the inks wet – because these react with water, they’re perfect for doing faux watercolor techniques like this! Give the stamp a couple of light spritzes – you want to see the ink just start to bead up a little bit. Next, place a piece of Stark White cardstock onto the wet inks on the background stamp and smooth it down to ensure the whole piece gets even coverage.

Step 3: Repeat steps one and two with your second set of colors so that you have two faux watercolor card panels in different color combinations.

Step 4: Once the cardstock has dried, use a pair of sharp scissors to cut around the flower and leaf shapes you like the most. Try to get a mixture of the two color combinations so that your flowers stand out and don’t blend together when you assemble the card.

Step 5: Next, grab another piece of Stark White cardstock and the Woof! Dye Ink Pad. Ink up the Painted Lines Background Stamp with Woof! and then stamp the background onto your cardstock. Layer the flower cutouts where you think they’ll look nice – be sure to leave room for your sentiment! Stamp out the sentiment (Hugs! Is from the Bestest Friends Stamp Set) in Jet Black Archival Ink for a really bold statement.

Step 6: Adhere the flower cutouts to your card panel. You can pop one or more of the flower pieces up on foam tape to add a bit of dimension to your card as well. You can add some small bits of tangled thread under a few of your flowers for a little extra color if you’d like, but it’s not required.

Step 7: Using the ‘Black Tie Enamel Accents, squirt a little on to one of the Tim Holtz Grid Stamping Blocks or your craft sheet. A little goes a long way! Squirt it a few times with the Distress Sprayer and then mix it around with the Distress Splatter Brush. Once the liquid and the enamel accents are combined, you can use the Splatter Brush to flick black splatters onto the background. Use your hand or a scrap piece of cardstock to shield your flowers from the splatter.

Step 8: Mount the card front to a grey A2 sized card base with Foam Tape. This makes the card a little sturdier and gives it a bit more substance. You can skip this step if you’d like a less dimensional card. That’s it! You’re finished and you have a feminine encouragement card to send off!


Related Posts
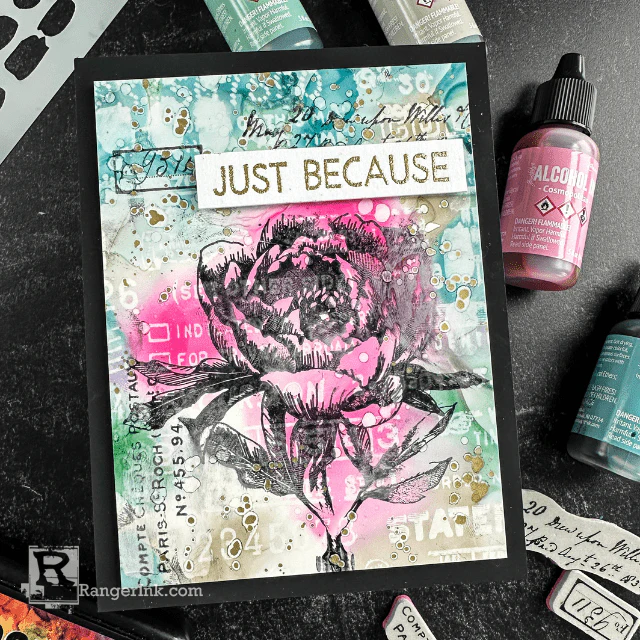
Tim Holtz Alcohol Ink Floral Card by Cheiron Brandon
Just because moments deserve something special! Follow along as Cheiron Brandon uses the latest Tim Holtz Alcohol Inks and...
Read More
