


Learn how to create stunning faux geode coasters with this easy tutorial by Brooke Bock! Follow along as Brooke shows how to use ICE Resin®, ICE Resin® Tints, ICE Resin® Lusters, and more to make your own little pieces of art that are great for home decor and gifts.
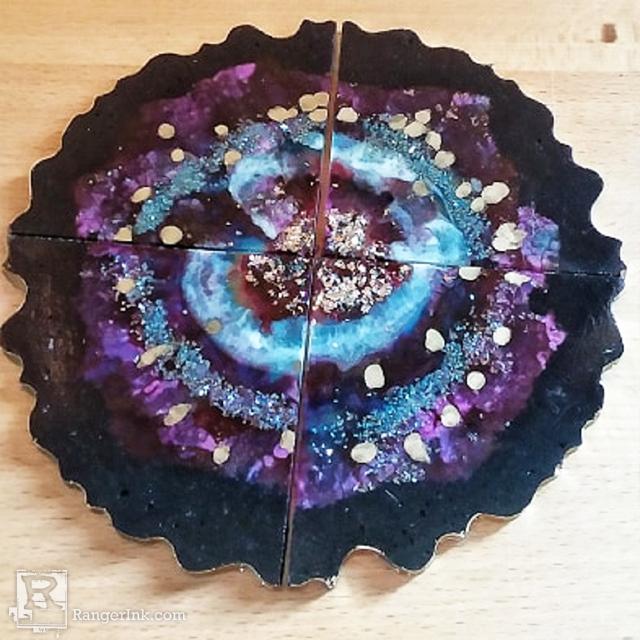
ICE Resin® Geode Coasters by Brooke Bock
- Materials
- Instructions
Pliers-needle nose
Emery board
Mold Silicone Geode 4-Part Coaster
Gold Marker: Krylon
Gold leafing
Pen
Toothpick
Instructions

I love natural gemstones and fossils. I collect them when I go for walks and am always on the lookout for them. One of my favorite sources for gemstones and fossils is a local cavern. They have a fantastic gift shop that has a large collection of crystals, gemstones, and fossils. I go a few times a year and stock up on natural wonders. When I recently found this quartered geode coaster mold I knew I wanted to try to make my own geode coasters. The process was incredibly fun and addictive. I hope you enjoy it as much as I did.

Step 1: Mix at least four mixing cups of ICE Resin® according to the manufacturer’s directions and allow the indicated wait time.

Step 2: Add different tints and paints to each cup and mix. Leave some resin clear.

Step 3: Pour ICE Resin® into molds mixing and overlapping as desired. Pour the resin in concentric circles around all four sections of the mold. Add a couple drops of the Gold Mixative to the mold as well. Use a toothpick to mix and drag layers together if you wish. Sprinkle rings of glitter into the molds as well.

Step 4: Allow resin to cure recommended time. When cured, pop out of the molds. Trim any sharp edges. You can do this with scissors if it is still soft. You can snap them off with a pair of pliers if it is hard and fully cured. You can also use an emery board to smooth rough edges.

Step 5: Use Gold Leafing pen to color the edges gold. Allow time to dry. Enjoy!!
Tips and Tricks:
-
Add Opals for a glittery look

Related Posts

Tim Holtz Distress Mini Oxides Christmas Wreath Card by Dominique Bennani
Step into a Winter Wonderland with this charming Christmas wreath card created by Dominique Bennani using the latest...
Read More
49 and Market Mistletoe and Memories Journal Page by Jessica Mikels
Read More
Drawer Title
- Choosing a selection results in a full page refresh.