


See how the new Tim Holtz Distress® Rustic Wilderness color is perfect for a holiday inspired tag with this tutorial by Paula Cheney.

Rustic Wilderness Merry Christmas by Paula Cheney
- Materials
- Instructions
Tim Holtz® by Stampers Anonymous Mini Etcetera Tag
Tim Holtz® Alterations by Sizzix: 664736 Holiday Brushstroke
Tim Holtz® idea-ology: TH94093 Baseboards Christmas (frame), TH94086 Ephemera Christmas, TH94108 Velvet Trim Christmas, TH94091 Sticker Book Christmas, TH94102 Label Tape Christmas, TH94090 Paper Dolls Christmas, TH93795 Vintage Clips
Self-healing mat and cutting knife
Foam Squares
Hot Glue Gun
Instructions
Hi friends!
Glad to be here today sharing a project using the new Distress color, Rustic Wilderness. It’s the most perfect green and fits in nicely with all the colors in the Distress line. I’m so happy to share a Christmas project today so you can see just how wonderful this green is! So, let’s get started!

Step 1: Gather these supplies to create the substrate for the project:
Mini Etcetera Tag
8.5 x 11” sheet of Woodgrain cardstock
Walnut Stain Distress Spray Stain
Picket Fence Distress Ink Pad
Picket Fence Distress Paint
Distress Splatter Brush

Step 2: Use Collage Medium to adhere Distress Woodgrain Cardstock to the Mini Etcetera Tag. Once dry, use a cutting knife and self-healing mat board to cut away the excess paper.

Step 3: Spray the surface with Walnut Stain Distress Spray Stain. Dry with Heat It Tool while blotting away the excess ink with a paper towel.

Step 4: Once completely dry, rub a Picket Fence Distress pad directly over the surface of the Woodgrain paper to highlight the grain in the wood.

Step 5: Squeeze out (nickel size) Picket Fence Distress Paint onto the Craft Sheet. “Stir” the paint with the Distress Splatter Tool - this will add paint to the tips of the plastic brush. With the bristles facing the surface, pull the brush back to create a splatter effect (practice on the Craft Sheet if you have never used the tool before). Set aside to let the paint dry.

Step 6: Cut an 8.5 x 11” sheet of the new White Heavystock paper in half to use for coloring. This new paper is HEAVY! It can easily stand up to repeated uses of wet mediums. I also like that the white surface gives you true color when using inks and stains. I love it and I’m grateful it was recently added to the Distress line.
Spray Craft Sheet with Distress Spray Stain Rustic Wilderness, Speckled Egg. Lay one 1/2 sheet of Heavystock into the ink, then pick up and dry with Heat It Tool, all the while blotting off excess ink - you can repeat the step numerous times to create layers of color. Spray Distress Oxide Rustic Wilderness onto Craft Sheet (right over the ink you already sprayed) and pick up some with the same card. Again, dry with Heat Tool while blotting off excess Oxide with a paper towel. You can also drip water from the Distress Sprayer over the Oxide, then dry again.

Step 7: Repeat inking steps with the remaining Heavystock paper, this time using Barn Door, Candied Apple, and Walnut Stain.

Step 8: Use both colored sheets you created to cut out leaves and berries using the Holiday Brushstroke Thinlit from Tim Holtz/Sizzix. I also use a bit of brown paper for a large stem for contrast. I made sure to use both the dark and light portions of the inked paper. For instance, the main part of the berries was cut with brown paper, the second layer was cut in the lightest area of the “red” inked paper, and the third layer was cut in the darkest area of the “red” inked paper. Once the three layers are assembled, you have created contrast. The cover art of the die helped me to see what should be light and what should be dark. Ink the edges of the die cuts with Walnut Stain Distress Ink and a Mini Blending Tool then glue together with Collage Medium.
 Step 9: Use Picket Fence Distress Ink and the Distress Splatter Tool to splatter white paint over the surface of the die cuts. Let dry.

Step 10: Use your fingertip to add Collage Medium to the tips of the die cut pieces. Immediately dip into Distress Clear Rock Candy Glitter. Let dry.

Step 11: Create a spray of the die cut pieces over the corner of a frame. This candy stripe frame is from the idea-ology Christmas Baseboards. Use a combination of foam squares and Collage Medium to create depth in the grouping. Add a small piece of idea-ology Velvet Ribbon to the frame with a hot glue gun. NOTE: The .25 cent card is from the idea-ology Ephemera Christmas pack and will be added permanently in step 15,

Step 12: Use foam squares to adhere the frame to the Mini Etcetera Tag. Add an idea-ology Vintage Clip to the top of the tag.

Step 13: Pick a Paper Doll to add to the tag. I chose two girls from the Christmas pack. Scribble some Distress Crayon onto the Craft Sheet. Using a damp Detailer Water Brush, pick up the Crayon color of choice and color the Paper Doll. Rinse brush in water when changing colors.
NOTE: If the crayon color is not “sticking”, you probably have too much water on your brush. Wipe off on a paper towel and start again over a dry surface.

Step 14: Squeeze some Stickles Glitter Glue on the neck and hem of each dress. Tap over Stickles to spread the glitter to the center of each dress. The Stickles should be flat for faster drying.

Step 15: Add a double stack of foam squares right below the frame. Add the Paper Dolls to the foam to secure. I also added black Label Tape across the bottom of the tag, as well as a sentiment from the Christmas Sticker Book.
I had a few extra die cut leaves/twigs so I added them to either side of the grouping above. Rustic Wilderness is the most perfect Christmas green!!
 I have been a “maker” all my life. Sewing, stamping, paper arts, I love it all. Creating and teaching is a passion for me, whether it is in the classroom or on my blog, One Lucky Day.. I have worked in the scrapbooking/mixed media field since 2005 and for the last 7 years have been the Creative Coordinator for Tim Holtz Brands, a dream job if there ever was one. On a personal note, I live on the Central Coast of California with my husband, Jay. I love to travel to new places to look for old junk and am willing to pack a bag at a moment’s notice. On an ordinary day you can find me working away in my craft room with the windows wide open and music playing in the background. Follow Paula on instagram @luckyday.
Related Posts

Distress Embossing Glaze Christmas Card by Cheiron Brandon
Get into the holiday spirit with this stunning “Peace on Earth” card by Cheiron Brandon! Learn how to layer...
Read More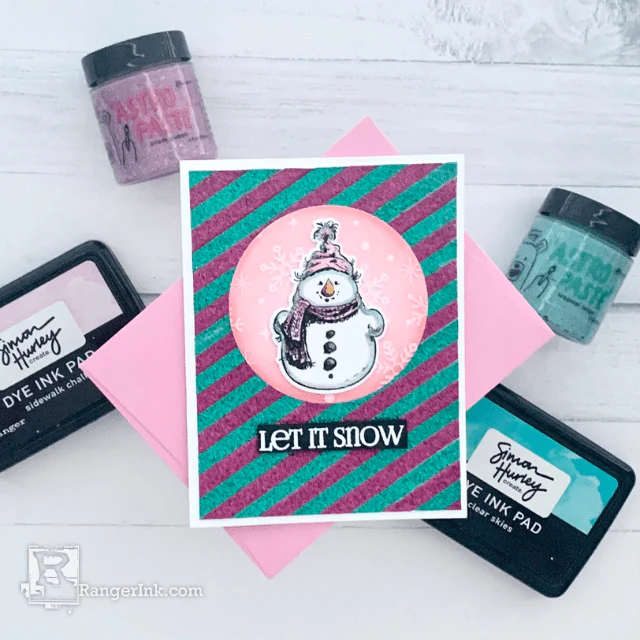
Simon Hurley create. Let It Snow Card by Lieschen Harshbarger
Let it Snow! How cute is this glittery snowman card by Lieschen Harshbarger? In this tutorial, she uses...
Read More