


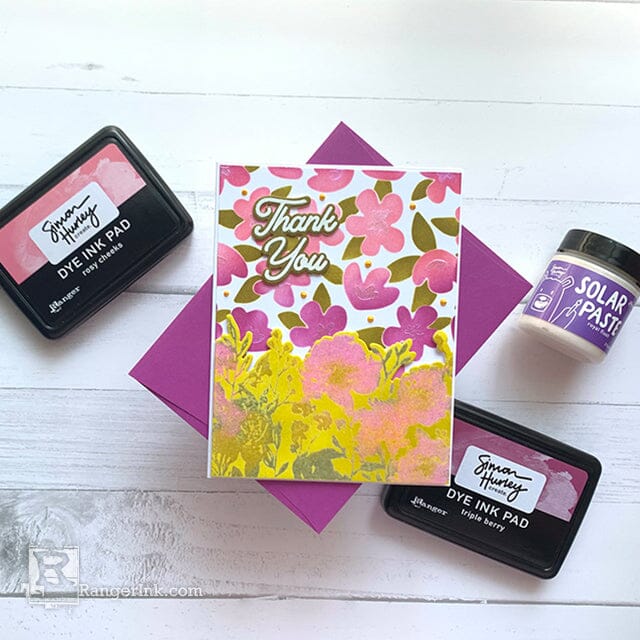
Express your gratitude with this lovely floral thank you card by Lieschen Harshbarger, crafted using the Simon Hurley create. Watercolor Flowers Stamp and Pretty Petals Stencil.
Free Shipping On All Orders Over $59.99
Express your gratitude with this lovely floral thank you card by Lieschen Harshbarger, crafted using the Simon Hurley create. Watercolor Flowers Stamp and Pretty Petals Stencil.
Instructions
Hi crafty friends! I’m very excited to share with you today’s card using one of Simon Hurley’s latest stamp sets with its coordinating dies, and a layered stencil from his latest release. I hope you enjoy today’s tutorial as much as I did when I made this card.

Step 1: Begin by creating an A2 card base out of Stark White cardstock by trimming the 8½” x 11” cardstock at 5½”, then score at 4¼”. For the front panel piece, trim another piece of cardstock measuring about 4¼ x 5¼.”

Step 2: On the front panel piece, use layers 1 and 3 from the Pretty Petals layering stencil with Rosy Cheeks, Triple Berry, and Viper inks. Blend with the mini ink blending tool.

Step 3: Next, use layer 2 from the Pretty Petals layering stencil on the inked front panel to apply Royal Flush Solar Paste on the flowers using a mini ink blending tool.

Step 4: On a separate piece of Stark White cardstock stamp the larger floral image from the Watercolor Flowers stamp set using the Emboss It ink pad clear. Once done stamping, use your finger to grab and sprinkle some distress embossing glaze. For the flowers, use Kitsch Flamingo and Fossilized Amber. For the leaves, use Peeled Paint. Then heat emboss with a heat gun.

Step 5: Once the heat embossing is done, ink blend the florals with Sike! ink. Then use the dies from the Watercolor Flowers to die cut the image.

Step 6: Glue the stenciled background to the card base and place foam adhesive on the back of the die cut piece. Then tape it to the front panel piece.

Step 7: On a separate piece of Stark White cardstock stamp and heat emboss one of the sentiments from the Watercolor Flowers stamp set. Then ink the cardstock with Viper Ink and die cut the sentiment 3 times to add dimension.

Step 8: To finish the card, glue the sentiment onto the card and add some Sunflower liquid pearls in the background. Now just pair the card with a colorful envelope and it is ready to send to a loved one!
 Hi! My name is Lieschen Harshbarger. I’m married to my best friend and even though we don’t have children yet, our dog Sophie fills our hearts with lots of love and joy. By day, I work for the State of Texas, but during my evenings and weekends you’ll find me in my craft room – making cards and trying out new techniques with my crafty supplies. I enjoy being creative, but mostly I have enjoyed getting to know others and learning fun new things in this wonderful crafty industry! You can see more of my crafty projects on my blog Harshgurl and Instagram at @harshgurl.

Celebrate Mom! Miriam Prantner shows us how to incorporate Perfect Pearls with multiple elements to create a soft and...
Read More
Ranger's Stickles Glitter Glue is the perfect way to add the twinkle and dimension of glitter to your projects...
Read More