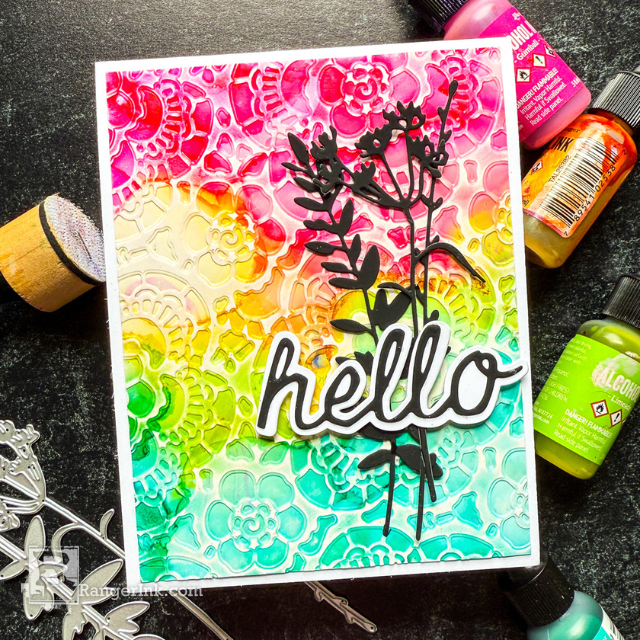
Check out this tutorial for your next hello card! Follow along as Cheiron Brandon uses Tim Holtz Alcohol Ink and Sanding Disks for a lift-ink technique to create this stunning, colorful card.

Tim Holtz Alcohol Ink Hello Card by Cheiron Brandon
- Materials
- Instructions
White Cardstock
Hi there! It’s Cheiron Brandon and I am back with another fun tutorial using Tim Holtz Distress products. This month I am creating a fun card with Alcohol Inks, Embossing Folders and using a sanding disk on a blending tool to reveal the white core of the Yupo paper.

Step 1: Add Alcohol Ink blending solution to a piece of Yupo.

Step 2: Add Alcohol Inks in Lemonade (I always start with the yellow first), Gumball, Limeade and Laguna.

Step 3: Use the Alcohol Ink Blower to move the ink around. Add more blending solution if necessary.

Step 4: Move the ink around until your panel is completely covered. Let dry COMPLETELY!!!! Trim panel to card front size.

Step 5: Insert panel into your embossing folder. Make sure the panel is facing the correct way (the way that you want the raised area to come through) then emboss.

Step 6: Using a sanding disk on a blending tool, carefully sand the raised areas of your panel.

Step 7: Continue sanding until all of the raised areas are exposed showing the lighter core underneath.

Step 8: Die cut and assemble the greeting from Distress Black Heavystock and white cardstock.

Step 9: Die cut and assemble the florals from Distress Black Heavystock


Step 10: Arrange and adhere all the pieces to the card.
Drawer Title
- Choosing a selection results in a full page refresh.


