


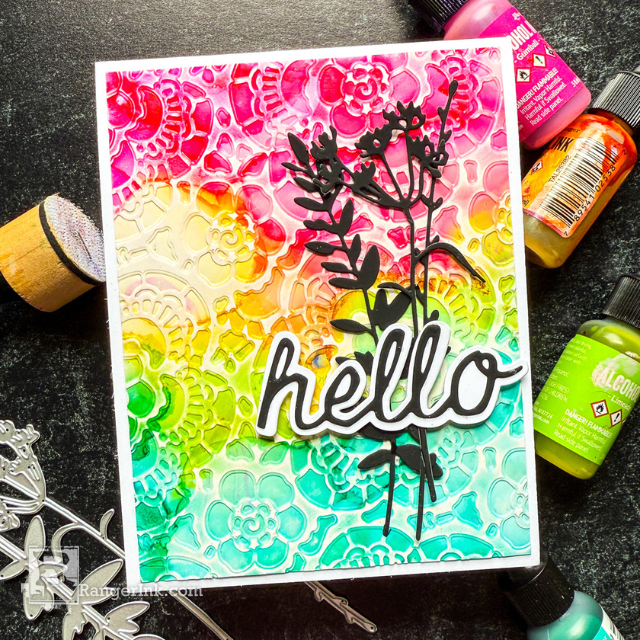
Check out this tutorial for your next hello card! Follow along as Cheiron Brandon uses Tim Holtz Alcohol Ink and Sanding Disks for a lift-ink technique to create this stunning, colorful card.
Tim Holtz Alcohol Ink Hello Card by Cheiron Brandon
- Materials
- Instructions
White Cardstock
Instructions
Hi there! It’s Cheiron Brandon and I am back with another fun tutorial using Tim Holtz Distress products. This month I am creating a fun card with Alcohol Inks, Embossing Folders and using a sanding disk on a blending tool to reveal the white core of the Yupo paper.

Step 1: Add Alcohol Ink blending solution to a piece of Yupo.

Step 2: Add Alcohol Inks in Lemonade (I always start with the yellow first), Gumball, Limeade and Laguna.

Step 3: Use the Alcohol Ink Blower to move the ink around. Add more blending solution if necessary.

Step 4: Move the ink around until your panel is completely covered. Let dry COMPLETELY!!!! Trim panel to card front size.

Step 5: Insert panel into your embossing folder. Make sure the panel is facing the correct way (the way that you want the raised area to come through) then emboss.

Step 6: Using a sanding disk on a blending tool, carefully sand the raised areas of your panel.

Step 7: Continue sanding until all of the raised areas are exposed showing the lighter core underneath.

Step 8: Die cut and assemble the greeting from Distress Black Heavystock and white cardstock.

Step 9: Die cut and assemble the florals from Distress Black Heavystock


Step 10: Arrange and adhere all the pieces to the card.
 My name is Cheiron Brandon. I live in a tiny house on a tiny farm in NJ. I work in the financial district by day and love to play with stamps, ink, and paint at night in my studio. You can find my art and online classes on my website Create with Cheiron, see my creative process on my YouTube Channel, and see my (almost) daily posts @cheiron on Instagram.
Related Posts

Tim Holtz Distress Mini Oxides Christmas Wreath Card by Dominique Bennani
Step into a Winter Wonderland with this charming Christmas wreath card created by Dominique Bennani using the latest...
Read More
49 and Market Mistletoe and Memories Journal Page by Jessica Mikels
Read More
Drawer Title
- Choosing a selection results in a full page refresh.