


Learn a cool technique using Watermark Resist Ink and Distress Stains. Then print a photo on Claudine Hellmuth Studio Sticky-Back Canvas to add some textural interest.
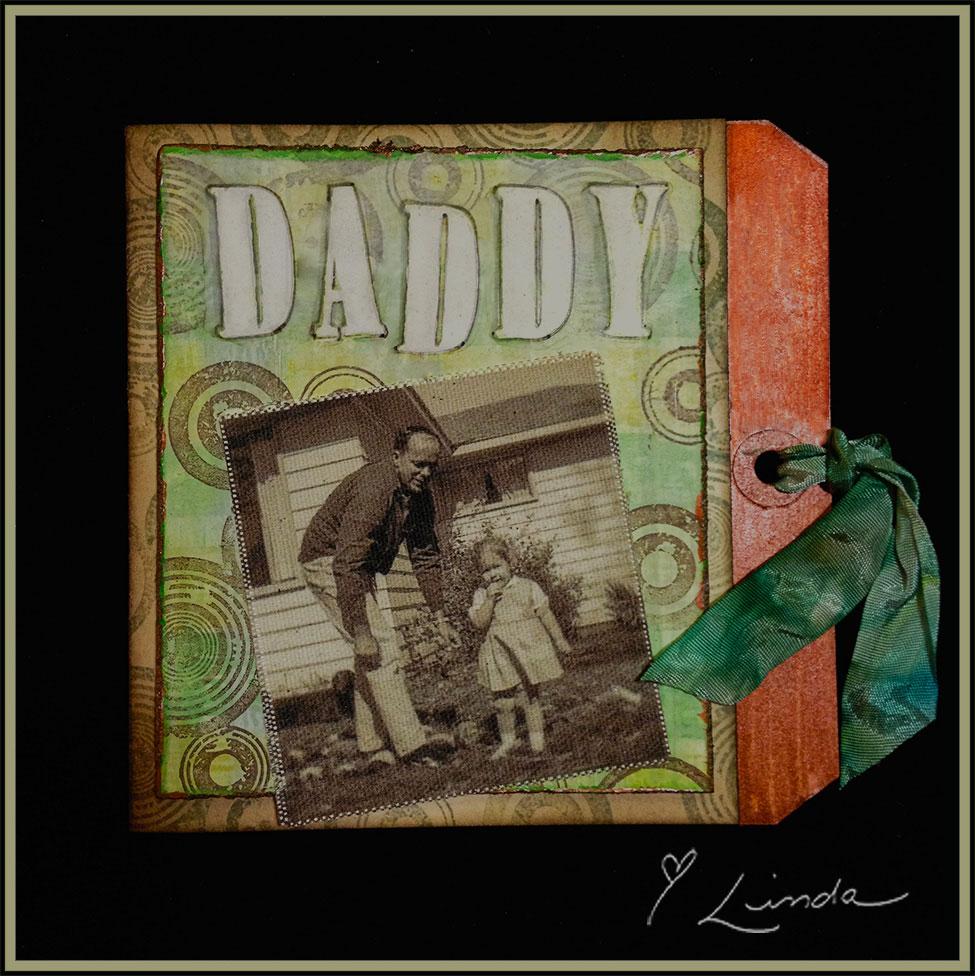
Watermark Resist/Distress Stain “Daddy and Me” Card by Linda Ledbetter
- Materials
- Instructions
- Ranger Sticky-Back Canvas
- Ranger Specialty Stamping Paper
- Ranger Watermark Resist Ink
- Tim Holtz® Distress Stains™: Crushed Olive, Iced Spruce, Mowed Lawn, and Wild Honey
- Ranger Mister
- Tim Holtz® Distress Ink Pads: Walnut Stain and Iced Spruce
- Tim Holtz® Distress™ Markers: Crushed Olive
- Tim Holtz® Waterbrush
- Ranger Non-Stick Craft Sheet™
- Ranger Heat it™ Craft Tool
- Ranger Ink Blending Tool & Foam
- Tim Holtz Collection by Stampers Anonymous-Worn Text Stamp Set, Grid Blocks
- Tim Holtz by Tonic Studios Paper Distresser
- Tim Holtz Idea-ology Trimmings Ribbon (plain)
- Soft rag or paper towels
- Masking Tape
Instructions
Foreground Panel:
 |
Working on the Non-Stick Craft Sheet, stamp letters from the Tim Holtz Stampers Anonymous Worn Text set onto Specialty Stamping Paper using Watermark Resist Ink. Allow the ink to air dry or heat-set it with a Heat Tool. |
 |
Apply Iced Spruce, Crushed Olive, Mowed Lawn and Wild Honey Distress Stain in both vertical and horizontal stripes across the paper, including the areas you’ve stamped with Watermark Resist. Mist the inks lightly with water from a Mister Bottle. Use a soft rag or damp paper towel to gently blot the ink off the stamped areas. Watch those letters pop! |
 |
Stamp the concentric circles from the Tim Holtz/Stampers Anonymous Bitty Grunge set randomly over the paper using Walnut Stain Distress Ink. Again, gently blot away the ink that covers the stamped letters. |
 |
For more impact, trace the letters with a Crushed Olive Distress Marker, then use the fine-tipped Tim Holtz Water Brush around the letters to smear the ink a bit. |
 |
Use a Tonic Paper Distresser to rough up the edges, then color them with Mowed Lawn Distress Stain. Once this dries, add a thin line of Antiqued Bronze Distress Paint along the outer edges. |
Background Card:
 |
Fold a large #12 Manila Tag so that the bottom edge just meets the bottom of the reinforcer. The tag should open like a book, with the longer edge in back and the reinforcer to the right. Stamp what’s now the front of the card with the same concentric circles stamp using Iced Spruce Distress Ink. Place a sheet of scrap paper inside the folded card so the stamping doesn’t touch to the back edge of the card. |
 |
Darken the edges of the card using Walnut Stain Distress Ink on an Ink Blending Tool. |
 |
Open the card, and use a piece of masking tape to create a straight edge right where the front edge of the card lines up. Use Antiqued Bronze Distress Paint on the un-masked edge. Let the paint dry, then remove to masking tape to reveal a nice, even line. |
 |
Photocopy (or scan and print) a photo onto Sticky-Back Canvas. Run it through your ink jet printer as you would any thick cardstock– it takes ink beautifully! |
 |
Mist a piece of Trimming ribbon with water and color it with Distress Stain in Mowed Lawn and Iced Spruce. Once it dries, thread it through the reinforcer on the back of the tag/card. |
Related Posts

Tim Holtz Distress Mini Oxides Christmas Wreath Card by Dominique Bennani
Step into a Winter Wonderland with this charming Christmas wreath card created by Dominique Bennani using the latest...
Read More
49 and Market Mistletoe and Memories Journal Page by Jessica Mikels
Read More
Drawer Title
- Choosing a selection results in a full page refresh.