


Hi everyone, it’s Audrey, and I’m so happy to be back with another guest project here on the Ranger Ink blog! Today I have a winter-inspired scene building card design to share with you that mixes several of my favorite Tim Holtz/Sizzix die sets with lots of beautiful Ranger Distress Dye and Oxide Inks.

Winter Theme Card by Audrey Pettit
- Materials
- Instructions
- Tim Holtz Distress® Watercolor Cardstock
- Tim Holtz Distress® Oxide® Ink Pads: Iced Spruce, Hickory Smoke
- Tim Holtz Distress® Ink Pads: Fossilized Amber, Gathered Twigs, Walnut Stain, Ground Espresso
- Perfect Medium™
- Ranger Embossing Powders: Super Fine Detail White
- Ranger Mini Blending Tool with Foam
- Ranger Multi-Medium: Matte
- Tim Holtz Distress® Sprayer
- Ranger Heat it™ Craft Tool
- Ranger Non-Stick Craft Sheet™
- Ranger Artist Brush Set
- Ranger Adhesive Foam Rolls: White Foam
- Cardstock: Tim Holtz Distress Kraft Stock Cardstock, Therm O Web Black Onyx
- Sizzix Dies: Snowglobe #2, Winter Wonderland, Festive Greens, Alphanumeric Thin
- Stamper’s Anonymous Stamp Set: Mini Swirly Snowflakes
- Twine: Maya Road
Instructions
Hi everyone, it’s Audrey, and I’m so happy to be back with another guest project here on the Ranger Ink blog! Today I have a winter-inspired scene building card design to share with you that mixes several of my favorite Tim Holtz/Sizzix die sets with lots of beautiful Ranger Distress Dye and Oxide Inks.

I absolutely love the large snow globe die set from last year’s holiday release, and one of my favorite things about it is that it’s such a versatile set. The large snow globe shape is perfect for building lots of different scenes, and it’s so fun mixing die sets and images to come up with all sorts of styles and designs. Also, the snow globe die set doesn’t necessarily have to create only snow globe designs, but can be used for framed openings, like I’ve done with my card today.

I’ve got all the step-by-steps for this card design to share, so let’s take a closer look.

Step 1: Cut a 5” square panel of Distress Watercolor Cardstock. Stamp snowflake images from the Mini Swirly Snowflake stamp set randomly around the edges of the paper using Perfect Medium Embossing Ink. Coat the images with Super Fine Detail White Embossing Powder as you stamp so that you can see where the images are. Once the panel is covered, heat set the powder with a Heat Tool.
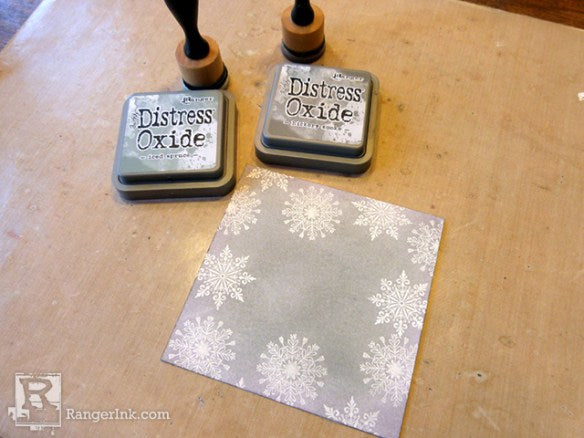
Step 2: Ink over the embossed panel with Distress Oxide Inks using a Mini Ink Blending Tool, starting with Iced Spruce Oxide in the center of the paper and fading into Hickory Smoke Oxide around the edges. Buff any ink off of the embossed snowflakes with a clear cloth. Spray the paper lightly with water from a Distress Sprayer. Allow the water to soak into the paper for about 10 seconds, and then blot it dry with the cloth or a clean paper towel. Ink the edges with Hickory Smoke Oxide Ink.

Step 3: Position the snow globe die onto the center of the embossed panel, slightly towards the top to allow room for the snow globe base. Hold the die in place with a bit of washi tape, and run the panel through your die cutting machine. Ink the inside frame edges with Hickory Smoke Oxide Ink. Die cut several clouds and the snowbank images from watercolor cardstock. Die cut the snow globe base from black cardstock. Cut a 5.25” square piece of black cardstock for the card base.

Step 4: Wrap twine around the top left corner of the outside frame panel. Since this area is along a curve, and the twine tends to slip, use some small dots of Multi Medium Matte adhesive to hold the twine in place. Ink the edges of the snowbank and clouds with Hickory Smoke Oxide Ink, and then adhere them to the center panel using Multi Medium Matte. Without using any adhesive for now, place the outer frame panel in position onto the black card base. Adhere the center snow globe shape into the framed opening.

Step 5: Ink a small piece of watercolor paper with Iced Spruce Oxide Ink using the Ink Blending Tool. Be sure the paper is large enough to die cut a portion of the church building, as well as the sentiment. Spell out the word “winter” using alphanumeric dies, and die cut the letters and the building. Adhere the letters to the center of the snow globe base. Die cut the bell tower of the church from sanded red Distress Kraft Stock cardstock. Die cut the roof sections from black cardstock.

Step 6: Dab Fossilized Amber Distress Ink onto your Craft Sheet. Using a Ranger Artist Brush, watercolor the ink onto a small scrap of watercolor cardstock. Dry the paper, and then die cut the moon and stars shapes. Adhere them to the scene.

Step 7: Watercolor another scrap of watercolor paper with Gathered Twigs and Walnut Stain Distress Ink. Dry the paper.

Step 8: Die cut two small deer from the Winter Wonderland die set. Dab Ground Espresso Distress ink onto the Craft Sheet, and use it to add darker color to the deer hooves and ears.

Step 9: Ink another scrap of watercolor cardstock with Iced Spruce Oxide Ink using the Ink Blending Tool. Die cut three pine sprigs from the Festive Greens die set. Die cut some berry sprigs from watercolor cardstock. Watercolor the berry branches with Walnut Stain and Fired Brick Distress Inks. Ink the tips of the pine and berry branches with Hickory Smoke Oxide Ink.

Step 10: Now it’s time to assemble the rest of the card. First, place foam adhesive onto the back of the square frame, and then adhere it to the card base. Adhere a portion of a die cut cloud to the roof of the church building, trimming off the excess, and then assemble and adhere the church building to the scene. Add foam adhesive onto the backs and heads of the deer, and dab small dots of Multi Medium matte to the hooves, and place them into the scene. And finally, arrange the snow globe base and the pine and berries around the frame, and adhere then in place with Multi Medium Matte.
Related Posts

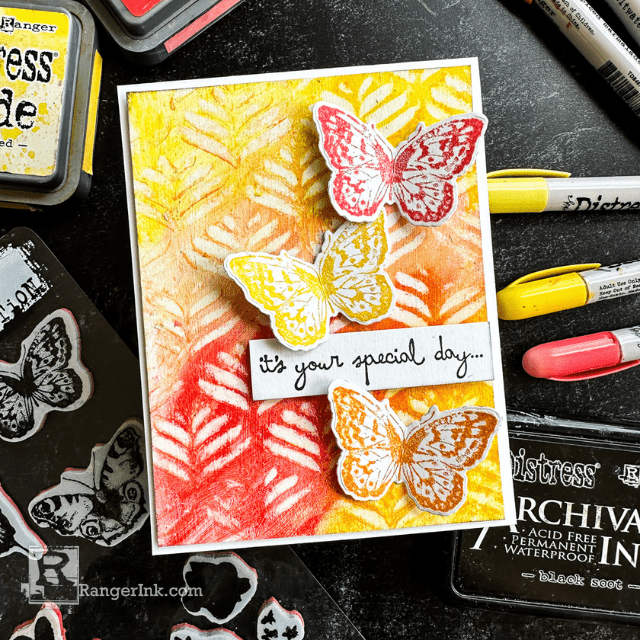
Distress Crayon Mother's Day Card by Cheiron Brandon
Fluttering into Mother's Day with a burst of color! Celebrate all the extraordinary women in our lives with Cheiron...
Read More
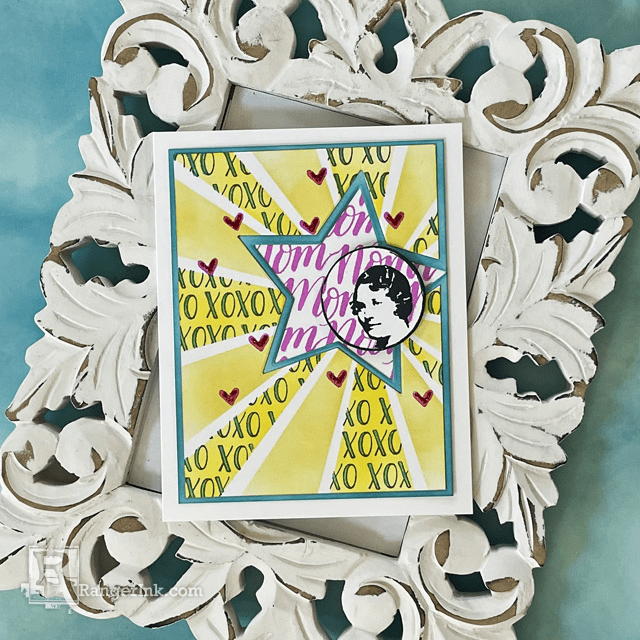
Archival Ink Mother's Day Card by Lauren Bergold
With Mother's Day just around the corner, it's time to go above and beyond for the special women in our...
Read More