


Combine Alcohol Inks and canned air to create amazing one-of-a-kind ink patterns.

Alcohol Ink + Canned Air Effects Card by Tammy Tutterow
- Materials
- Instructions
- Ranger Non-Stick Craft Sheet™
- Ranger Mini Blending Tool
- Tim Holtz® Distress Ink Gathered Twigs
- Tim Holtz® Alcohol Blending Solution
- Tim Holtz® Alcohol Ink Applicator
- Tim Holtz® Adirondack® Alcohol Inks: Aqua, Cloudy Blue
- Ranger Specialty Stamping Paper
- Ranger Gloss Paper
- Tim Holtz Idea-ology: Merriment Paper Stash, Mirror Sheets, Crinkle Ribbon, Gumdrops
- Tim Holtz Sizzix: Layered Snowflake Die, Stacked Snowflakes Dies, Vagabond
Instructions
 Begin by dripping alcohol ink onto a non-porous surface. For this example I am using Ranger’s Glossy Cardstock.
 Begin blowing the ink with the canned air.
 As the air hits the ink, it will cause the ink to move in a burst pattern. You can continue to blast the ink with air as long as it is wet. Turn your cardstock as you blast the air to create lots of different directions in the ink patterns.
 You can layer different colors. Because the ink is transparent, you will see the layers through one another. Just be sure each layer is dry before adding another. Where the same color overlaps, you will see a deeper shade of the color. (Top cardstock Ranger Gloss Cardstock. Lower cardstock Specialty Stamping Paper.)
 You can also use this technique on other specialty papers and surfaces. The surface on the left is Ranger Foil Cardstock. The surface on the right is Tim Holtz Mirror sheets. The ink moves much faster on the mirror sheets. It gets a bit cloudy on this surface if you blast it too long.
 Clear films are also fun with this technique. The film on the left is Ranger Shrink Plastic. The film on the right is Tim Holtz Frosted sheets. Ranger Shrink Plastic comes clear so it is a great surface to use for projects without shrinking!
 To create the card shown above, apply Pearl Alcohol Ink to a piece of Ranger Shrink Plastic using an ink applicator tool.
 Splatter Snow Cap Alcohol Ink on the plastic on top of the dry Pearl Alcohol Ink.
 Blast the Snow Cap Alcohol Ink with the air can. You may notice that the Alcohol Ink Mixatives do not spread as much as the colors.
 Drip Silver Mixative onto the plastic over the dry inks. Blast the Silver Mixative with canned air to spread it.
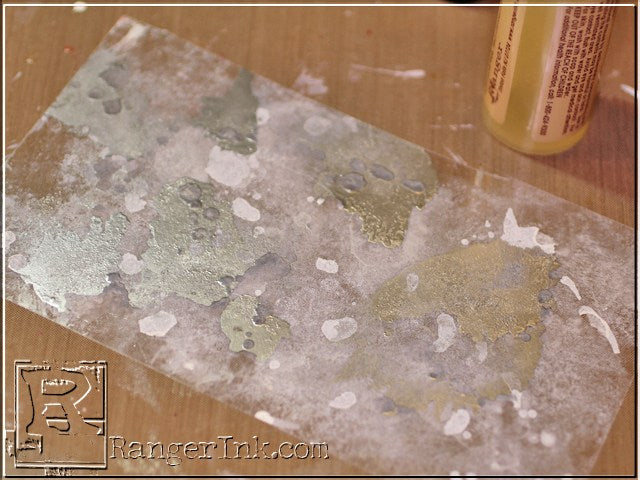 If you would like to create splatters in the ink, sprinkle a bit of Alcohol Ink Blending solution onto the plastic. Allow the solution to blend and break up the ink where it lands. It will create some specks in the inks like water splatters do to Distress Inks.
 Tap over the surface with a clean dry ink applicator tool with felt to remove any excess blending solution.
 When the blending solution is dry, drip cool light blue alcohol inks (Cloudy Blue and Aqua) onto the surface. Blast the inks with canned air to create movement and pattern in the drips.
I really love how the plastic looks here. It reminds me so much of frost on a window during winter.
 Die cut and emboss the inked Shrink Plastic using the Tim Holtz Layered Snowflake die and Texture Fade set. Die cut two additional smaller snowflakes using the Tim Holtz Stacked Snowflakes die. The die cuts can be used with the shiny side or the inked side up. They are both so pretty!
 Drip alcohol ink onto a Tim Holtz Gumdrop to create a dimensional center for the large snowflake. (Color shown: Cloudy Blue.)
 Tear a scrap piece of pattern paper to fit the front of a card created with Kraft Cardstock. If you are using double sided pattern paper, crinkle and curl the edge back to show off the color and pattern on the back side of the paper. Brush the edges of the paper with Gathered Twigs Distress Ink using an ink blending tool. Wrap the the pattern paper with a Crinkle Ribbon tied into a bow.
 Adhere the paper and bow to the front of the card. Add the three snowflakes.
This is one of those cards that you really need to see in person to fully get just how pretty it is. The layers of color on the Shrink Film are so pretty as they show through to the front. Wouldn’t these snowflakes be so pretty hanging on a Christmas tree with the lights shining behind them? I may have to make more and do that!

Related Posts

Dylusions DIY Christmas Gift Wrap & Tags by Jess Peters
Dress up your holiday gifts with this Dylusions DIY Christmas Gift Wrap & Tags by Jess Peters! Using Dylusions...
Read More
Tim Holtz Distress Mini Oxides Christmas Wreath Card by Dominique Bennani
Step into a Winter Wonderland with this charming Christmas wreath card created by Dominique Bennani using the latest...
Read More