


by Audrey Pettit

Crazy Cats Happy Birthday Card by Audrey Pettit
- Materials
- Instructions
- Ranger Glossy Accents™
- Tim Holtz® Distress Ink Pads: Black Soot, Pumice Stone, Antique Linen, Brushed Corduroy, Frayed Burlap, Shaded Lilac, Wilted Violet, Picked Raspberry
- Archival Ink™ #0 Pads: Jet Black
- Ranger Non-Stick Craft Sheet™
- Ranger Mini Blending Tool
- Tim Holtz Distress® Sprayer
- Ranger Artist Brush Set
- Tim Holtz Distress® Collage Mediums
- Ranger Specialty Stamping Paper
- Ranger Watercolor Paper
- Tim Holtz idea-ology Sanding Tool, Deco Tape, Paper String
- Tim Holtz Core’dinations Metallic Cardstock
- Tim Holtz by Stampers Anonymous Crazy Cats Stamp Set
- Tim Holtz by Stampers Anonymous Wallpaper & Wood Stamp Set
- Tim Holtz Alterations by Sizzix Birthday Clear Stamp Set, Crazy Cats Framelits Set
Instructions
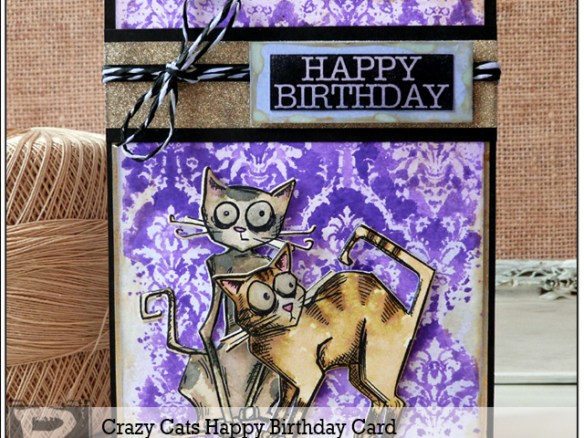
Tim Holtz’s Bird Crazy collection has been all the rage this past year, and now we have the fabulous Crazy Cats joining in. Today I have a fun birthday card to share, featuring these adorable cats along with the new Distress Collage Mediums.

These cats have such fun expressions, and I love that there are matching dies for all the cats, including detail dies for layering individual pieces. I added my cats against a bright Distress background, made with stamps, Distress Inks, and the new Collage Mediums. Let’s take a closer look.
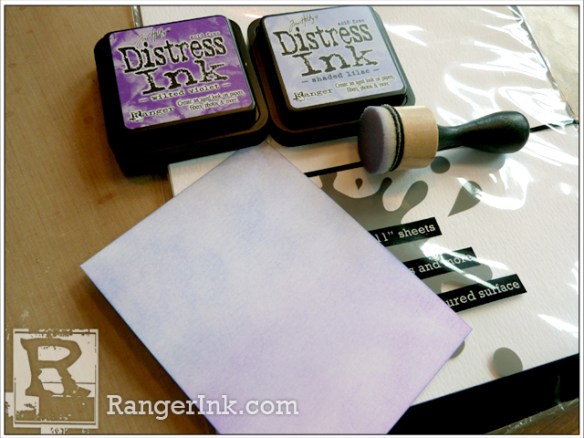
Step 1: Cut a piece of Ranger Watercolor Paper slightly smaller than a standard A2 sized card base. Using a Mini Ink Blending Tool, blend Shaded Lilac Distress Ink onto half of the panel. And then add Wilted Violet Distress Ink to the other half, blending the two colors together in the middle when they meet.

Step 2: Lay the Wallpaper background stamp face up on your work surface, and ink the image with Wilted Violet Distress Ink. Spritz the stamp several times with the Distress Sprayer to get the ink fairly wet. Press the inked watercolor panel down onto the inked stamp, pressing lightly against the middle of the paper while not applying much pressure against the edges. Lift the paper up, and allow the ink to dry.

Step 3: Using a paintbrush, or just the tip of your finger, apply a light coat of Vintage Distress Collage Medium to the edges of the stamped panel. The Collage Medium works beautifully over the top of the Distress Inks, and adds a great aged look to the paper.
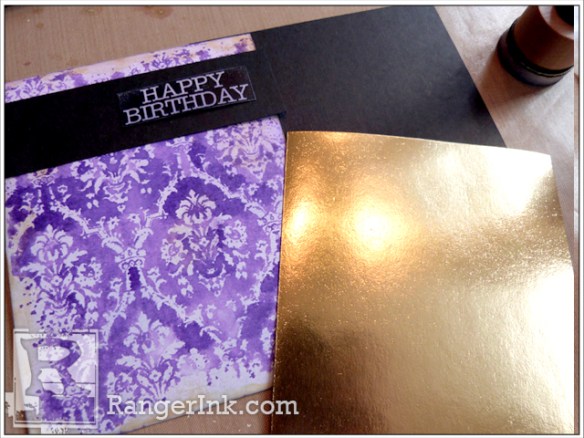
Step 4: Cut a piece of Ranger Black Cardstock to the size of an A2 card base. Cut a piece of Tim Holtz Metallic Cardstock just slightly larger than the stamped watercolor panel, but then cut about an inch off of the height. Cut another strip of black cardstock that is about 1.25” wide. Stamp birthday sentiment onto Stamper’s Select Cardstock using Jet Black Archival Ink. Trim out sentiment. Ink over the sentiment using the Ink Blending Tool and Shaded Lilac Distress Ink.

Step 5: Begin to assemble the card base. Lightly sand over the Metallic Cardstock, and then adhere it to the bottom of the black cardstock base. Adhere the stamped panel next. Wrap strips of gold Deco Tape across the strip of black cardstock, leaving equal borders between the strips.

Step 6: Wrap Paper String around the center of the black cardstock strip, tying the string into a bow on the left hand side. Using your Ink Blending Tool, swipe Shaded Lilac Distress Ink over the white portions of the string. Cut a piece of Stamper’s Select Cardstock that is slightly larger than the sentiment. Ink it with Shaded Lilac Distress Ink, and then add a coat of Vintage Distress Collage Medium to the edges. Once the Collage Medium is dry, adhere the sentiment to the center, and pop the piece onto the right side of the black strip using foam adhesive. Adhere the black strip to the top of the card base.

Step 7: Stamp a pair of Crazy Cats onto the smooth side of the Watercolor Paper using Jet Black Archival Ink.

Step 8: Watercolor the cats using Distress Inks. To do so, press the inks onto the surface of your Non-Stick Craft Sheet, and pick up the inks with a wet paintbrush. I colored my front cat with Antique Linen, and then added details with Brushed Corduroy and the darkest shadows with Frayed Burlap.

Step 9: The back cat was colored with Pumice Stone, and details were added with Black Soot. I colored both noses and the inside of the ears with Picked Raspberry. The eyes got a very light coat of Pumice Stone.

Step 10: Die cut the cats using the matching Framelits die set.

Step 11: You can see how close the dies cut to the image, which is really amazing. There is still a slight white border around parts of the images, like around the whiskers, so to mute the white edges a bit, go over the edges of the die cuts with Antique Linen Distress Ink.

Step 12: I then added a bit more detail to my cats by painting on a bit of Vintage Collage Medium to the stripes on my front cat. And then I added Crazing Collage Medium to the eyes.

Step 13: To adhere the cats, add a bit of foam adhesive on the back of the images at the top only. Apply Matte Collage Medium to the bottom of the images. This will give some great dimension behind the cats, while still grounding them to the background.

Step 14: And finally, apply Glossy Accents to the eyes.
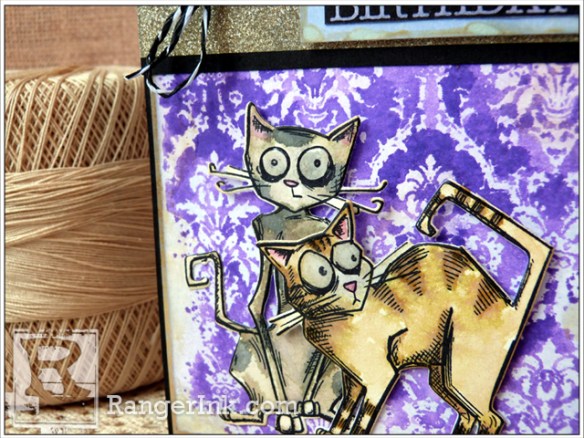
I just love how the Collage Mediums add another level of age and distress to the finished look. The Vintage finish edge blends beautifully into the gold cardstock below. And I really like how it looks different over the different colors of inks below. And the little bit of crazing in the eyes adds such quirky character to those cats.

That shabby Wallpaper background makes me think of old Victorian parlor. How great would that be at Halloween in some old haunted mansion? Oh, the ideas!

Related Posts

"My Cup of Care" Journal Page with Dylusions Pastel Paints by Miranda van den Bosch
Read More

Tim Holtz Distress® Micro Glaze Embossing Resist by Tami Bastiaans
Create gorgeous embossed backgrounds with the Micro Glaze Embossing Resist technique! ✨ Tami Bastiaans pairs Tim Holtz Distress® Micro...
Read MoreDrawer Title
- Choosing a selection results in a full page refresh.