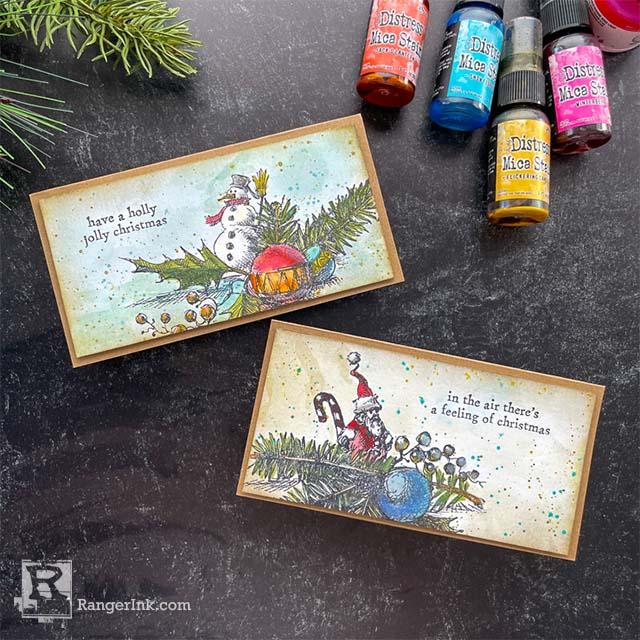
In this tutorial, Cheiron Brandon shows you how to watercolor with Tim Holtz Distress® Mica Stains to make these joyful and festive slimline Christmas cards.

Distress Mini Slimline Christmas Cards by Cheiron Brandon
- Materials
- Instructions
Tim Holtz Distress® Holiday Mica Stain Set #2
Tim Holtz Distress® Spray Stain: Antique Linen, Speckled Egg
Tim Holtz Distress® Sprayer
Tim Holtz Distress® Archival Ink 4pk: Black Soot
Tim Holtz Distress® Ink Pad Pumice Stone
Tim Holtz Distress® Watercolor Cardstock
Tim Holtz Distress® Glitter Clear Rock Candy
Tim Holtz® Waterbrush Detailer Tip
Ranger Mini Ink Blending Tool with Foam
Ranger Glossy Accents
Ranger Heat It™ Craft Tool
Letter It™ White Foam Roll Tape
Tim Holtz® by Stampers Anonymous Stamp Set: CMS444 Cozy Christmas
Other:
Tim Holtz® by Tonic Studios Glass Mat
Hi there, crafty friends! It’s Cheiron Brandon here and today I am thrilled to be sharing a couple of Mini Slimline Christmas cards featuring the new Distress Mica Stains. Last month, we got two gorgeous sets of Halloween Seasonal colors, and recently we got the Christmas ones. So now, we have a full rainbow! Today I have combined all of the Distress Mica Stains to create some watercolor cards with easy, loose water coloring.
To begin, gather your supplies. You will need Distress Watercolor Cardstock cut to 3 x 6, Distress Mica Stains, a Waterbrush or a paintbrush, and the Cozy Christmas stamp set. I will walk you through how to create two cards (each featuring one image from the stamp set).

Step 1: Stamp your images in Distress Archival Ink and dry with a Heat Tool.

Step 2: Using a light color of Distress Spray Stain (I used Antique Linen and Speckled Egg), spray some onto your glass mat and add a bit of water using a Distress Sprayer. Create a watery wash all over your card panel avoiding the inside of the focal image. Dry with a Heat Tool.

Step 3: Spray your Distress Mica Stains onto the glass mat. You only need a spray or two of each…a little goes a long way.

Step 4: Using a paint brush, pick up some of the Distress Mica Stain and paint in your image. I worked on two images at once, so I painted each color I was using on both cards before cleaning my brush and switching colors. For example, paint all the yellow first, then move onto the green etc. Let the panels dry or dry with a Heat Tool.

Step 5: Using the remaining stain on your mat, add some spatter to your card using the paintbrush. I masked the sentiment and was careful to avoid the main focal images. Let dry or dry with Heat Tool.

Step 6: Use a Foam Blending Tool to ink the edges of the panels with Pumice Stone Distress Ink.

Step 7: Add the watercolor panels to a 3 ¼ x 6 ¼ kraft card panel using foam tape.

Step 8: Add Glossy Accents to a few areas of the card, and then sprinkle Distress Rock Candy Glitter for a little extra sparkle and let dry.


