Create this colorful journal page with Dylusions Ink Sprays, Stamps and Stencils.

Dylusions Spring Art Journal Page by Kourtney Osborn-Vallee
- Materials
- Instructions
- Dylusions Large Creative Journal
- Dylusions Stencils: 9x12 Leaf Flourish, Bubbles, Flower Medley, Alphabet Border, Diamond of a Border
- Ranger Mister
- Dylusions Ink Sprays: Vibrant Turquoise, Funky Fuchsia, Bubblegum Pink, Squeezed Orange, Cherry Pie, White Linen
- Ranger Non-Stick Craft Sheet™
- Tim Holtz® Distress Ink Pads: Mowed Lawn, Peeled Paint, Black Soot
- Ranger Heat it™ Craft Tool
- Embossing Powders: Clear
- Ranger Emboss It™ Dabber
- Archival Ink™ #0 Pads: Jet Black
- Tim Holtz Distress® Marker Spritzer
- Tim Holtz® Distress™ Marker: Picket Fence
- Ranger Glossy Accents™
- Stickles™ Glitter Glue: Neon Flamingo
- Stampers Anonymous: Tim Holtz Acrylic Grid Block
- Tim Holtz Alterations by Sizzix: Vagabond Machine, Honeycomb Frameworks Border Die
- Tim Holtz by Tonic Studios Kush Grip Snips
- Tim Holtz Idea-ology: Crinkle Ribbon
- Old Book Print Pages
- Bazzill: Black Cardstock
- Moxxie: Buttons
Instructions
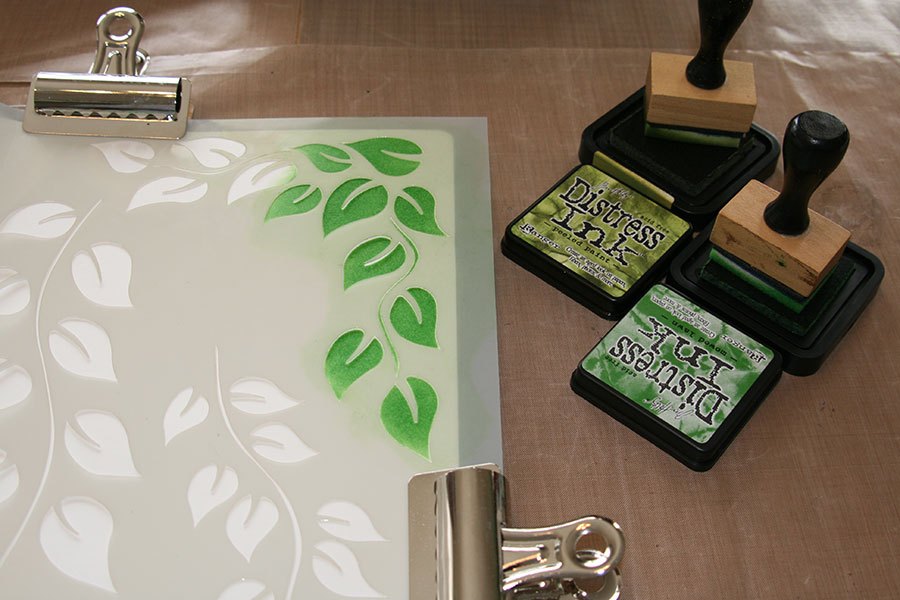
1. Start with a white page spread in the Dylusions Creative Art Journal. Lay the Leaf Flourish stencil in the top right hand corner. Using an Ink Blending Tool apply Mowed Lawn Distress Ink over the entire pattern. Go back over the base of each flower with Ink Blending Tool and Peeled Paint Distress Ink to give each leaf shading.
Remove the stencil. While the Distress Ink is still wet, cover the entire image with clear embossing powder. Knock of the excess powder and return to jar. Heat embossing powder with Heat Tool until it turns clear and glossy. Repeat the leaf image along the right side and across the top of the page by lining the straight part of the Leaf stencil up to the edge of the corner pattern, ink and heat emboss this, too.
2. Using Mister Bottle, lightly mist both pages with water. Now make puddles of color on the pages with Dylusions Vibrant Turquoise and Funky Fuchsia. The water already on the page will allow the colors to blend and create a third color. Allow the colors to seep in for several seconds, then use a paper towel and blot up the excess wet sprays. The embossing powder will resist the Dylusions Spray and will wipe right off of the leaf image.
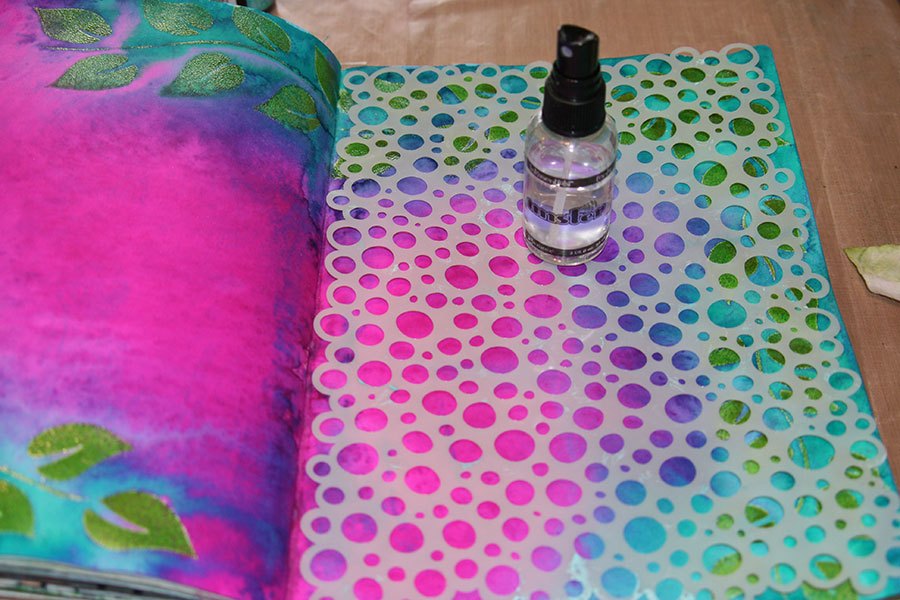
3. Create a ghosting effect by laying the Bubbles stencil on the right page. Mist water lightly through the stencil. Allow a few seconds for the water to react with the Dylusions underneath and then flip the stencil over onto the left page and press down on the stencil to apply the excess water that was on top of the stencil to the page. This will give the page a reverse ghosting image. Lift the stencil and allow a few seconds for the water to react. Roll a paper towel roll over both pages to pick up any excess water and it will pull off some of the reactivated ink. Use Heat Tool to lightly dry pages, try not to cook the embossing powder that is already on the page.
4. Shake the White Linen Dylusions spray until all of the sediment on the bottom of the bottle is gone. Liberally spray the White Linen Dylusions onto a clean Dylusions Ink Spray Pad to create a custom ink pad. Ink up the Alphabet stamp from the Basics Background collection with White Linen, roll it randomly over the background just stamping potions of the image. Use an Ink Blending Tool and apply Black Soot Distress Ink all around the outside edge of the page.
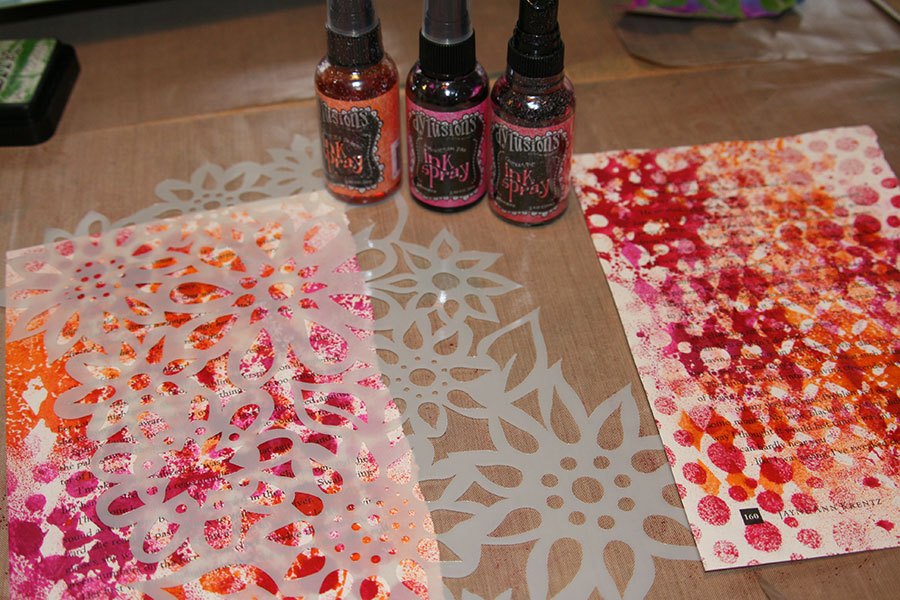
5. For the flowers and lettering, lay 5-6 old book pages out on a Non-Stick Craft Sheet. Randomly lay the Flower Medley stencil on top of one of the book pages and lightly spray Squeezed Orange Dylusions sprays through it, then flip the stencil onto another page and press to use all the ink that was sitting on the top of the stencil. Repeat this a few times and layer with the Alphabet Border and Diamond of a Border Stencil using Bubblegum Pink and Cherry Pie Dylusions Spray. Leave some of the color of the book pages showing through. Dry book print with Heat Tool. (photo 5)
6. Using Jet Black Archival Ink, stamp all three sizes of Fancy Florals and the word “Create” onto the book pages. Use scissors and cut out all the flowers and letters by hand leaving about 1/8th inch border around edge. Stack the flower pieces starting with the largest on the bottom and glue a button in the center with Glossy Accents. Outline some of the stamped black lines on the flowers with Neon Flamingo Stickles. Set to the side to dry.
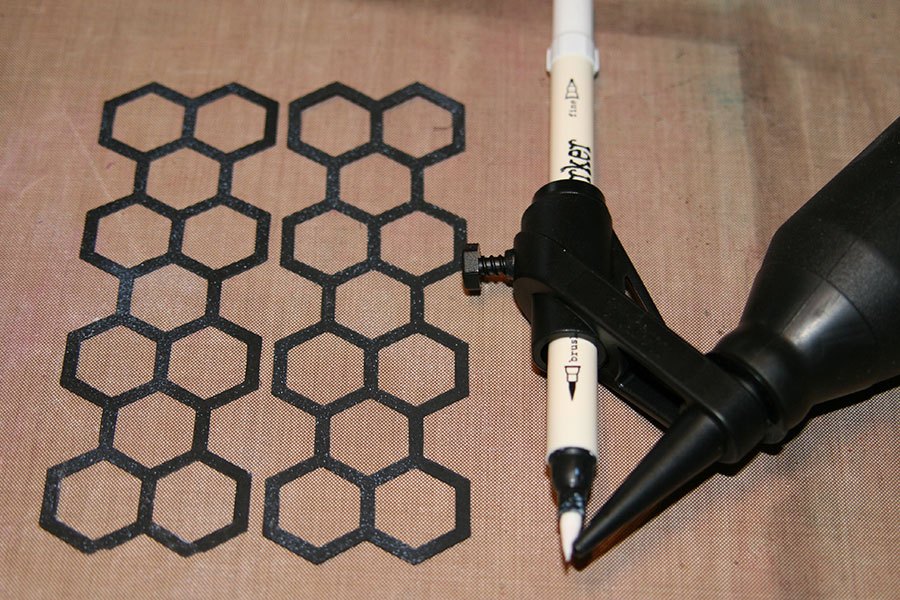
7. Die cut 2 Honeycomb shapes from black cardstock with the Vagabond Machine. Insert the Picket Fence Distress Marker into the Distress Marker Spritzer. Hold above the black honeycomb die cut and squeeze the spritzer several times to spritz ink for a splatter effect.
8. Puddle White Linen Dylusions Spray along the top of black tag, then tilt to allow the puddles to run down the tag. Dry with Heat Tool. For the crinkle ribbon, spray with Squeezed Orange and Bubble Gum Pink Dylusions sprays. Crinkle up in a ball and hit it with the Heat Tool. Run the ribbon through the hole on the end of the tag and tie.
9. Assemble the page starting with the black tag. Cut off 2 inches from the end of the tag and run it across the crease of the book, this will help the page close. Adhere with Glossy Accents. Glue the letters “Create” to the black tag and add a flower to the bottom right corner. Add the two black honeycomb die cut pieces to the left page. Add the remaining preassembled flowers with glossy accents.


