


Wendy Vecchi

Enjoy Fall Card by Wendy Vecchi
- Materials
- Instructions
- Archival Ink™ Designer Series Wendy Vecchi: Tiger Lily, Fern Green, Leaf Green, Watering Can, Tree Branch, Violet, Potting Soil
- Archival Ink™ Jet Black
- Ranger Mini Blending Tool
- Tim Holtz® Distress Glitter Clear Rock Candy
- Ranger Fillable Jars
- Ranger Multi-Medium Matte
- Wendy Vecchi Embossing Powder: Violet & Tree Branch
- Ranger Heat it™ Craft Tool
- Ranger Non-Stick Craft Sheet™
- Ranger Adhesive Foam Rolls
- Stampers Anonymous wendy vecchi studio490 Magic Mat Board (black) (WVMMB) Clearly for Art (clear) (WVAPCLEARLY) Newsprint (WVNEWS) Stampers Anonymous wendy vecchi studio490 stamps: Prairie Flower Stamp-it Stencil-it (WVSTST021), Polka Dot background (WVBG024), Large Hosta (SCS135 Happiness & Art), Flourish (SCS126 Say it with Art)
- Tim Holtz Idea-ology: Yuletide Paper Stash, Silverware, Trophy Antlers, Chit Chat Seasonal, Yuletide Tissue Tape
- Tim Holtz Alterations by Sizzix: Mini Tea Time, Pumpkin Parts, Tag and Bookplates, Adventure Words script
- Black waterproof pen, Mini flower Paper punch
Instructions

There’s nothing that I love more than discovering a new technique and a new way to combine Ranger products, to create something different. Today’s art focuses on a new technique called…GLITTERED EMBOSSING POWDER.
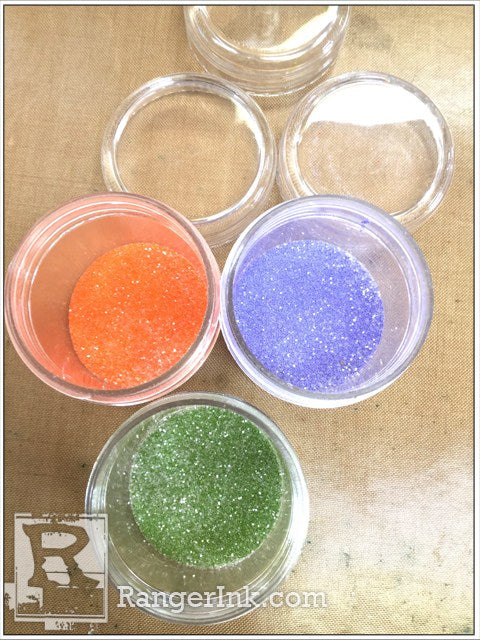
Step 1. Use 3 fillable jars to mix equal parts of Rock Candy Distress Glitter with these 3 embossing powders…Tiger Lily, Violet and Fern Green. Add 1 scoop of Rock Candy Glitter to each fillable jar, then mix in an equal amount of the colored embossing powder.

Step 2. Die cut the Tim Holtz/Sizzix pumpkin from studio 490 black Magic Mat Board. Ink the stem with Fern Green Archival Ink, then sprinkle with the “Fern Green glitter embossing powder”. Heat to melt the powder.
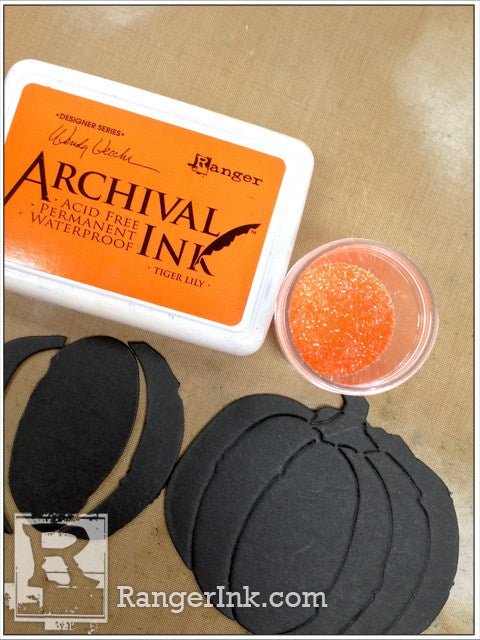
Step 3. Ink all 4 pieces of the pumpkin with Tiger Lily archival ink, then sprinkle with “Tiger Lily glitter embossing powder”. Ink, sprinkle, then heat each piece. Glue the pieces together to assemble the pumpkin.

Step 4. Die cut the mini Tim Holtz/Sizzix cup and saucer from studio 490 black Magic Mat Board. The saucer was cut from a scrap, which allowed me to use the cup that is not attached to the saucer.

Step 5. Ink the cup with Violet Archival Ink, sprinkle with “Violet glitter embossing powder”, then heat to melt the powder. Ink the saucer with Violet, and sprinkle with Violet embossing powder. Add a tiny bit of Potting Soil to accent the saucer edges. Cut the handle from the spoon, ink with Potting Soil, DRY, then insert into the cup opening.

Step 6. Cut a piece of Tim Holtz Yuletide paper to 4 1/4 x 5 1/2 inches and glue to a 4 3/4 x 6 inch black Magic Mat Board base. Add pen stitching to the edges with a waterproof pen.
Step 7. Use painters tape to mask off the stem/leaves of the studio 490 prairie flower.

Step 8. Use Jet Black Archival to stamp the flower in the top left corner.

Step 9. Place the coordinating prairie flower stencil over the leaves/stem and ink with Leaf Green, using the Blending Tool with Foam.


Step 10. Position the stencil over the stamped dots and ink thru the stencil with Tiger Lily.

Step 11. Use Glue N’ Seal to adhere studio 490 Newsprint to clear, Clearly for Art (CFA). Stamp the large hosta leaves onto the Newsprint side, using Jet Black. Cut out the leaves and cut off the flower/stem. Ink the leaves with Fern Green, Leaf Green and a tiny bit of Tiger Lily. Use Fern Green to stamp the studio 490 polka dot background stamp over the leaves. Heat the leaves to soften the CFA and shape the leaves.
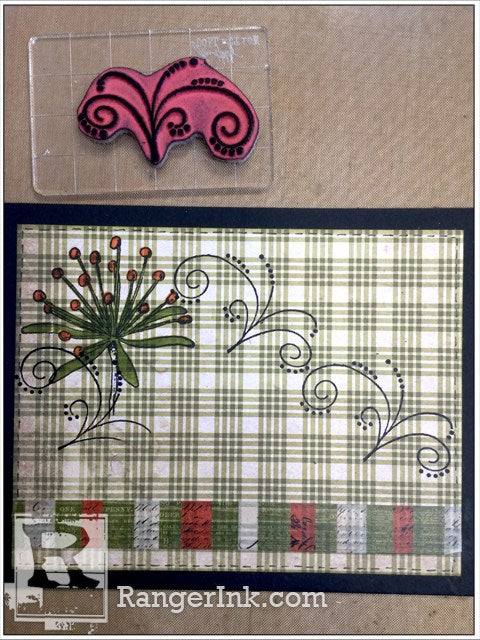
Step 12. Add a piece of Yuletide tissue tape about 1/4 inch from the bottom of the patterned paper. Test drive the placement of the pumpkin and the leaves. This will show you where to stamp the studio 490 flourish. Stamp the flourish 3 times, using Jet Black.

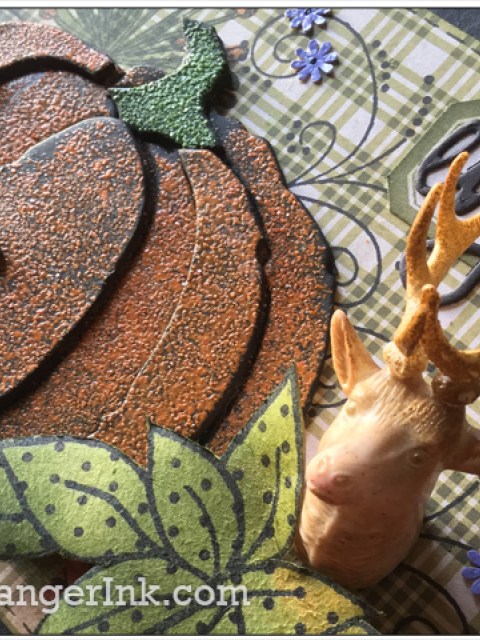
Step 13. Remove the antlers from the Tim Holtz deer. Ink the deer with Tree Branch Archival and accent the ears with Potting Soil. Dry.

Step 14. Create a textured matte finish embossing powder by mixing equal parts of Tree Branch embossing powder with Frosted Crystal Embossing Powder. Ink the antlers with Tree Branch Archival, then sprinkle with the “frosted Tree Branch Embossing Powder”, and heat to create the authentic velvet on the deer antlers. Pop the antlers back in the deer head.

Step 15. Add a piece of Double Sided Adhesive Sheet to Black Cardstock. Die cut the Tim Holtz/Sizzix word. Cut out a label from the Yuletide Paper stash. Ink the cut edges with Fern Green, using the Blending Tool with Foam.
Step 16. To assemble, glue the pumpkin to the left side. Use Black Foam Adhesive under the CFA leaves. Glue the tea cup/saucer over the left side of the pumpkin. Add a tiny bit of Tree Branch over a chit chat seasonal word. Add the word to a scrap of black Magic Mat Board and glue to the cup. Add the label to the base, then remove the backing paper from the word & it’s a sticker. This is VERY CONVENIENT for thin dies. Glue the deer in place.

Step 17. Cover a scrap of Manila Cardstock with Violet Ink, then sprinkle with Violet Embossing Powder. Heat to melt the powder. Use a punch to punch 3 tiny flowers. Add to accent the flourishes.
Step 18. To create the COOKIES on the saucer, use the HOLES from the reinforcer from the Tim Holtz/Sizzix tag die. Ink with Tree Branch, sprinkle with Tree Branch Embossing Powder and heat to melt. Glue the LOW CALORIE COOKIES on the saucer.
Because the glitter is hard to photograph…here’s a mini video to show how the Rock Candy Glitter combines with the embossing powders. It’s a sparkly effect and the glitter is cooked into the powder, so it stays in place! Watch here >
Things to note:
1. Archival Inks are versatile. For this piece, I used them to stamp, to stencil, to emboss, to create custom embellishments and to alter the deer and the spoon handle.
2. Water will not remove the Archival Ink from the stencil, since it is a waterproof ink, but rubbing alcohol (isopropyl) will remove it easily.
3. Embossing cardstock scraps is a great way to USE them to create custom embellishments. This works well with punches and dies. The Fillable Jars are perfect for storing small pieces.
4. By combining Rock Candy Glitter with colored embossing powders, it changes the embossing powder surface from smooth and shiny to textured with subtle sparkle. It DOUBLES your embossing powders! It’s a jar of MAGIC!
5. By combining Frosted Crystal Embossing Powder with colored embossing powders, the embossing powders are changed from smooth and shiny to textured with a matte finish. It too doubles your embossing powders. It too is a jar of MAGIC!
6. I say this with every post…but I’ll say it again. Glue N’ Seal is THE BEST paper adhesive in the whole wide world!
7. This little art can be displayed on an easel or you could punch holes at the top, add wire and make it a hanging piece.
8. PS…don’t eat the LOW CAL cookies!

