


by Patti Behan

Father’s Day Card by Patti Behan
- Materials
- Instructions
- Ranger Adhesive Strips
- Ranger Multi-Medium Matte
- Ranger Non-Stick Craft Sheet™
- Tim Holtz Distress® Collage Brushes
- Tim Holtz® Distress Collage Mediums: Crazing
- Ranger Mini Blending Tool
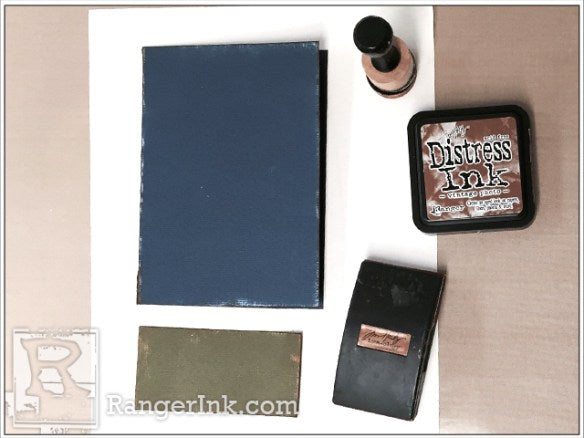
- Tim Holtz® Distress Ink Pad: Vintage Photo
- Tim Holtz Distress® Marker Spritzer
- Tim Holtz® Distress Markers: Pine Needles, Mustard Seed, Chipped Sapphire
- Archival Ink™ #0 Pads: Olive & Cobalt
- Core’dinations Kraft Core Cardstock Green
- Navy Cardstock
- Tim Holtz idea-ology-Sanding Grip, Trinket Pin, Typed Charm
- Tim Holtz by Stamper’s Anonymous Stamp Sets – Halftone & Rings and Vintage Auto
- Tim Holtz by Tonic Studios – Kush Grip Snips
- Tim Holtz Alterations by Sizzix – Thinlits: Daily Words-Block; Holiday Words 2-Script
- Scrap Paper, Paper Towels
Instructions


Step 1: Cut Navy Cardstock to 6-1/4” x 9”; Kraft Cardstock to 4” x 5-3/4”, Green Cardstock to 4” x 2” and Mixed Media Cardstock to 3-1/2” x 8” and 3-3/4” x 4-1/2”. Save scraps from Green and Navy Cardstock to cut out the letters.
Step 2: Score Navy Cardstock in half to make a 4-1/2” x 6-1/4” card. Working on a piece of scrap paper, use the Sanding Grip to distress the edges. Ink the edges with Vintage Photo ink using the Blending Tool with Foam. Distress and ink the edges of the 4” x 2” green cardstock the same way.

Step 3: Working on the Non-Stick Craft Sheet, ink the Halftone Stamp with Olive Archival Ink and stamp onto Kraft Cardstock.
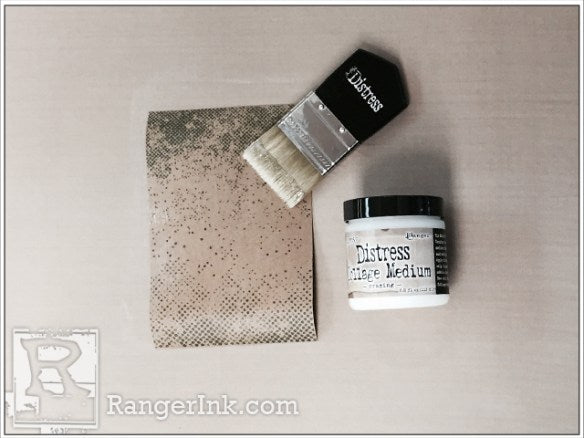
Step 4: Apply a medium coat of Crazing Medium with the Collage Brush. Set aside to dry.

Step 5: Ink the Antique Car stamp with Cobalt Archival Ink and stamp image onto the 3-3/4” x 4-1/2” Mixed Media Cardstock.

Step 6: Cut out the image and ink the edges with Vintage Photo using the Blending Tool.

Step 7: Place the argyle stencil over the 3-1/2” x 8” Mixed Media Cardstock. Place Pine Needles Marker into Spritzer and lightly spritz in a random fashion through the stencil. Repeat with Chipped Sapphire Mustard Seed Markers until you are satisfied with your background. I chose to have a background that wasn’t heavy on the ink.

Step 8: Cut a 1-1/2” x 5-3/4” rectangle from the argyle background, and ink the edges with Vintage Photo. Ink the edges and all over the crazed Kraft background with Vintage Photo.

Step 9: Paint Trinket Pin and Typed Token with Chipped Sapphire Distress Paint. Wipe excess off with a paper towel and let dry.

Step 10: Cut out the words “Happy” and “Day” from Navy cardstock. Use the Daily words dies to cut out “Father’s” from green cardstock. Glue the pieces together as shown. Use Multi Medium for the letters and Adhesive Strips for the rest.

Related Posts

Dylusions Neon Ink Sprays Journal Page by Miranda van den Bosch
Neon color takes center stage on this eye-catching journal page by Miranda van den Bosch! The newest...
Read More
Tim Holtz Distress Paint Summer Card by Tami Bastiaans
Bring the beach to your craft table! Tami Bastiaans created this bright summer card using Distress Texture Paste, Paints,...
Read More