


By Anna-Karin Evaldsson

Heart Butterfly Tag By Anna-Karin Evaldsson
- Materials
- Instructions
- Tim Holtz Distress® Sprayer
- Ranger Pipettes
- Dina Wakley Media Palette Knife
- Tim Holtz® Alcohol Ink Applicator
- Ranger Mini Blending Tool
- Ranger Heat it™ Craft Tool
- Ranger Non-Stick Craft Sheet™
- Perfect Pearls™ Pigment Powder Perfect Pearl
- Embossing Powder Verdigris
- Perfect Medium™
- Ranger Emboss It™ Ink Pad
- Ranger Emboss It™ Dabber
- Tim Holtz® Alcohol Inks: Juniper, Lettuce, Rust, Teakwood, Pitch Black
- Archival Ink™ Designer Series: Wendy Vecchi Red Geranium
- Tim Holtz® Distress Ink Pads: Candied Apple, Cracked Pistachio, Hickory Smoke
- Ranger Metal Foil Tape Sheets
- Ranger Craft Tags: Manila
- Tim Holtz by Stamper’s Anonymous – Distress Damask, Watercolor, Love Struck, Nature Walk
- Tim Holtz Alterations by Sizzix Dies – Heartfelt, Layered Wings
- Tim Holtz idea-ology Grungeboard; Postale Tissue Wrap; Crinkle Ribbon; Frames & Trims Industrious Stickers; Occasions Small Talk Stickers
Instructions
Hello everyone! It is Anna-Karin here with you today, with a tutorial for a Valentine’s tag, using a bunch of fun techniques with Alcohol Ink, Perfect Pearls and Distress Paint.

I made a Valentine’s tag, but the techniques would work for a lot of different themes, just use different images and colours. It is always fun to alter metal and here I used alcohol ink and embossing powder. There is also quite a bit of Perfect Pearls on the tag, which is hard to see on this photo. In real life, this tag really shines and shimmers.
 Step 1: Start by adhering tissue wrap to a manila tag, using Gel Medium.
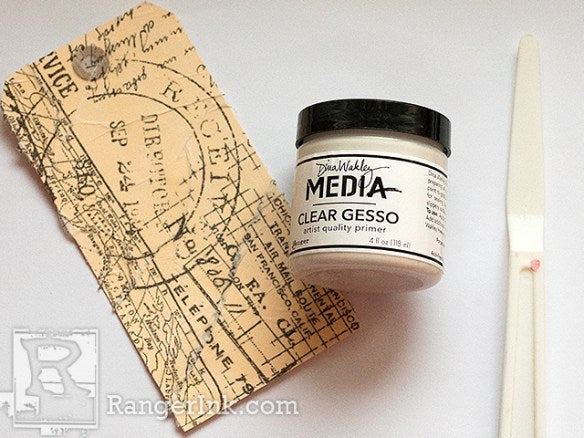 Step 2: Cover the tag with Clear Gesso, which gives great tooth for paint to adhere to, something that worked well in this case, since paints, especially watery paint, tends to bead up on the slick surface of the tissue wrap.
 Step 3: White-wash with Picket Fence.
 Step 4: Paint with watered-down Candied Apple, Victorian Velvet and Cracked Pistachio. I like to add a little bit of paint to a palette and apply the water to the paint with a pipette. It gives more control and is less messy than using a sprayer. When the paints had been applied to the tag, I sprayed them to get them to blend more.
 Step 5: When the paint is dry, stamp with Archival Inks.
 Step 6: Dry-brush a little Black Soot around the edges and here and there. If you want your tag to be brighter, leave out this step.
 Step 7: For the hearts, adhere a foil tape sheet to grungeboard.
 Step 8: Die cut one large and three small hearts with the Tim Holtz Sizzix Heartfelt die.
 Step 9: Make marks in the metal with a paper piercer, old ballpoint pen and a Mini Attacher without staples.
 Step 10: Colour the hearts with Alcohol Inks. I used Juniper, Lettuce, Rust, Teakwood, and Black Soot, but other combinations work well too.
 Step 11: Apply a tiny bit of embossing ink to the hearts, sprinkle Verdigris powder on top and melt with a Heat Tool. Don’t touch the metal or the powder since it gets very hot.
 Step 12: Die cut three layered wings from manila cardstock.
 Step 13: Stamp the wings with Picket Fence paint. Remember to always clean your stamps immediately after using them with paint.
 Step 14: When the paint is dry, ink with Candied Apple and Cracked Pistachio. The paint resists the ink.
 Step 15: Ink the edges slightly with Hickory Smoke and dry with a Heat Tool to make sure the ink is dry. Dye a piece of Crinkle Ribbon with Hickory Smoke.
 Step 16: Stamp with Emboss It Clear Ink or Perfect Medium and apply Perfect Pearls, Perfect Pearl colour, with a paint brush.
 Step 17: I also misted the tag with Perfect Pearls mist, to give it a lovely pearlescent look.
 Step 18: The Perfect Pearls gives a lovely subtle pearl effect to the wings, which is hard to photograph. You might see it better in this photo.
 Step 19: The heart has a gorgeous distressed metallic look to it, and the embossing powder adds nice texture.
 Step 20: Once I had glued the heart to the wings, I realised it looked like a butterfly, and added antennas with wire.
 Step 21: The small hearts were glued at the top of the tag.
 I hope you enjoyed this tutorial. Thank you so much for watching! Happy crafting! Anna-Karin

Related Posts

49 and Market Mistletoe and Memories Journal Page by Jessica Mikels
Read More

Dylusions Reusable Nesting Gift Boxes by Lauren Bergold
Wrap your holidays with handmade magic! Lauren Bergold decked out these Dylusions nesting boxes for the holidays! Serving as reusable gift...
Read MoreDrawer Title
- Choosing a selection results in a full page refresh.