


Instructions
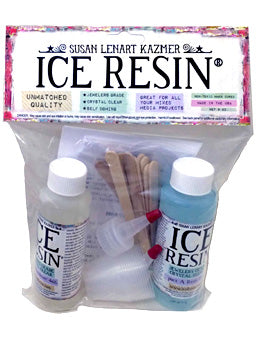
How to use ICE Resin®
- Materials
- Instructions
Instructions
The most important thing to consider when mixing ICE Resin® is to remember that it is a two-part epoxy resin. Part A is the resin and Part B is the hardener. It works on a one-to-one ratio, meaning equal amounts of both resin and hardener must be used together. An accurate measurement is essential to success.
Mixing ICE Resin®
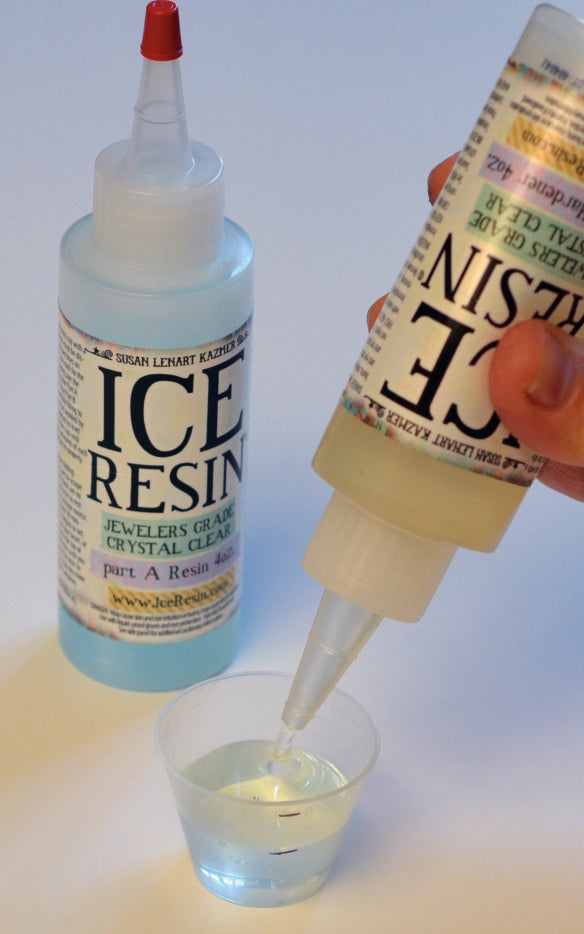
To begin mixing, use the plastic measuring cups provided in the kit. Begin pouring the Part A resin into a measuring cup.
Stop pouring when you have filled half the cup (1 TBS or 4 drams) with Part A resin.
Add an equal amount of Part B hardener on top of the resin (use the same cup) and fill to the 2 TBS or 8 dram mark.
TIP: Use a Sharpie marker to draw a visible line at the 4 dram and then again at the 8 dram mark to make it easier to measure.
TIP: It’s best to pour the resin first and then the hardener second because the resin is denser and it makes for a more accurate measurement.

Begin mixing the two parts together with a craft stick, gently folding the resin and hardener into each other. As you mix, tiny bubbles will form and the color will turn slightly opaque. Don’t worry, as ICE Resin® is chemically engineered to self-correct.
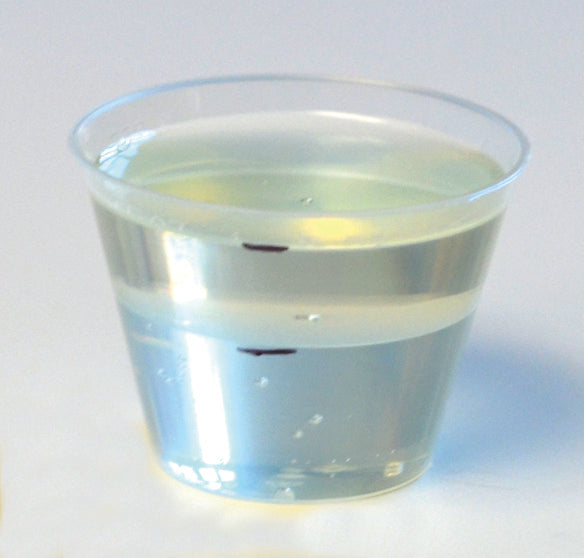
After about a minute of folding, your resin and hardener will begin to blend, then switch to a stirring action. Be sure to scrape down the sides of the mixing cup as your stir and ensure that you’ve “lifted” the resin from the bottom of the cup as you folded the two parts together. Continue mixing thoroughly for a full 2 minutes.
When you have mixed for 2 full minutes, set the mixed resin aside for 5 minutes to rest. This small amount of time will allow its self-leveling chemistry to continue activating, which will help dissipate the tiny bubbles caused during mixing. This is a very important step to create crystal clear bezels. Please do not rush the process, as the small wait time yields noticeable results.

TIP: If your studio is colder than 65 degrees, place the mixed resin under a warm task lamp for 5 minutes, as the heat will help activate the process. If you closely watch your mixed resin during this time, you will see teeny tiny bubbles rising to the surface and popping.
Pouring ICE Resin®
Using the same craft stick that you used for mixing, begin to slowly drip the resin into your bezel. Take your time and work in a controlled manner, dripping enough to fill your bezel just shy of its top.

To easily create a beautiful dome (rounded bubble-like top) on your bezel, it’s best to pour in stages. For the first pour, stop before the liquid reaches the top and let dry. Once the bezel is dry, mix up a smaller batch of ICE Resin® and slowly drip into your bezel, watching for the natural dome effect caused by the surface tension of the resin.

TIP: If you are working with a small bezel, the surface pressure of the bezel combined with the resin’s natural drop shape creates an easy dome in one pour.
Do not move your bezel after pouring. Let your project sit, but check on its progress about 30 minutes after finishing the pour to watch for any wayward bubbles. You can easily pop the bubbles with the end of a toothpick or piece of metal wire while the resin is still in its liquid resting state.
ICE Resin® works best when measured carefully, mixed thoroughly and then left alone to work its chemistry. A little bit of patience is the key to perfection.
Discard all measuring cups and craft sticks after mixing and pouring. They should not be reused so as to not contaminate a fresh batch of mixed resin.
TIP: Sometimes your bezels do not lay perfectly flat, particularly if you are using pre-made ring blanks or bracelet cuffs. A simple way to fashion a level surface is to cut a slit into a sponge. Nestle your bezel into the slit in the sponge and push down slightly to secure. Drip resin into your bezel, stopping just shy of the top. Leave the bezel resting inside the sponge until dry.
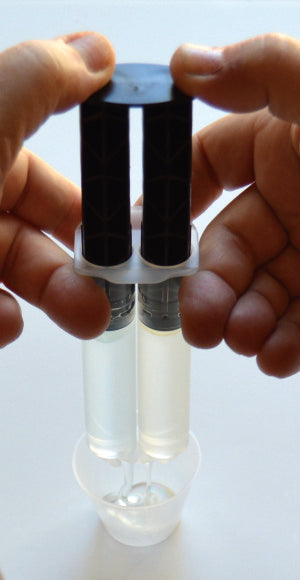
How to Use the ICE Resin® Plungers:
ICE Resin® comes in a 25ml size with a two-part plunger delivery system that’s taken the measuring out of the equation. With your thumbs, place equal pressure on both plungers and squeeze into a mixing cup. Mix and pour as per the above instruction. The best part about this delivery system is that you can mix a small amount for one or two bezels and save the rest for your next project.

Drying and Curing:
It doesn’t matter if you’re pouring a small shallow bezel, a deep welled bezel, a large mold or coating a piece of paper, the drying time is the same. As long as it’s measured carefully and mixed thoroughly, ICE Resin® takes anywhere from 6 to 10 hours to dry. If the room is on the cooler or humid side, it can take as long as 12 hours to dry. If your bezel is still sticky or tacky after 24 hours, something went awry in the measuring or mixing part of the process.
Once dry, it will feel completely smooth to the touch, like glass, and will look crystal clear. You can work with your bezels or resin paper as soon as they are dry to the touch.
The resin takes 3 days to cure, but this just means that you won’t want to put your newly-made pieces in an airtight container because a lack of oxygen while the resin is curing could possibly cause your pieces to turn cloudy. Once the resin is fully cured, it will be rock hard and crystal clear forever.
Clean Up:
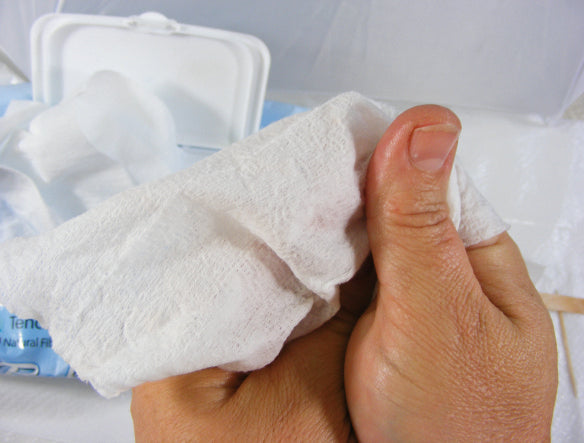
If you pour too much and it drips down the sides of your bezel, you can gently clean the sides with the tip of a baby wipe. (Do not use water. Resin is an oil-based product and oil-and-water doesn’t mix well). Baby wipes have a touch of mineral oil in them which is why they work well. Set aside to dry. If the crevices are tight, wad the baby wipe into tip to work it into the crevice, or cut a piece of baby wipe and wrap it around a cotton swab. Clean any of your spills within 3 days of your pour. Once ICE Resin® is cured, it stays rock hard and glass like and it takes lots more effort to get the spills filed off.
Shelf Life:
ICE Resin® should be used within one year to 18 months of purchasing. While unopened bottles have an indefinite shelf life, once you open your bottles, air will slowly affect the hardener over time, causing it turn darker yellow in color. If your hardener has yellowed, don’t worry, it’s most likely still good. To be safe, pour a test bezel or a practice piece of paper before tackling a large or important project.
If your resin is white and cloudy or has a really yellow tint in your cup after it has been mixed, it’s past its shelf life. Whatever it looks like in your cup after it’s been mixed is what it will look like in your bezel or on your project. However, this only affects the clarity. You can still use this resin by tinting it and then using it for casting. Even resin past its shelf life will still properly cure.
Safety Precautions:
Always make sure there is adequate ventilation in your workspace. If you are pouring large batches of epoxy resin at one time – 100 or more bezels for example or a sealing a particularly large painting for instance, please wear a mask and use fans for additional ventilation. Health and safety for working artists are always an issue with any medium involving chemicals. Please take normal safety precautions when working with cured resin, such as sanding or filing, by wearing a mask so dust particles are not inhaled.
Related Posts

Tim Holtz Distress® Micro Glaze Embossing Resist by Tami Bastiaans
Create gorgeous embossed backgrounds with the Micro Glaze Embossing Resist technique! ✨ Tami Bastiaans pairs Tim Holtz Distress® Micro...
Read More
Dina Wakley Media Flower Pastel Journal Page by Doreen Dilger
In this art journal tutorial, Doreen Dilger demonstrates a mixed media flower pastel journal page using a pink, yellow...
Read More