


Joy Baldwin shares how she creates an all occasion greeting card using Letter It products. In this tutorial, you will learn simple techniques for adding dimension & shine to your cards with Texture Paste & Liquid Pearls.
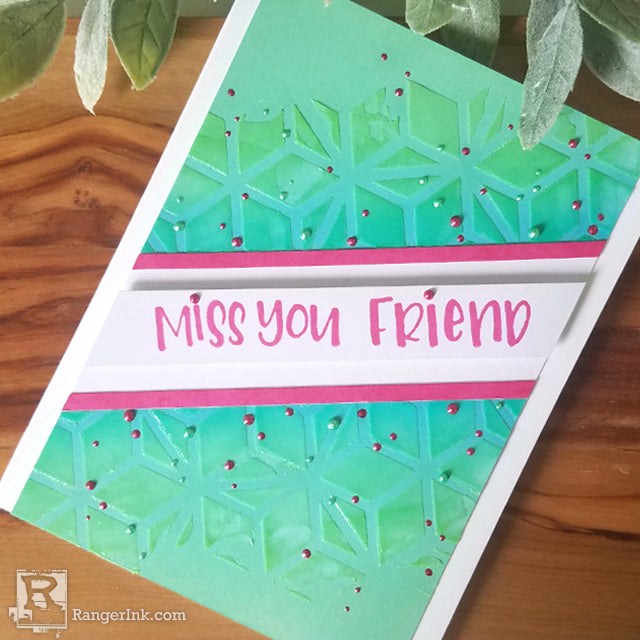
Miss You Friend Card by Joy Baldwin
- Materials
- Instructions
- Letter It™ White 4.25x5.5 Cardstock
- Letter It™ Stamp Set: Greetings
- Letter It™ Stencil" Puzzled Mosaic
- Letter It™ Archival Ink: Wild Berry
- Ranger Adhesive Foam Tape: White
- Ranger Texture Paste Transparent Gloss
- Letter It™ Acrylic Stamping Block
- Ranger Multi Medium Matte
- Ranger Mini Ink Blending Tool & Foam
- Ranger Non-Stick Craft Sheet
- Ranger Liquid Pearls: Raspberry, Mint Green
- Tim Holtz Distress Oxide Ink: Peacock Feathers, Cracked Pistachio
- Simon Hurley Stark White Cardstock
- Dina Wakely Media Palette Knife
Instructions

Step 1: Using a piece of low tack tape, tape off a section of Letter It White Cardstock at a diagonal. Then use Tim Holtz Distress Oxide Inks with Ranger's Mini Ink Blending Tool/Foam to ink up the cardstock.

Step 2: Starting on both sides of the tape, use Peacock Feathers and a Mini Ink Blending Tool to blend the color out a short way. Then use Cracked Pistachio and blend into Peacock Feathers and to the rest of the card panel.

Step 3: Using Ranger's Non-Stick Craft Sheet as your work surface, adhere Letter It's Puzzled Mosaic Stencil with low-tack tape on top of the inked card panel. Then use the Palette Knife to spread the Texture Paste over the stencil.


Step 4: Only spread the Texture Paste over the center, don't go all the way to the edge of the card panel. Remove tape immediately before the Texture Paste dries. Set aside to dry. The Texture Paste will dry clear and glossy.

Step 5: Using the Letter Acrylic Block and Letter It's Greeting Stamp, stamp the sentiments onto a trimmed piece of White Cardstock with Letter It's beautiful Wild Berry Archival Ink.

Step 6: Take the Wild Berry Archival Ink pad, directly to the White Cardstock until you get a solid color.

Step 7: Trim two thin pieces of the Wild Berry inked cardstock.

Step 8: After the stenciled background is dry, trim 1/4” off the right and left side of the panel.

Step 9: Using Ranger's Mutli Medium Matte Glue, adhere the two pieces of Wild Berry inked cardstock on both sides of the white center part of the panel. Trim off any excess paper.

Step10: Adhere Ranger's Adhesive Foam to the back of the sentiment strip. This will add dimension to the card front.

Step11: Center the sentiment strip in the white opening in the center of the card and trim off any excess from the sides.

Step12: To finish the card, adhere the front panel to a piece of Simon Hurley's Stark White Cardstock, cut to an A2 sized card base with Multi Medium Matte. Embellish by placing dots of Liquid Pearls in Raspberry and Mint Green on the inked panel.
 Hi! my name is Joy Baldwin, AKA, Create it with Joy. I am a wife and a mother to 3 kids and 3 crazy animals. I run and cook for a small community kitchen in our city (it's a great feeling to serve), I homeschool my 2 youngest kids (maybe I'm crazy) and am a part-time Nail Tech. I absolutely LOVE the creative process of making cards and the tutorials that go along with them. Also, the community of wonderful crafters and the friendships that follow. Find me at www.createitwithjoy.com.
Related Posts

Dylusions Neon Ink Sprays Journal Page by Miranda van den Bosch
Neon color takes center stage on this eye-catching journal page by Miranda van den Bosch! The newest...
Read More
Tim Holtz Distress Paint Summer Card by Tami Bastiaans
Bring the beach to your craft table! Tami Bastiaans created this bright summer card using Distress Texture Paste, Paints,...
Read More