


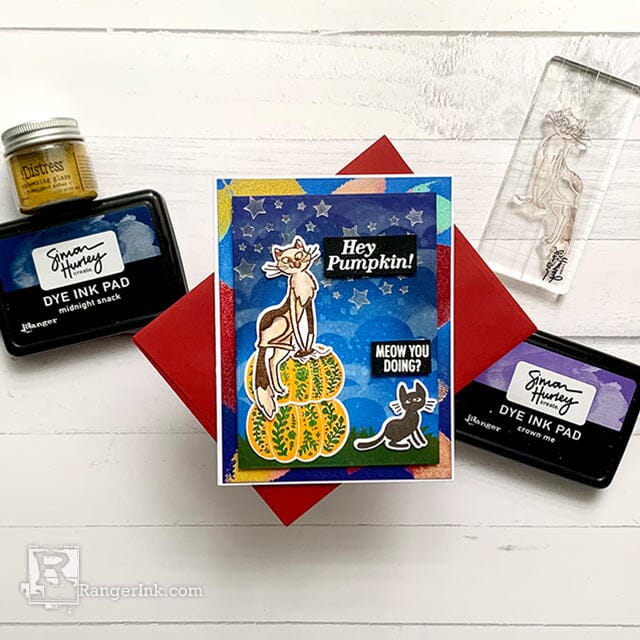
Join Lieschen Harshbarger in this tutorial as she brings together the latest Simon Hurley create. products to craft a colorful, purr-fect pumpkin card.
Simon Hurley create. Purrs and Pumpkins Card by Lieschen Harshbarger
- Materials
- Instructions
Simon Hurley create. Photopolymer Stamp Purrfect Cats
Simon Hurley create. Spellbinders Purrfect Cats Die
Simon Hurley create. Stamp & Die Set Fall Sampler
Simon Hurley create. Cling Stamp Leaf Prints
Simon Hurley create. Stencil 6x6 Scene Maker
Simon Hurley create. Lunar Paste Cookie Dough
Simon Hurley create. Dye Ink Pad Viper
Simon Hurley create. Dye Ink Pad Fake Plant
Simon Hurley create. Dye Ink Pad Guppy
Simon Hurley create. Dye Ink Pad Shady
Simon Hurley create. Dye Ink Pad Cookie Dough
Simon Hurley create. Dye Ink Pad Weeping Willow
Simon Hurley create. Dye Ink Pad Midnight Snack
Simon Hurley create. Dye Ink Pad No Diving
Simon Hurley create. Dye Ink Pad Crown Me
Simon Hurley create. Stark White Cardstock
Simon Hurley create. Acrylic Stamping Blocks
Simon Hurley create. Acrylic Stamping Block 5x6
Wendy Vecchi MAKE ART Perfect Card Adhesive
Tim Holtz Distress® Black Heavystock
Tim Holtz Distress Embossing Glaze Cracked Pistachio
Tim Holtz Distress Embossing Glaze Lumberjack Plaid
Tim Holtz Distress Embossing Glaze Aged Mahogany
Tim Holtz Distress Embossing Glaze Fossilized Amber
Tim Holtz Distress Embossing Glaze Tattered Rose
Tim Holtz Distress Embossing Glaze Abandoned Coral
Tim Holtz Distress Sprayer
Ranger Artist Brushes
Ranger Glossy Accents
Liquid Pearls™ Ballerina
Ranger Heat It™ Craft Tool
Ranger Silicone Mat
Ranger Mini Ink Blending Tool
Ranger Mini Ink Blending Tool Domed Replacement Foams
Emboss It™ Ink Pad Clear
Embossing Powder Super Fine White
Tim Holtz® Tools by Tonic Studios – Trimmer
Other:
Foam Sheet
Rectangle Nested Dies
White Pigment Ink
Die Cutting Machine
Scor board
Envelope
Instructions
Hi crafty friends! I’m very excited to share with you today’s card tutorial. I was inspired by my recent fall time trip to Indiana – seeing all the changing leaves and hanging out at my sister-in-law’s house out in the country. This tutorial features stamps and dies from Simon Hurley’s latest release. I really enjoyed making this card! And I hope it gives you inspiration to do something fun and creative today!

Step 1: Begin by creating an A2 card base out of Stark White card stock by trimming an 8½” x 11” piece of cardstock at 5 ½” then scoring it at 4 ¼”. Next, trim the front panel piece out of Stark White cardstock measuring 5¼” x 4”.
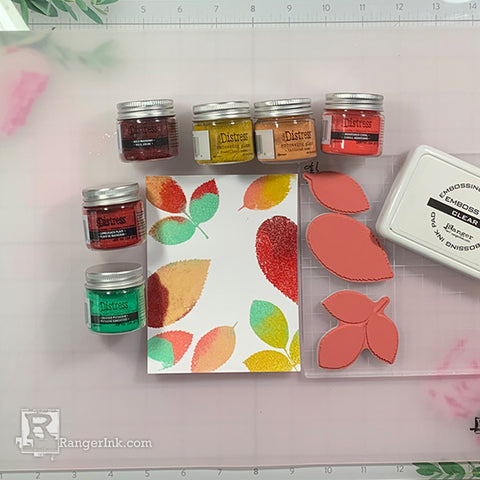
Step 2: On the front panel piece, stamp leaves from the Leaf Print stamp set using Emboss It ink. Then, use Cracked Pistachio, Lumberjack Plaid, Aged Mahogany, Fossilized Amber, Tattered Rose, and Abandoned Coral embossing glazes to heat emboss the leaves.

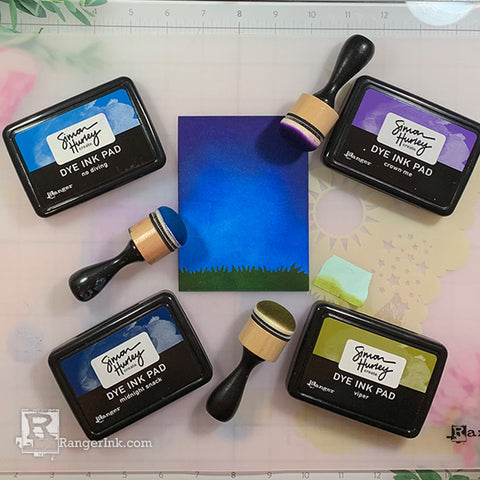
Step 3: Then, ink blend the front panel background with a mini blending tool and use Midnight Snack, No Diving, and Crown Me inks.
Step 4: Next, use a rectangle nested die to die cut a rectangle piece out of Stark White cardstock.

Step 5: Use the Tim Holtz Distress sprayer to spray some water on the inked background from step 4.

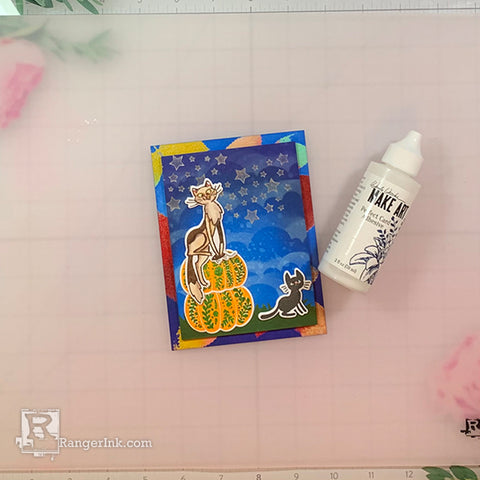
Step 6: Then, use white pigment ink to add some clouds with the Scene Maker stencil.
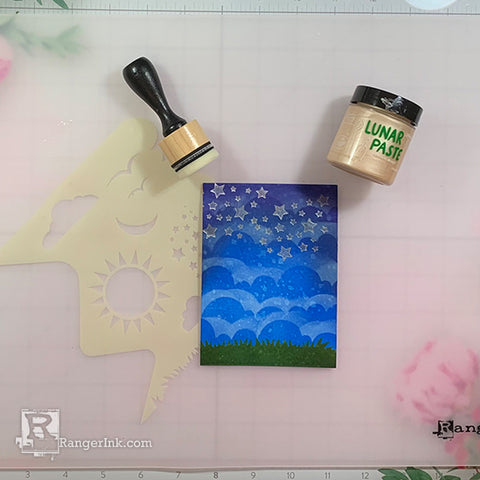
Step 7: Next, add some stars to the background using Cookie Dough Lunar Paste and the Scene Maker stencil. Apply the Lunar Paste with the mini ink blending tool.
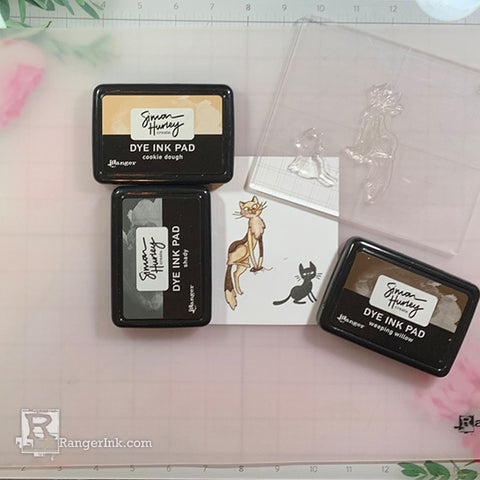
Step 8: On a separate piece of Stark White cardstock, stamp two of the cat images from the Purrfect Cats stamp set. Use Shady ink to stamp the smaller cat and for the large cat image use Weeping Willow. Then, use Cookie Dough ink with a brush to color in the rest of the image.
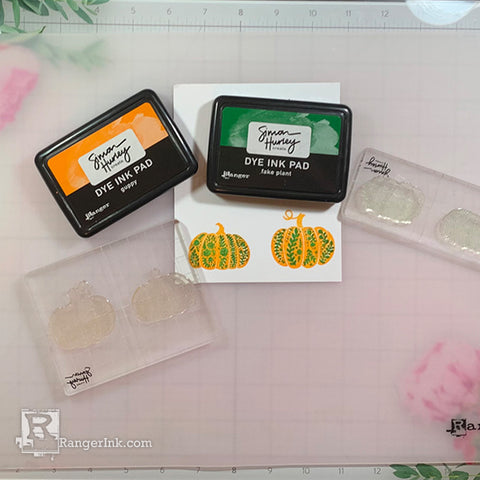
Step 9: On the same piece of card stock, stamp two pumpkins from the Fall Sampler stamp set. Use Guppy and Fake Plant to stamp the images.
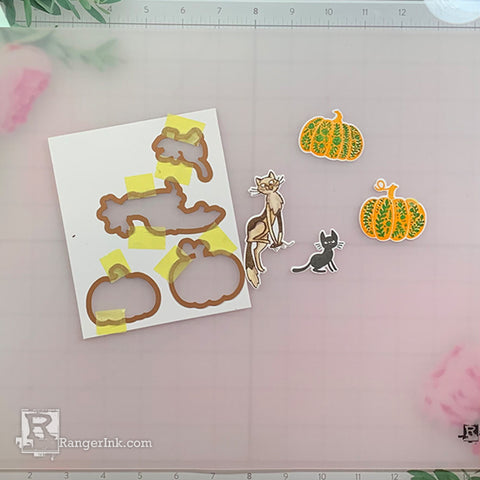
Step 10: Use the coordinating dies of the Purrfect Cats stamp set and die cut the images from step 8 and 9 using a die cutting machine.
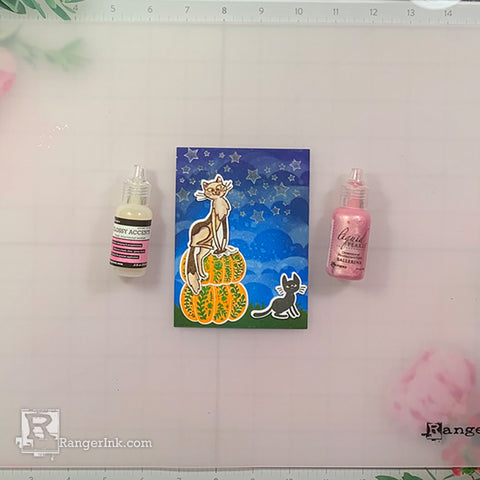
Step 11: Glue the die cut pieces onto the rectangle die cut background from step 4. Next use Glossy Accents on the eyes of the cat images and Ballerina Liquid Pearl on the noses and ears of the cats.

Step 12: Trim a piece of foam sheet to glue on the back of the rectangle background using Wendy Vecchi MAKE ART Perfect Card Adhesive.
Step 13: Use Wendy Vecchi MAKE ART Perfect Card Adhesive to glue rectangle die cut from step 12 onto the leaves background from step 2.
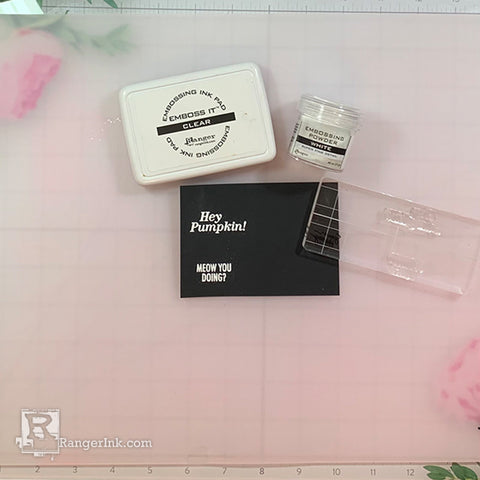
Step 14: On a piece of Tim Holtz Distress Black Heavystock, stamp a sentiment from the Purrfect Cats stamp and another sentiment from the Fall Sampler using Emboss It ink. Then heat emboss with white embossing powder. Next, trim the pieces and use foam tape to tape them to the rectangle background.

Step 15: Glue the background to the card base and pair the card to a complimentary envelope. Now it’s ready to be sent to a loved one this fall season!
 Hi! My name is Lieschen Harshbarger. I’m married to my best friend and even though we don’t have children yet, our dog Sophie fills our hearts with lots of love and joy. By day, I work for the State of Texas, but during my evenings and weekends you’ll find me in my craft room – making cards and trying out new techniques with my crafty supplies. I enjoy being creative, but mostly I have enjoyed getting to know others and learning fun new things in this wonderful crafty industry! You can see more of my crafty projects on my blog Harshgurl and Instagram at @harshgurl.

