


Hi there crafty friends! It’s Cheiron here and today I am sharing a tutorial to create a fun stars and stripes journal page. I love the 4th of July and I also love family history, On my mom’s side, we can trace our ancestry all the way back to the Revolutionary War. The page I made today reflects that, with the 7 silhouettes in my background and one on the tag reflecting the eight generations I can trace back to the patriot in my family.
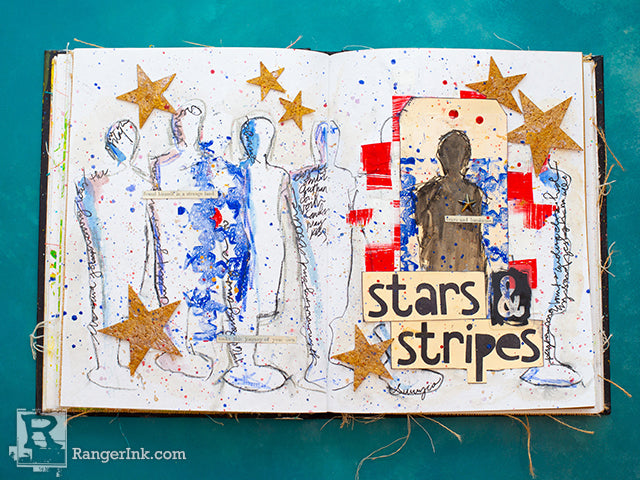
Stars and Stripes Journal Page by Cheiron Brandon
- Materials
- Instructions
- Dina Wakley Media Journals
- Dina Wakley Media Acrylic Paints: White, Ruby, Lapis, Buff, Gilt, Ancient
- Dina Wakley Media Stencils & Masks: Variegated Stars, Giant Funky Silhouettes
- Dina Wakley Media Brushes
- Dina Wakley Media Scribble Sticks
- Dina Wakley Media Mediums and Gessoes: Gel Medium, Ultra Thick Gel Medium
- Gel Plates
- Fude Ball Pen: Black
- Ranger Craft Tags: #8
- Tim Holtz Clippings Stickers
- Tim Holtz Idea-ology Cutout Lower Cling Foam Stamps th93700
- Tim Holtz Metallic Stars
- Stabilo All Pencil
Instructions

Step 1: For the background of my page, I knew I somehow wanted to incorporate stars and stripes into it, so I made my own out of collage paper and paint using a Gel Plate.
I used the blank sheets from the Dina Wakley Media Collage Paper. (There are 10 blank sheets in addition to the patterned sheets in each pack).

Step 2: I painted stripes using Dina Wakley Media Paint in Ruby and White onto my Gel Plate, then printed them onto the collage paper. I picked up any excess paint with tags and scraps I had on my table.

Step 3: To make the star pattern, I painted Lapis paint onto my Variegated Stars stencil, then pressed it onto my Gel Plate before picking it up with the collage paper.

Step 4: Now I have a few pieces of starred and striped paper waiting for my journal page.

Step 5: I then took the Giant Funky Silhouette Mask and traced it across my journal page seven times, spreading them out.

Step 6: I cut up the striped strips and started arranging them and adhering them with Gel Medium to make a focal point for my tag where I wanted to put the eight figures.
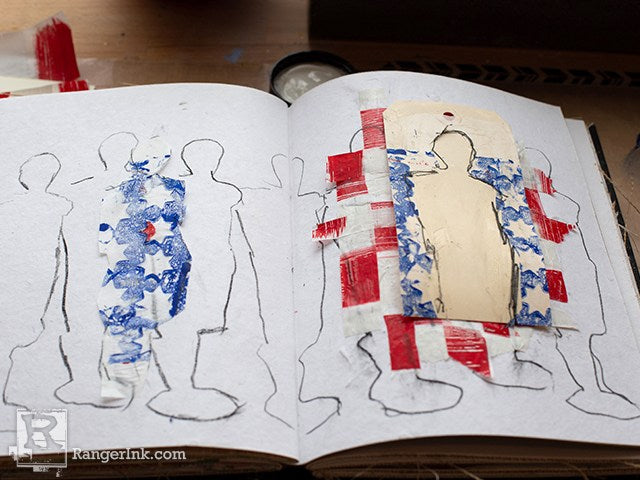
Step 7: I traced another silhouette onto my star paper and put the cutout onto the page and the outline onto my tag to help create to focal image.

Step 8: To create my words “stars” and “stripes” I used Tim Holtz Cutout Lower Cling Foam Stamps and Jet Black Archival Ink.
I stamped the words onto manila cardstock and cut them out, then inked the edges.

Step 9: I then took watered down paints in Buff, Lapis, Gilt and Ruby and painted around the figures and added lots of splatter for interest.
Once the splatter dries, it is time to finish the page.

Step 10: I cut some stars from cork paper and painted them using Gilt and Ancient paints. These will be used to finish the page.

Step 11: Using Dina Wakley Ultra Thick Gel Medium, I glued my tag in, then painted the inner silhouette with watered down Black paint. I also used the Ultra Thick Gel Medium to adhere the cut out words. I added some shading with Scribble Sticks to make the images pop.

Step 12: I glued on the stars and decided to add some of my own writing to the figures, including some information about the names of the ancestors in my family and a little bit about where they were from with a Fudeball pen. Once this was dry, I added Clippings stickers to finish the page. For the final step, I used a wet paintbrush to flick some more color from my scribble sticks all over the page.


Hope you enjoyed this tutorial, wishing you and your family a very Happy 4th!

Related Posts

"My Cup of Care" Journal Page with Dylusions Pastel Paints by Miranda van den Bosch
Read More

Tim Holtz Distress® Micro Glaze Embossing Resist by Tami Bastiaans
Create gorgeous embossed backgrounds with the Micro Glaze Embossing Resist technique! ✨ Tami Bastiaans pairs Tim Holtz Distress® Micro...
Read MoreDrawer Title
- Choosing a selection results in a full page refresh.