


Guest designer Audrey Pettit shares a clever and oh so pretty fall decor piece that is sure to add a warm touch to your fall home decor!

Thankful Hanging by Audrey Pettit
- Materials
- Instructions
- Ranger Ink Blending Tool & Foam
- Ranger Mister
- Ranger Non-Stick Craft Sheet™
- Ranger Heat it™ Craft Tool
- Stickles™ Glitter Glue: Stardust
- Tim Holtz® Distress Glitter: Rusty Hinge
- Tim Holtz Distress® Rock Candy Crackle Paint
- Tim Holtz® Distress Stains: Wild Honey, Peeled Paint, Ripe Persimmon
- Tim Holtz® Distress Ink: Frayed Burlap, Peeled Paint, Mustard Seed, Spiced Marmalade, Fired Brick
- Archival Ink™ Jet Black
- Recycled Corrugated Cardboard
- Cotton Batting
- Tim Holtz Sizzix Vagabond Die Cutting Machine, Base Tray
- Tiny Attacher
- Pinking Shears
- Acorns
Instructions

Dab Wild Honey and Peeled Paint Distress Stain randomly onto a non-stick craft sheet, and spritz the stain liberally with a Mister Bottle.

Take a #10 manila tag and press the tag down into the stain mixture, moving and swiping the tag to make sure it is fully covered in the stain. Take a second manila tag and swipe it through the remaining stain. Cut approximately 2.5’ of crinkle ribbon, and use the ribbon to mop up any remaining stain mixture on your sheet. Dry both tags and the crinkle ribbon with a heat tool.
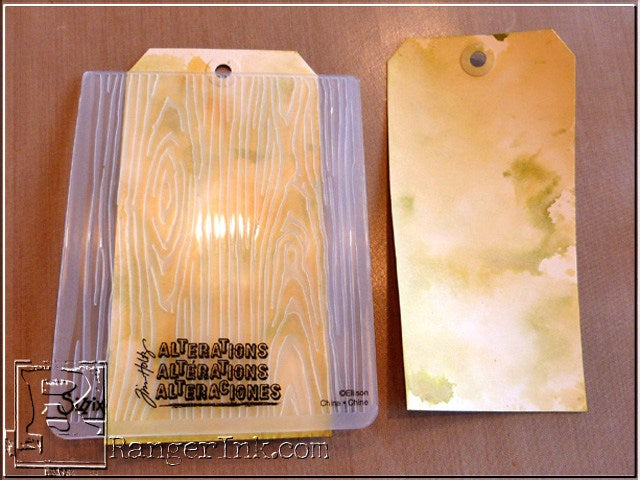
Make a slit in the crease of the Woodgrain Texture Fade embossing folder, so that the top of the tags can slide through the opening and poke about ½” out the top of the folder. Emboss both tags in this fashion using a Vagabond die cutting machine.

Highlight the raised embossed pattern by applying Peeled Paint Distress Ink to the raised portion of the tags using an ink blending tool.

Add Frayed Burlap Distress Ink to just the edges of both tags using an ink blending tool.

Spritz a generous amount of water into your hand using the Mister Tool, and then flick the water onto the tags. This is a subtle detail, but water reacts with the Distress Ink to create some really amazing droplets and splatters.

Apply some random stripes of Star Dust Stickles to both tags….

…and working quickly before the glitter dries, drag a scrap piece of chipboard across the tags from top to bottom, filling in some of the recessed areas with glitter and removing the excess. Allow the Stickles to dry for a few minutes, and then you can finish up the process with the heat tool.

Lightly adhere the tags side-by-side to a piece of cotton batting that is slightly larger than the tags. Use a strong tacky glue or red-line adhesive for this step, but only place the adhesive in the center of the tags, leaving the edges adhesive-free for sewing.
Use a Zig-zag stitch to stitch around the edges of the tags, as well as down the center where the two tags meet. Trim around the batting using a pinking shear, leaving about a ¼” allowance all around.

Cut two pieces of the dyed crinkle ribbon large enough to span the front of the hanging and tie into a knot. Wrap one end around to the back of the hanging, about a third of the way down from the top, and secure the ribbon end with the Tiny Attacher staples. Attach the other piece to the other side of the hanging in the same fashion, and then tie the two pieces together in the front. Cut about 8” of the ribbon off to use as the hanger, and then loosely create a figure 8 with the remaining ribbon by wrapping it around your fingers. Pinch the ribbon together in the center, then tie the loops into the knot on the front of the hanging.

Cut a piece of recycled cardboard that is slightly larger than the tags and batting, and peel off the top layer of the cardboard to reveal the corrugation underneath. Using the Adirondack Sandal Paint Dabber, apply paint to the very edges only of the cardboard.

Adhere the tags and batting layer to the cardboard base using a strong adhesive or tacky glue. Punch holes through the top of the tags, and tie the remaining crinkle ribbon through the holes to create the hanger.
Now the base of the hanger is done and it’s time to move onto the leaves.
First we need to add color to some pieces of manila cardstock using a variety of fall Distress colors.

Dab Mustard Seed and Spiced Marmalade Distress Ink onto the craft sheet and mist with water. Dip one piece of cardstock into the ink mixture and dry with a heat tool.
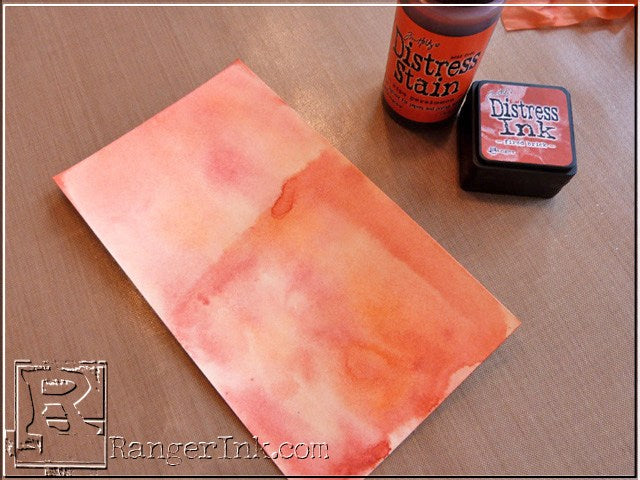
Dab Ripe Persimmon Distress Stain and Fired Brick Distress Ink onto the craft sheet and mist with water. (Either stain or ink would work here. I’m just using what I have on hand.) Dip a second piece of manila cardstock into the mixture and dry with a heat tool.

Repeat the process one more time with Spiced Marmalade Distress Ink and Ripe Persimmon Distress Stain and a third piece of manila cardstock.

Die cut a variety of both big and small leaves from the cardstock pieces using the Bigz L Tattered Leaves Die and the Movers & Shapers Tattered Leaves Dies.

Ink the edges of all the leaves with Frayed Burlap Distress Ink using an ink blending tool. Lightly fold the leaves in half and ink the crease to create center vein lines on the leaves.

Die cut some branches from kraft cardstock using the Spring Greenery Decorative Strip Die. These die cuts are super thin and fragile, but you can lightly ink them by pouncing Frayed Burlap Distress Ink in an up and down method using the ink blending tool.

Apply a medium to heavy coat of Clear Rock Candy Distress Crackle Paint to all the leaves, and while the paint is still wet, sprinkle each leaf with a bit of Rusty Hinge Distress Glitter. Set the leaves aside and allow them to dry completely.

Cut three 1×6 strips of kraft cardstock, and cut V-notches into the ends of all three strips. Stamp sentiment onto one of the strips using the Frayed Burlap Distress Ink. Ink the edges of all three pieces using Frayed Burlap Distress Ink and the ink blending tool.

Arrange the leaves and die cut branches into and around the bow, and adhere using tacky glue.

Tuck the sentiment strip and another kraft strip up under the bow and adhere. Cut the remaining kraft strip into two pieces, and tuck them into the top of the bow, behind the leaves and branches. Adhere in place.

Adhere three acorns to the center of the bow using strong tacky glue.
This piece is such a lovely addition to your fall home decor. It would also be a wonderful hostess gift for your Thanksgiving dinner hostess! Enjoy!

Related Posts

Dylusions Neon Ink Sprays Journal Page by Miranda van den Bosch
Neon color takes center stage on this eye-catching journal page by Miranda van den Bosch! The newest...
Read More
Tim Holtz Distress Paint Summer Card by Tami Bastiaans
Bring the beach to your craft table! Tami Bastiaans created this bright summer card using Distress Texture Paste, Paints,...
Read More