


Use the Ranger QuickCure Clay to sculpt waterlilies that make perfect accents to your ICE Resin® jewelry with this tutorial by Milagros Rivera.
Waterlily Jewelry by Milagros Rivera
- Materials
- Instructions
- ICE Resin®
- ICE Resin® Industrial Bezels: Large Rectangle
- ICE Resin® Industrial Bezel Mold
- ICE Resin® Tints: Turquoise, Hacienda
- ICE Resin® Jump Rings
- ICE Resin® Industrial Bezel Template
- ICE Resin® Paper Sealer
- ICE Resin® Brushes
- ICE Resin® Foil Sheets
- Tim Holtz® Alcohol Ink: Meadow, Amethyst, Dandelion, Pink Sherbet, Sepia
- Ranger QuickCure Clay
- Ranger Heat It™ Craft Tool
- ICE Resin® Studio Sheet
- Toothpick
Instructions
There’s something absolutely calming about staring at a pond filled with waterlilies. I’m fascinated by the floating leaves and the breathtaking blooms that come in such vibrant hues or the most delicate pastels. If the pond has koi fish all the better, maybe in another try...Inspired by them and the new industrial bezels I decided to dig my very own pond.

Step 1: Prepare your resin following instructions. Fill your fab mold in desired shapes. I’m going for the long rectangle, big triangle and big circle. It all started with the rectangle but after making one... well you get the idea and Mother’s Day is coming I know these will make very cool presents! Just saying...As you know I like to mix them up right on the mold, just in case I want to do a yellow as well! I also always go for a toothpick to add just the smallest amount. You can always add more color.

Step 2: I almost freaked out when I added the meadow, because it was too dark but hey ponds are murky places so all was good!

Step 3: Use the template to mark and cut the foil. Cut it longer so you can create ripples in the water underneath!

Step 4: Use the paintbrush to add the paper sealer to secure your foil underneath.

Step 5: There are many steps in creating the waterlily I’ve made you a guide, it works you just need a bit of patience when dismounting them from the mat and transferring them on top of each other. They were done using the smallest amount of Quick Cure Clay, cured with a Ranger Heat It™ Craft Tool and then painted with Alcohol Inks.

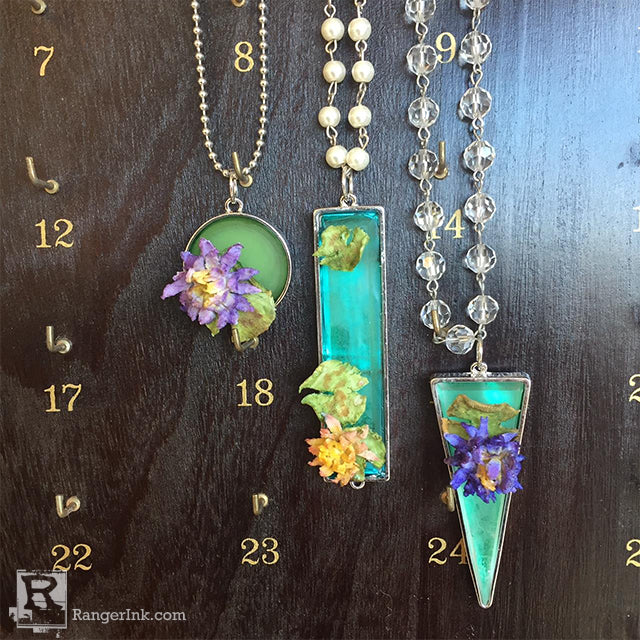
Step 6: The round one is the one I initially freaked by being to dark, out of the mold it was another story it really was a beautiful shade. Here it is out of the mold and as you can see the shade turned out perfect. Initially I was planning to use it clear with the foil underneath but I tinted a second one and I liked the way the tinted one played against the foil. In the end I used a tinted round with no foil underneath. A rectangular one tinted with turquoise foil underneath and finally a clear one with a green foil underneath!

Step 7: That’s a closer look at foil/no foil. To finish them I mixed a small batch of resin poured a bit inside the bezel, popped in the mold renderings and waited until the resin was sticky to secure my lilies on top.

Step 8: Since I wanted a matte finish I was very careful when adhering my flowers. I used the tiniest amount of resin on a toothpick! I love that I have that choice when taking them out of the molds.

Related Posts

Tim Holtz Distress® Micro Glaze Embossing Resist by Tami Bastiaans
Create gorgeous embossed backgrounds with the Micro Glaze Embossing Resist technique! ✨ Tami Bastiaans pairs Tim Holtz Distress® Micro...
Read More
Dina Wakley Media Flower Pastel Journal Page by Doreen Dilger
In this art journal tutorial, Doreen Dilger demonstrates a mixed media flower pastel journal page using a pink, yellow...
Read More