


Follow along as Lauren Bergold combines Wendy Vecchi's Merci and More Stamp, Die and Stencil set with a rainbow of Archival Inks to make a lovely array of Thank You cards ideal for any special moment.
Follow along as Lauren Bergold combines Wendy Vecchi's Merci and More Stamp, Die and Stencil set with a rainbow of Archival Inks to make a lovely array of Thank You cards ideal for any special moment.
Instructions
Thank You cards are something I like to have ready in my stash, just in case a friend surprises me with a treat! When making multiples, it's definitely more efficient to mass-produce, but I find it much more fun to vary the details. This set of cards splits the difference by highlighting different colors within a rainbow theme.
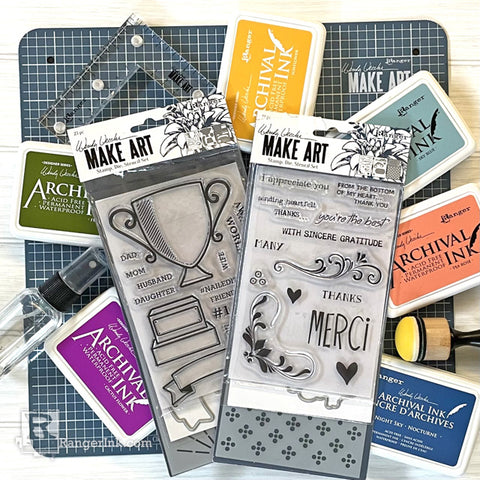
Step 1: Gather supplies: Wendy Vecchi's Merci and More Stamp, Die and Stencil set; Perfect Cardstock Panels in white; and your choice of six or seven inks in rainbow shades. The "Roy G. Biv" acronym helps us remember the colors of the spectrum in order: Red, Orange, Yellow, Green, Blue and Indigo. These samples feature Wendy Vecchi Designer Series Archival Inks in Mulberry, Tea Rose, Sunflower, Fern Green, Sky Blue, Night Sky and Cactus Flower.

Step 2: Tear an A2-size panel of Perfect Cardstock in half from top to bottom, on a slight diagonal. Stamp "Merci" from the Merci and More set in rainbow colors, from top to bottom, changing position each time, overlapping them slightly, and allowing the words to go off the edge of the torn panel. Stamp the smaller "Thanks" sentiment from the set multiple times in Jet Black Archival, so that each "Merci" touches one repeat of "Thanks".

Step 3: In the white spaces between the colorful sentiments, stamp the larger heart from Merci and More in Pink Peony Archival. Use the stencil sheet from Wendy Vecchi's Award Winning Stamp, Die and Stencil Set and Buttercup Archival to add sun rays around each heart. Change the direction of the stencil several times so that the rays fill in the white spaces nicely.

Step 4: Trim a piece of Watercolor Paper to just a hair under 4 x 5.25". Smoosh one of your rainbow Archival Ink Pads onto a non-stick craft sheet and lightly spritz with Isopropyl Alcohol using a Ranger Mister. Dip the panel into the ink and move it around a bit to soak up some color. Repeat several times until the panel is covered in your chosen shade; on this sample it is Cactus Flower. There's no need to worry about perfect consistency, darker and lighter tones give a nice variety, as do a few spots or speckles of white.

Step 5: Use the stencil sheet from Wendy Vecchi's Country Flowers Stamp, Die and Stencil Set and a Mini Ink Blending Tool with a Domed Foam to add striped or dotted accents to the lefthand side of the watercolor panel in the same shade you used on the panel. Lightly edge the panel in the same shade of ink, if desired.

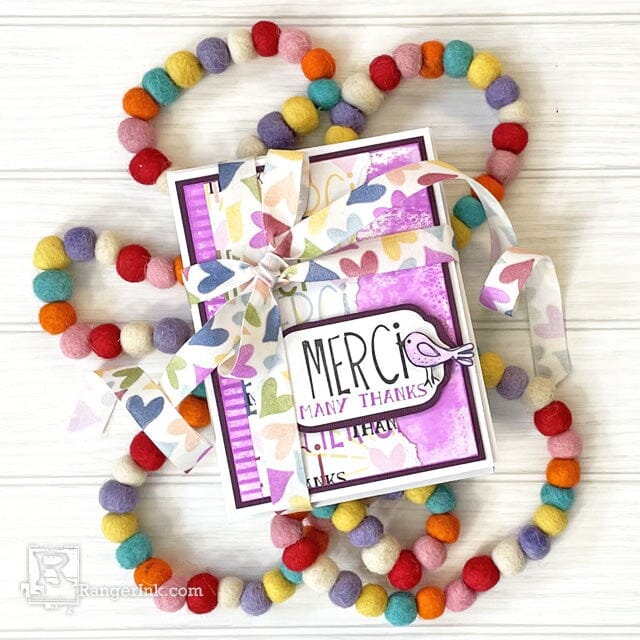
Step 6: Stamp "Merci" in Jet Black Archival on the center of a 2 x 3" scrap of Perfect White Cardstock. Stamp "Many Thanks" directly below that sentiment, in Cactus Flower. Use the coordinating label-shaped die from the Merci and More set to diecut the sentiment.

Step 7: Stamp Wendell, the little bird from Wendy Vecchi's Doodle Holiday Stamp Set, in Jet Black Archival and use your favorite markers or pencils to color him in a coordinating shade. Use scissors to neatly cut out.

Step 8: Assembly: Affix the torn rainbow sentiment panel to the Cactus Flower tinted watercolor paper with Perfect Card Adhesive. Edge the entire panel lightly with Jet Black Archival, if desired. Mat the panel on a piece of coordinating cardstock approximately 4 x 5.25"; use a scrap of the same cardstock to mat the small label-shaped sentiment. Affix the sentiment label to the card using Letter It White Foam Roll Tape and add the bird to the edge of the label. Mount the finished panel on a White A2 Card.

Step 9: While you're on a roll, make a few more panels using the same steps, but varying the background and mat colors; then add them to your stash with appropriately sized envelopes, so you'll be ready to send a thank you note the minute you need one!
 My name is Lauren Bergold, and I live in central New Jersey with my husband of 30+ years and A LOT of art supplies! My favorite medium is paper, and I especially love making cards. I teach papercrafting classes, as well as collecting and compiling vintage and found papers. You can find me on my blog, All the Good Blog Names Were Taken, and on Instagram as @llaurenb where I love to connect with other artists and makers!
 Soft pastel rainbows, playful splatter, and a handmade touch make these notecards a joy to create and send! 🌈...
Read MoreThis card is proof that simple techniques can create breathtaking results. ✨ Dominique Bennani stamped with Tim Holtz Distress®...
Read More
