


See how Jess Francisco creates this radiantly beautiful I Love You card using Stickles™ Glitter Gels. Perfect for a Valentine, Anniversary or just because.
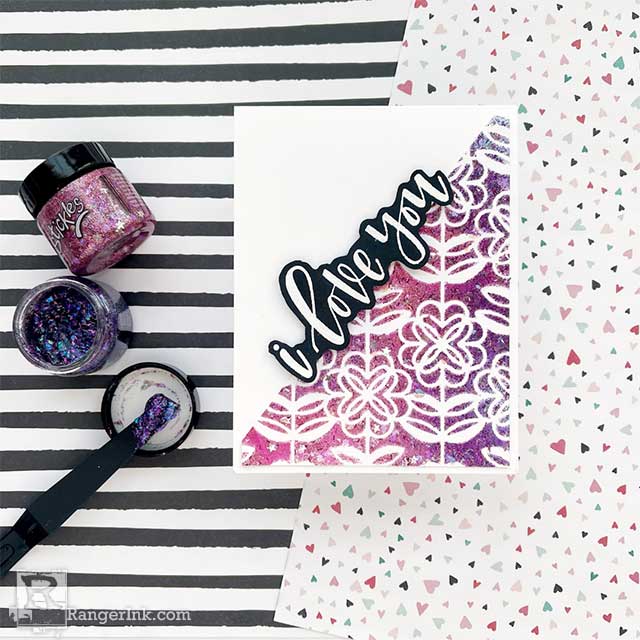
Stickles™ Glitter Gels I Love You Card by Jess Francisco
- Materials
- Instructions
Other:
Foam Tape
Black Cardstock
Paper Trimmer
Scissors
Instructions

Step 1: Lay the 'Flower Power' stencil on top of a piece of white cardstock measuring 4” x 5.25”. Use the Mini Ink Blending Tool to apply ink through the stencil in Breakup Blue, Prom Queen, and Crown Me. Overlap the colors lightly to get a nice blend, but don't focus on a perfect blended background as you'll be covering this in the next step. Do not remove the stencil from your ink-blended background.

Step 2: Use a palette knife to scoop out a bit of Glitter Gel in Venus. Apply the gel to the ink-blended background without moving the stencil. Focus the Venus Glitter Gel over the areas that are pink, then clean the palette knife and use the Pegasus Glitter Gel over the purple areas.

Step 3: Carefully remove the stencil and set the background aside to dry. Rinse your stencil well before moving on.

Step 4: Treat a piece of black cardstock with anti-static powder and stamp the 'I love you' sentiment from Letter It: Loves with Embossing Ink. Pour White Embossing Powder over the stamped image and tap off the excess. Use your heat tool to melt the powder.

Step 5: Use a pair of sharp scissors to cut around the sentiment. Apply foam tape to the back of the sentiment.

Step 6: Once your background is completely dry, use a paper trimmer to cut the panel in half diagonally. Set one piece aside to use in a future project. Attach the other piece to a white A2 sized card base, leaving a small white border around the edge.

Step 7: Remove the backing strips from the foam tape and attach the sentiment to the card base. Your card is finished and ready to send!

I’m Jess Francisco from Love, Jess or @lovejessco. I live in Chesapeake with my husband and our sons who are 7 and 4 years old. They keep me busy, so most of my crafting is done while they’re in bed.
I have been creating for as long as I can remember, but I started my card making journey in 2015. I have learned so many techniques and added so many new products to my growing list of favorites. Now that I have a few years under my belt, I’m excited to share what I’ve learned with the crafting community! You can find me on social media as @lovejessco or Love, Jess.
Related Posts

Painting with Liquid Pearls by Miriam Prantner
A little Liquid Pearls magic goes a long way! Miriam Prantner keeps this card simple and stunning by painting...
Read More
"My Cup of Care" Journal Page with Dylusions Pastel Paints by Miranda van den Bosch
Read More
Drawer Title
- Choosing a selection results in a full page refresh.